
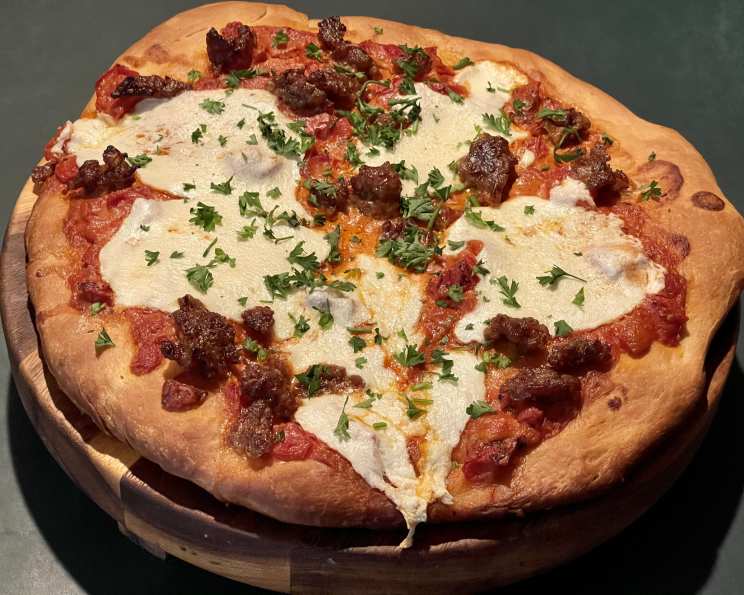
Pizza Alla Vodka: A Slice of Nostalgia
The first time I tasted pizza alla vodka, it wasn’t in a fancy Italian restaurant, but at a friend’s casual summer BBQ. The host, a self-proclaimed pizza aficionado, had converted his backyard into a makeshift pizzeria. The unexpected combination of creamy tomato sauce, a subtle kick of vodka, and perfectly charred crust transported me back to childhood memories of sneaking bites of my grandma’s Sunday gravy. It was rustic, comforting, and utterly delicious. From that moment on, I was hooked, determined to recreate the magic of that pizza in my own kitchen.
Recipe Overview
- Prep Time: 20 minutes
- Cook Time: 13-15 minutes
- Total Time: 33-35 minutes
- Servings: 8
- Yield: 2 pizzas
- Dietary Type: Vegetarian (adaptable)
Ingredients
For the Sauce:
- 1 tablespoon butter
- 1-2 garlic cloves, finely chopped
- ¼ cup vodka
- 1 cup chopped tomato (peeled fresh or canned)
- Crushed red pepper flakes (to taste)
- Salt (to taste)
- ½ cup whipping cream
- ¼ cup frozen peas
Remaining Ingredients:
- Prepared pizza dough, for two 12-inch pizzas
- 4 ounces sliced mozzarella cheese
- ½ cup thinly sliced mushroom
- 2 tablespoons grated pecorino romano cheese
- 1 tablespoon chopped fresh basil
- 2 tablespoons chopped prosciutto (optional, for non-vegetarian version)
Equipment Needed
- Saucepan
- Pizza stone
- Pizza peel (or rimless cookie sheet)
- Oven
Instructions
-
Preheat your oven to 500°F (260°C). Place a pizza stone on a rack in the lowest level of the oven. The stone needs to be screaming hot to achieve that perfect crispy crust. Let it preheat for at least 30 minutes.
-
Prepare the vodka sauce: Melt the butter in a saucepan over medium heat. Add the finely chopped garlic and cook for about 30 seconds, or until it’s lightly golden and fragrant. Be careful not to burn the garlic, as this will impart a bitter taste.
-
Carefully pour in the vodka. Cook for about 1 minute more, until the alcohol evaporates. This step is crucial for mellowing the vodka’s harshness and developing the sauce’s unique flavor profile.
-
Add the chopped tomatoes, crushed red pepper flakes, and salt to taste. Simmer for 10 minutes, allowing the flavors to meld and deepen. The sauce should thicken slightly during this time.
-
Stir in the whipping cream and frozen peas. Cook until the sauce is reduced and thickened, about 5 minutes. Taste and adjust the seasoning as needed. Let the sauce cool slightly while you prepare the pizza dough.
-
Place one ball of pizza dough on a lightly floured surface. Holding your hands flat, gently pat the ball out evenly with your fingers, lifting it and turning it over several times, until it reaches a 12-inch circle. Avoid kneading the dough or handling it more than necessary. If the dough seems sticky, dust it lightly with flour.
-
Dust a pizza peel (or rimless cookie sheet) with flour. This will prevent the pizza from sticking.
-
Carefully transfer the circle of dough to the peel, reshaping it as needed. Shake the peel once or twice to ensure the dough doesn’t stick. If it does, sprinkle the peel with more flour.
-
Quickly top the dough with half of the prepared vodka sauce, spreading it to within ½ inch of the edge with the back of a spoon.
-
Layer with half of the mozzarella cheese, mushrooms, and a sprinkling of pecorino romano cheese.
-
To slide the pizza onto the preheated baking stone, line up the edge of the pizza peel with the back edge of the stone. Tilt the peel, jerking it gently to start the pizza moving. Once the edge of the pizza touches the stone, carefully pull back on the peel until the pizza is completely off.
-
Once the pizza is on the stone, do not attempt to move it until it firms up in 2-3 minutes.
-
Bake the pizza for 6-7 minutes, or until the cheese is melted and the crust is browned and bubbly.
-
Just before serving, sprinkle with half of the chopped prosciutto (if using) and fresh basil. Repeat steps 6-14 for the second pizza.
Expert Tips & Tricks
- Dough is King: Start with high-quality pizza dough. Whether you make your own or buy it from a reputable pizzeria, the dough is the foundation of a great pizza.
- Don’t Overcrowd: Avoid overloading the pizza with toppings, as this can lead to a soggy crust. Less is often more.
- High Heat is Key: A very hot oven is essential for achieving a crispy, charred crust. Be patient and allow your pizza stone to preheat fully.
- Vodka Quality: While you don’t need top-shelf vodka, avoid using the cheapest option. A decent mid-range vodka will work perfectly.
- Make-Ahead Sauce: The vodka sauce can be made a day ahead and stored in the refrigerator. This allows the flavors to meld even further.
- Spice it Up: Add a pinch of cayenne pepper to the sauce for an extra kick.
Serving & Storage Suggestions
Serve the pizza immediately after baking, while the cheese is melted and bubbly and the crust is crispy. Garnish with extra fresh basil, if desired.
Leftover pizza can be stored in the refrigerator for up to 3 days. Reheat in a preheated oven at 350°F (175°C) for 5-10 minutes, or until heated through. You can also reheat individual slices in a skillet over medium heat, covered, for a few minutes. Avoid microwaving, as it can make the crust soggy.
Pizza is best enjoyed fresh, but it can be frozen for longer storage. Wrap individual slices tightly in plastic wrap and then place them in a freezer-safe bag. Frozen pizza can be stored for up to 2 months. Thaw overnight in the refrigerator before reheating.
Nutritional Information
| Nutrient | Amount per Serving | % Daily Value |
|---|---|---|
| Calories | 395 kcal | 20% |
| Total Fat | 22g | 34% |
| Saturated Fat | 12g | 60% |
| Cholesterol | 65mg | 22% |
| Sodium | 510mg | 21% |
| Total Carbohydrate | 35g | 12% |
| Dietary Fiber | 3g | 12% |
| Sugars | 5g | – |
| Protein | 15g | 30% |
Nutritional information is an estimate and may vary based on specific ingredients and portion sizes.
Variations & Substitutions
- Vegetarian Delight: Omit the prosciutto for a vegetarian version. Add extra vegetables like roasted red peppers, spinach, or artichoke hearts.
- Gluten-Free Pizza: Use gluten-free pizza dough for a gluten-free option.
- Dairy-Free Option: Substitute the whipping cream with cashew cream or oat cream. Use dairy-free mozzarella cheese.
- Spicy Vodka Pizza: Add a pinch of cayenne pepper or a few dashes of hot sauce to the vodka sauce for extra heat.
- Pesto Swirl: Swirl a spoonful of pesto over the finished pizza for added flavor and visual appeal.
- Seasonal Twist: Incorporate seasonal ingredients like butternut squash in the fall or grilled corn in the summer.
FAQs (Frequently Asked Questions)
Q: Can I use regular tomato sauce instead of chopped tomatoes?
A: While you can, using chopped tomatoes (fresh or canned) provides a better texture and flavor complexity. If you must substitute, use a high-quality crushed tomato sauce and adjust seasonings accordingly.
Q: Why is the vodka added to the sauce?
A: The vodka acts as an emulsifier, helping to bind the tomato and cream together. It also adds a subtle, unique flavor that complements the other ingredients.
Q: How do I prevent my pizza from sticking to the peel?
A: Make sure the pizza peel is generously dusted with flour or cornmeal. Shake the peel gently before topping the pizza to ensure it moves freely.
Q: Can I use a baking sheet instead of a pizza stone?
A: Yes, but the crust won’t be as crispy. Preheat the baking sheet in the oven before placing the pizza on it.
Q: What if my pizza crust burns before the cheese melts?
A: Lower the oven temperature to 450°F (230°C) and continue baking until the cheese is melted and bubbly. You can also tent the pizza with foil to prevent further browning.
Final Thoughts
Pizza alla vodka is more than just a recipe; it’s an invitation to experiment, to indulge in comforting flavors, and to share a memorable meal with loved ones. Don’t be afraid to get creative with your toppings and adjust the recipe to suit your personal preferences. Whether you’re a seasoned pizza maker or a kitchen novice, I encourage you to give this recipe a try. I’m confident that you’ll be delighted with the results. Share your creations and feedback – happy cooking!