
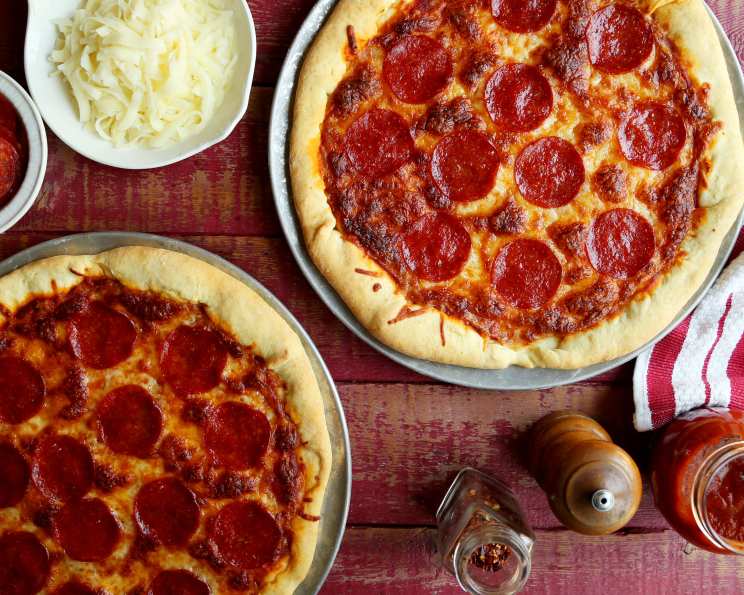
Unleashing Pizza Night: The Magic of Yeast-Free Dough
The scent of baking pizza has always been a powerful trigger, instantly transporting me back to my childhood. Every Friday night was pizza night, a sacred ritual in our household. While my mom usually opted for a store-bought crust (don’t tell her I said that!), my dad would sometimes surprise us with his homemade dough. It wasn’t always pretty, and the crust wasn’t always perfectly round, but the love baked into every bite made it taste like the best pizza in the world. I didn’t know then that the dough came from a decades-old recipe, one passed down through generations – a yeast-free marvel that made the process incredibly simple and family-friendly. It’s a recipe I still cherish and use today, a reminder of simple joys and the power of homemade goodness.
Recipe Overview
Here’s a quick rundown of what you can expect:
- Prep Time: 15 minutes
- Cook Time: 20-25 minutes
- Total Time: 35-40 minutes
- Servings: 4
- Yield: 2 (13-inch) pizzas
- Dietary Type: Vegetarian (easily made vegan)
Ingredients
Get your ingredients ready! Here’s what you’ll need for this amazing yeast-free pizza dough:
- 2 cups all-purpose flour, plus more for dusting
- 2 teaspoons baking powder
- 1 teaspoon salt
- 2/3 cup milk (dairy or non-dairy alternative)
- 1/4 cup salad oil (vegetable or canola oil)
- 2 tablespoons salad oil (for brushing)
Equipment Needed
- Large Mixing Bowl
- Measuring cups and spoons
- Pizza pan or baking sheet
- Rolling pin
- Oven
Instructions
Let’s get baking! Follow these simple steps to create a delicious homemade pizza crust without any yeast:
-
Preheat your oven to 425°F (220°C). Ensure your oven rack is in the middle position for even baking.
-
In a large mixing bowl, combine the flour, baking powder, and salt. Measure these ingredients carefully to ensure the correct texture and rise.
-
Add the milk and 1/4 cup of salad oil to the dry ingredients.
-
Stir vigorously with a spoon or spatula until the mixture begins to come together and pulls away from the sides of the bowl. Don’t overmix at this stage. It’s okay if it looks a little shaggy.
-
Gather the dough into a ball. Turn it out onto a clean, lightly floured surface or keep it in the bowl.
-
Knead the dough in the bowl for about 10 times. This short kneading process is enough to bring the dough together and develop some structure, even without yeast.
-
Divide the dough in half. Each half will make one 13-inch pizza.
-
On a lightly floured surface, roll each half of the dough into a 13-inch circle. Use a rolling pin and apply even pressure to create a uniform thickness.
-
Carefully transfer each rolled-out dough circle to a pizza pan or baking sheet.
-
Turn up the edges of the dough about 1/2 inch to create a slight crust. Pinch the edges to secure them. This will help contain the toppings.
-
Brush the entire surface of each dough circle with the remaining 2 tablespoons of salad oil. This will help the crust crisp up and add flavor.
-
Add your favorite pizza toppings! Get creative with sauce, cheese, vegetables, meats, and spices. Remember not to overload the crust, as it could become soggy.
-
Bake for 20-25 minutes, or until the crust is golden brown and the toppings are cooked to your liking. Keep a close eye on the pizza during the last few minutes of baking to prevent burning. The cooking time can vary slightly depending on your oven.
-
Remove from the oven and let cool slightly before slicing and serving.
Expert Tips & Tricks
- Adjusting the Milk: If your dough seems too dry, add milk one tablespoon at a time until it reaches the desired consistency. If it’s too wet, add a little more flour.
- Pre-Baking: For an extra crispy crust, pre-bake the dough for 5-7 minutes before adding the toppings.
- Flavor Infusion: Add herbs like dried oregano, basil, or garlic powder to the dough for extra flavor.
- Resting the Dough: Although not necessary, letting the dough rest for 10-15 minutes after kneading can make it easier to roll out.
- Baking Stone: If you have a pizza stone, preheat it in the oven for at least 30 minutes before baking the pizza. This will result in a crispier crust.
Serving & Storage Suggestions
Serve your homemade pizza hot and fresh from the oven! Garnish with fresh basil leaves or a sprinkle of red pepper flakes for an extra touch.
Leftover pizza can be stored in the refrigerator for up to 3-4 days. Wrap it tightly in plastic wrap or store it in an airtight container.
To reheat, you can use the oven, microwave, or a skillet. For the oven, preheat to 350°F (175°C) and bake for 5-10 minutes, or until heated through. Microwaving will be faster but may result in a softer crust. Heating in a skillet on medium heat can help crisp up the crust.
Pizza can also be frozen for longer storage. Wrap individual slices tightly in plastic wrap and then place them in a freezer bag. Frozen pizza can last for up to 2-3 months. Thaw it in the refrigerator before reheating.
Nutritional Information
Here’s an estimate of the nutritional information per serving (without toppings), but remember this will vary depending on the specific ingredients and portion sizes used:
| Nutrient | Amount per Serving | % Daily Value |
|---|---|---|
| Calories | 250 kcal | 13% |
| Total Fat | 10g | 15% |
| Saturated Fat | 2g | 10% |
| Cholesterol | 5mg | 2% |
| Sodium | 400mg | 17% |
| Total Carbohydrate | 35g | 12% |
| Dietary Fiber | 1g | 4% |
| Sugars | 2g | 4% |
| Protein | 5g | 10% |
Variations & Substitutions
- Vegan Pizza Dough: Substitute the milk with a plant-based milk alternative like almond, soy, or oat milk. Ensure the toppings you choose are also vegan.
- Whole Wheat Pizza Dough: Replace up to half of the all-purpose flour with whole wheat flour for a nuttier flavor and added fiber.
- Gluten-Free Pizza Dough: Use a gluten-free all-purpose flour blend. You may need to adjust the amount of liquid, as gluten-free flours can vary in their absorption.
- Garlic Herb Crust: Add 1-2 teaspoons of garlic powder and a mix of dried herbs like oregano, basil, and rosemary to the dough for a flavorful crust.
- Spicy Pizza Dough: Add a pinch of red pepper flakes or a dash of cayenne pepper to the dough for a little heat.
- Sweet Pizza Dough: Add 1-2 tablespoons of sugar to the dough for a slightly sweeter crust that pairs well with dessert pizzas.
FAQs (Frequently Asked Questions)
Q: Can I make this dough ahead of time?
A: While it’s best to use the dough immediately, you can make it a few hours in advance. Cover it tightly with plastic wrap and store it in the refrigerator. Let it come to room temperature for about 30 minutes before rolling it out.
Q: Why is my dough tough?
A: Over-kneading can make the dough tough. Be sure to knead it only for the recommended 10 times.
Q: Can I freeze the pizza dough?
A: Yes, you can freeze the dough after dividing it into portions. Wrap each portion tightly in plastic wrap and then place them in a freezer bag. Thaw in the refrigerator overnight before using.
Q: What if I don’t have salad oil? Can I use olive oil?
A: Yes, olive oil can be used as a substitute. It will impart a slightly different flavor, but it works well.
Q: My pizza crust is browning too quickly. What can I do?
A: If the crust is browning too quickly, you can tent it with aluminum foil for the last few minutes of baking.
Final Thoughts
So, there you have it—a simple, satisfying pizza dough recipe that skips the yeast but delivers all the flavor. It’s a perfect weeknight meal, a fun family activity, or a great way to impress your friends. Don’t be afraid to experiment with different toppings and variations to create your signature pizza. Now, gather your ingredients, preheat your oven, and prepare to unleash your inner pizzaiolo! I encourage you to try it, share your results, and let me know what toppings you paired with this versatile dough. Happy baking!