
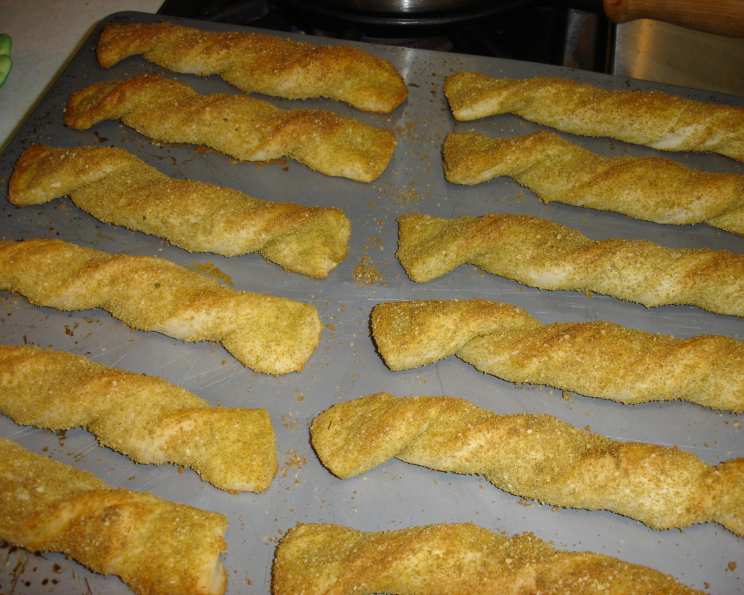
Recreating the Magic: Pizza Hut Breadstick Seasoning at Home
The aroma still wafts through my memory – the buttery, garlicky scent that defined after-school hangouts at Pizza Hut. More than the pizza itself, it was those warm, slightly chewy breadsticks, generously coated in a mysterious, savory dust, that I craved. I remember trying, unsuccessfully, to recreate that flavor at home, mixing random spices, never quite hitting the mark. Now, decades later, armed with this recipe I discovered tucked away in an old cookbook, I’m confident we can finally unlock that nostalgic Pizza Hut breadstick flavor.
Recipe Overview
- Prep Time: 5 minutes
- Cook Time: varies depending on breadsticks
- Total Time: varies depending on breadsticks
- Yields: enough seasoning for one batch of breadsticks
- Dietary Type: Vegetarian (can be made vegan by verifying parmesan substitute)
Ingredients
- 4 tablespoons dry parmesan cheese (or vegan parmesan substitute)
- 3 tablespoons garlic powder
- 1 tablespoon onion salt
- 1 tablespoon dried oregano
Equipment Needed
- Small mixing bowl
- Baking sheet
- Oven
- Breadsticks (store-bought or homemade)
Instructions
- In a small mixing bowl, combine the dry parmesan cheese, garlic powder, onion salt, and dried oregano. Mix thoroughly until all ingredients are evenly distributed. This creates your Pizza Hut-inspired breadstick seasoning.
- Prepare your breadsticks according to your chosen recipe or package instructions. This recipe does not include instruction for how to make breadsticks themselves.
- While the breadsticks are still warm from the oven, immediately roll or sprinkle them with the seasoning mixture. Ensure an even coating for maximum flavor. The amount of seasoning needed will depend on the quantity of breadstick dough and your personal preference, but the proportions will remain the same.
- Bake breadsticks according to your breadstick recipe instructions. If purchased frozen, follow package directions.
Expert Tips & Tricks
- Freshness is key: Use freshly opened spices for the most potent flavor. Spices lose their potency over time, so check the expiration dates or, even better, replace them every 6-12 months.
- Parmesan perfection: If you’re using real parmesan, choose a finely grated variety for better adhesion to the breadsticks. This helps the seasoning stick and prevents clumping. For a vegan version, many brands make parmesan substitutes, some are based on nuts or nutritional yeast.
- Buttery boost: Lightly brush the baked breadsticks with melted butter (or vegan butter alternative) before applying the seasoning. This will help the seasoning adhere even better and add to that signature rich flavor.
- Adjust to taste: Feel free to adjust the ratios of the spices to your preference. If you like a stronger garlic flavor, add a little more garlic powder. If you prefer a saltier seasoning, increase the onion salt.
- Garlic powder type matters: Granulated garlic has a coarser texture and can add a bit of crunch, while fine garlic powder incorporates more smoothly.
- Oven Consistency: Every oven is different. Keep an eye on your breadsticks to make sure they’re browning at the correct rate. If necessary, adjust cooking time or rack placement.
Serving & Storage Suggestions
Serve the seasoned breadsticks warm, straight from the oven, for the best flavor and texture. They’re perfect alongside pizza, pasta, salads, or as a snack on their own.
Storage:
- Room Temperature: Seasoned breadsticks are best consumed fresh. However, if you have leftovers, store them in an airtight container at room temperature for up to 2 days. The texture will soften slightly.
- Refrigerator: To extend their shelf life, store leftover breadsticks in an airtight container in the refrigerator for up to 5 days.
- Freezer: For longer storage, freeze the breadsticks in a single layer on a baking sheet until solid, then transfer them to a freezer-safe bag or container. They can be frozen for up to 2 months.
Reheating:
- Oven: Reheat breadsticks in a preheated oven at 350°F (175°C) for 5-10 minutes, or until warmed through. This method helps restore some of the original crispness.
- Microwave: Microwave breadsticks on high for 15-30 seconds, or until heated through. Be careful not to overheat, as they can become tough.
- Air Fryer: Reheat breadsticks in an air fryer at 350°F (175°C) for 3-5 minutes, or until warmed through and crispy.
Nutritional Information
Note: Nutritional information is an estimate and will vary depending on the specific ingredients and serving size. The below information is calculated for a hypothetical serving size based on the ingredients listed.
| Nutrient | Amount per Serving | % Daily Value |
|---|---|---|
| Calories | 50 kcal | 3% |
| Total Fat | 3g | 4% |
| Saturated Fat | 2g | 10% |
| Cholesterol | 5mg | 2% |
| Sodium | 150mg | 7% |
| Total Carbohydrate | 2g | 1% |
| Dietary Fiber | 0g | 0% |
| Sugars | 0g | 0% |
| Protein | 2g | 4% |
Variations & Substitutions
- Spicy Kick: Add a pinch of red pepper flakes to the seasoning blend for a spicy kick.
- Italian Herb Blend: Incorporate other dried Italian herbs, such as basil, thyme, or rosemary, for a more complex flavor profile.
- Garlic Salt: Substitute garlic salt for the garlic powder and onion salt. Be careful with the amount, as garlic salt can be quite potent.
- Vegan Delight: Use a vegan parmesan cheese substitute and vegan butter to make the breadsticks completely vegan.
- Cheesy Bread Twist: Sprinkle the seasoned breadsticks with shredded mozzarella or cheddar cheese before baking for a cheesy bread experience.
- Everything Bagel Seasoning: Use Everything Bagel seasoning in place of the other ingredients for a different savory flavor.
FAQs (Frequently Asked Questions)
Q: Can I use fresh garlic instead of garlic powder?
A: While fresh garlic offers a more intense flavor, garlic powder is preferred in this recipe for its even distribution and dry texture, which adheres better to the breadsticks.
Q: How do I prevent the seasoning from burning in the oven?
A: Ensure the breadsticks are not over-baking and that the oven temperature is accurate. Applying the seasoning after the breadsticks are mostly baked can also help.
Q: Can I make a large batch of the seasoning and store it?
A: Yes, you can make a larger batch of the seasoning and store it in an airtight container in a cool, dark place for up to 6 months.
Q: What kind of breadsticks work best with this seasoning?
A: This seasoning works well with most types of breadsticks, whether they are homemade, store-bought, or frozen. Adjust the baking time according to the specific breadstick recipe.
Q: Can I use this seasoning on other foods?
A: Absolutely! This seasoning is also delicious on popcorn, roasted vegetables, garlic bread, or even sprinkled over pasta.
Final Thoughts
Armed with this recipe, you’re now equipped to recreate a beloved classic right in your own kitchen. Don’t be afraid to experiment with the ratios and add your own personal touch. The most important thing is to enjoy the process and savor the familiar flavors. Gather your loved ones, bake up a batch of warm, seasoned breadsticks, and let the memories flood back with every bite. We hope you enjoy this trip down memory lane as much as we do. We’d love to hear your feedback, so please share your experiences and variations in the comments below. And why not pair these nostalgic breadsticks with a homemade pizza for the ultimate Pizza Hut experience? Happy baking!