
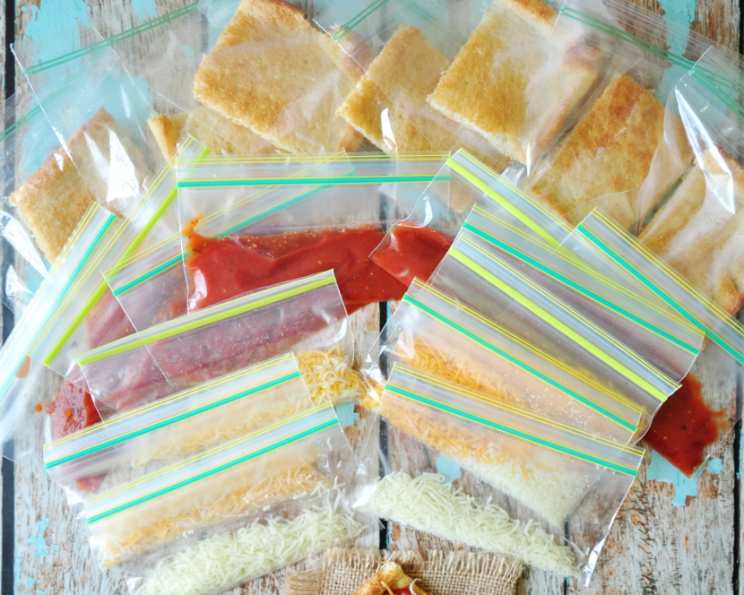
Pizza Lunchable – OAMC (Once A Month Cooking)
My kitchen, more often than not, resembled a small-scale battleground during the school year. Amidst the chaos of backpacks, permission slips, and last-minute homework scrambles, the daily lunchbox assembly loomed like a dreaded chore. My son, bless his heart, had a particular fondness for those pre-packaged pizza kits – you know, the ones with the sad little crackers, the suspiciously orange “cheese,” and the sauce that tasted vaguely of…something. While I appreciated the convenience, the ingredients list read like a chemistry experiment gone wrong. That’s when I decided to embark on a mission: to create a homemade, healthier, and equally convenient version of his beloved pizza lunchable.
Recipe Overview
- Prep Time: 30 minutes
- Cook Time: 15 minutes
- Total Time: 45 minutes
- Servings: 12
- Yield: 12 packets
- Dietary Type: Vegetarian (can be made Vegan)
Ingredients
- 16 ounces pizza dough (I use the Pillsbury canisters)
- 3 cups pizza sauce
- 3 cups cheese, shredded (use vegan cheese for a vegan option)
- 24 snack-size ziplock bags
- 12 quart-size ziplock bags
Equipment Needed
- Baking Sheet
- Pizza cutter or knife
- Rolling Pin (optional)
Instructions
-
Preheat your oven according to the instructions on your pizza dough packaging. Usually, this is around 400-425°F (200-220°C). Prepare a baking sheet, usually by greasing or lining with parchment paper.
-
On a lightly floured surface, roll out the pizza dough. You can roll it out into one large rectangle or circle to fit your baking sheet, or divide it and roll it into smaller individual pizzas. This recipe calls for squares, so rolling into a rectangle might be easier.
-
Bake the pizza dough according to the directions on the canister. Keep a close eye on it. Baking times vary depending on your oven and the thickness of the dough, but it usually takes about 12-15 minutes, or until the crust is golden brown and cooked through. Look for some browning on the edges and bottom to ensure it’s not doughy.
-
While the pizza crust is baking, prepare the sauce and cheese packets. Divide the 3 cups of shredded cheese evenly into 12 snack-size ziplock bags, placing about 1/4 cup of cheese in each bag. Seal each bag securely.
-
Similarly, divide the 3 cups of pizza sauce evenly into the remaining 12 snack-size ziplock bags, placing about 1/4 cup of sauce in each bag. Seal each bag securely, being careful not to get any sauce on the zipper.
-
Once the pizza crust is done, remove it from the oven and let it cool slightly. This will make it easier to handle.
-
Using a pizza cutter or knife, cut the baked pizza crust into 12 equal squares. The original recipe is based on the serving size indicated on the pizza dough packaging. If you’ve made individual pizzas, cut each one into the appropriate number of slices so you get 12 pieces total.
-
Now, it’s time to assemble the individual lunchable packets. Place two pizza squares into each quart-size ziplock bag.
-
Add one cheese packet and one sauce packet into the same quart-size ziplock bag with the pizza squares.
-
Seal each quart-size ziplock bag securely.
-
Freeze the assembled pizza lunchable packets. They are now ready for easy lunch packing!
-
To eat, simply have your child put one package in their lunch box in the morning. By lunchtime, it will have thawed and be ready to enjoy.
Expert Tips & Tricks
- Get the kids involved! This is a great recipe to make with your children. They can help roll out the dough, fill the bags with cheese and sauce, and assemble the packets.
- Don’t overbake the crust. A slightly underbaked crust is better than a rock-hard one, as it will continue to thaw in the lunchbox.
- Use high-quality ingredients. The better the ingredients, the better the final product will taste. Spring for good quality pizza sauce and cheese.
- Customize it! Add your child’s favorite toppings, such as pepperoni, olives, or mushrooms, to the cheese and sauce packets. Just make sure they are small enough to fit easily into the bag.
- Prevent soggy pizza: For an even better texture, you can lightly toast the pizza squares before assembling the lunchables. This will help them hold their shape better as they thaw.
Serving & Storage Suggestions
Serve the pizza lunchables directly from the lunchbox after they have thawed. If desired, you can pack a small napkin or paper towel for easy cleanup.
The assembled pizza lunchables should be stored in the freezer. They will last for up to 2-3 months in the freezer. Once thawed, they should be consumed within a few hours. Do not refreeze thawed pizza lunchables.
Nutritional Information
(Note: Nutritional information will vary depending on the specific ingredients used, especially the type of dough, sauce, and cheese.)
| Nutrient | Amount per Serving (Estimated) | % Daily Value (Estimated) |
|---|---|---|
| Calories | 250 kcal | 13% |
| Total Fat | 10g | 15% |
| Saturated Fat | 5g | 25% |
| Cholesterol | 20mg | 7% |
| Sodium | 400mg | 17% |
| Total Carbohydrate | 30g | 10% |
| Dietary Fiber | 2g | 7% |
| Sugars | 5g | – |
| Protein | 10g | 20% |
Variations & Substitutions
- Gluten-Free: Use gluten-free pizza dough to make this recipe gluten-free.
- Vegan: Use vegan cheese and ensure your pizza dough and sauce are also vegan.
- Spicy: Add a pinch of red pepper flakes to the sauce packets for a little kick.
- Different Crust: Experiment with different types of crusts, such as whole wheat or cauliflower crust, for added nutrition and flavor.
- Different Cheeses: Try using different types of cheese, such as mozzarella, cheddar, or provolone.
- Different Toppings: Get creative with the toppings! Add pepperoni, ham, vegetables, or herbs to the cheese and sauce packets.
- Calzones: Cut the dough into circles, add the cheese and sauce, fold over and bake for a hot calzone lunch.
FAQs (Frequently Asked Questions)
Q: Can I make these ahead of time and store them in the refrigerator instead of the freezer?
A: While you can store them in the refrigerator for a day or two, freezing is recommended for longer storage and to maintain the best quality. Refrigerating them may make the pizza squares soggy.
Q: How long does it take for the pizza lunchables to thaw?
A: Typically, it takes about 3-4 hours for the pizza lunchables to thaw in a lunchbox at room temperature.
Q: Can I use pre-made pizza crust instead of making my own?
A: Yes, you can use pre-made pizza crust to save time. Just make sure to adjust the cutting and assembly accordingly.
Q: Can I add other toppings besides cheese and sauce?
A: Absolutely! Feel free to add any small, pre-cooked toppings your child enjoys, such as pepperoni, olives, or mushrooms, to the cheese and sauce packets.
Q: My child doesn’t like pizza sauce. What can I substitute?
A: You can substitute the pizza sauce with pesto, marinara sauce, or even a light coating of olive oil and herbs.
Final Thoughts
Creating these homemade pizza lunchables not only solved my lunchtime dilemma but also allowed me to feel good about what my son was eating. It’s a simple, customizable recipe that brings a smile to his face, and that’s what matters most. I encourage you to give this recipe a try and make it your own with your family’s favorite flavors. Share your creations and any fun variations you come up with – happy lunch packing!