
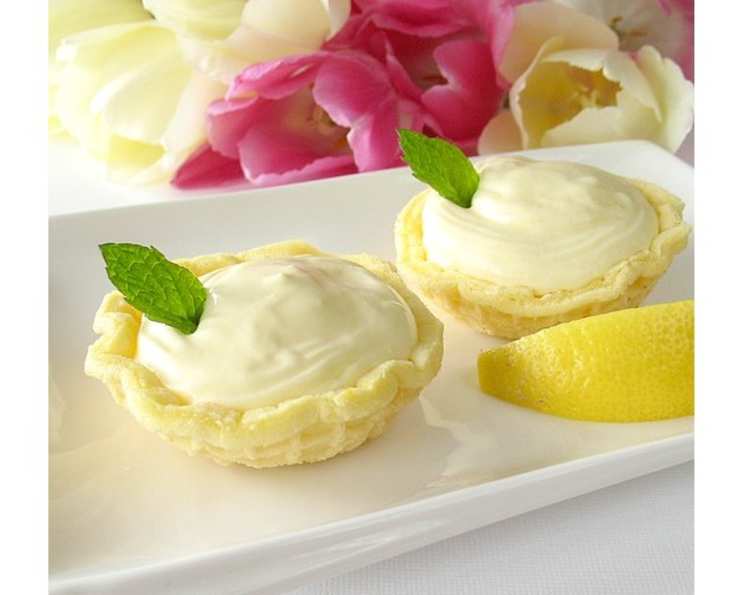
Pizzelle Dessert Cups: A Delicate Italian Delight
The aroma of pizzelles always takes me back to my Nonna’s kitchen. I remember standing on a stool, mesmerized as she carefully poured the batter onto the hot iron, the sizzle filling the air with sweet anticipation. It wasn’t just the cookies themselves, but the ritual – the shared laughter, the gentle guidance, and the feeling of being enveloped in her love. These pizzelle cups, a modern twist on a classic, capture that same warmth and joy, offering a delightful and elegant way to end any meal.
Recipe Overview
- Prep Time: 15 minutes
- Cook Time: 25 minutes
- Total Time: 40 minutes
- Servings: 18
- Yield: 18 cups
- Dietary Type: Vegetarian
Ingredients
- 2 eggs
- ½ cup sugar
- ¼ cup canola oil
- 1 tablespoon lemon extract
- 1 teaspoon lemon zest (optional)
- ¼ teaspoon baking powder
- ⅔ cup flour
Equipment Needed
- Pizzelle iron
- Small-bottomed glasses (for shaping)
- Whisk
- Non-stick cooking spray
- Airtight container
Instructions
-
Begin by plugging in your pizzelle iron. Allow it to heat up completely while you prepare the batter. This step is crucial for achieving the crisp texture we’re after. The hotter the iron, the quicker the pizzelles will cook and the less likely they are to stick.
-
In a medium-sized bowl, prepare the batter. Whisk together the eggs, sugar, canola oil, lemon extract, lemon zest (if using), and baking powder until the mixture is smooth and well combined. The lemon zest adds a wonderful brightness, but it’s perfectly fine to omit it if you prefer a more subtle flavor.
-
Gradually add the flour to the wet ingredients, continuing to whisk until a smooth batter forms. Be careful not to overmix, as this can develop the gluten in the flour and result in tougher pizzelles. A few small lumps are perfectly acceptable.
-
Once the pizzelle iron is hot, lightly spray both the top and bottom plates with non-stick cooking spray. This will prevent the pizzelles from sticking and make removal much easier.
-
Carefully drop a tablespoon of the batter onto the center of the hot iron. Close the lid gently and allow the pizzelle to cook for approximately 1 minute. The cooking time may vary slightly depending on your pizzelle iron, so keep a close eye on it. You’re looking for a light golden-brown color.
-
Once the pizzelle is cooked, carefully remove it from the iron. Work quickly, as you need to shape the cookie while it’s still pliable.
-
Immediately press the hot cookie over the bottom of a small glass, gently molding it into a cup shape. Hold it in place for a few seconds until it begins to firm up.
-
Place the shaped pizzelle cup on a cooling rack to cool completely. As it cools, it will become crisp and hold its shape.
-
Repeat steps 4-8 with the remaining batter.
-
Once the pizzelle cups are completely cool, store them in an airtight container to maintain their crispness. These delicate cookies are best enjoyed fresh, but they can be stored for a few days.
Expert Tips & Tricks
- Even batter distribution is key: For uniformly shaped pizzelles, use a measuring spoon to ensure each cookie receives the same amount of batter.
- Temperature control is crucial: If the pizzelles are browning too quickly, reduce the heat on your pizzelle iron slightly. If they’re not browning enough, increase the heat.
- Don’t overcrowd the cooling rack: Allow enough space between the pizzelle cups on the cooling rack to ensure proper air circulation and even cooling. This will prevent them from becoming soggy.
- Reviving soggy pizzelles: If your pizzelle cups lose their crispness, you can revive them by placing them in a preheated oven at 300°F (150°C) for a few minutes. Watch them closely to prevent burning.
- Flavor infusion: Experiment with different extracts, such as almond, anise, or vanilla, to create unique flavor profiles.
- Decorating: Drizzle the finished pizzelle cups with melted chocolate, dust them with powdered sugar, or dip the rims in sprinkles for a festive touch.
Serving & Storage Suggestions
These pizzelle dessert cups are incredibly versatile and can be filled with a variety of delicious treats. They are the perfect vessel for creamy chocolate mousse, refreshing fruit granita, decadent puddings, or classic ice cream.
For an elegant presentation, consider filling the cups just before serving to prevent them from becoming soggy. Garnish with fresh berries, whipped cream, or a sprig of mint.
Store unfilled pizzelle cups in an airtight container at room temperature for up to 3 days. Filled pizzelle cups are best enjoyed immediately.
Nutritional Information
| Nutrient | Amount per Serving | % Daily Value |
|---|---|---|
| Calories | 75 kcal | 4% |
| Total Fat | 3.6g | 5% |
| Saturated Fat | 0.4g | 2% |
| Cholesterol | 23.5mg | 8% |
| Sodium | 12.9mg | 1% |
| Total Carbohydrate | 9.2g | 3% |
| Dietary Fiber | 0.1g | 0% |
| Sugars | 5.6g | 11% |
| Protein | 1.2g | 2% |
Variations & Substitutions
- Gluten-free: Substitute the all-purpose flour with a gluten-free blend for a gluten-free version. Be sure to use a blend that’s designed for baking and contains xanthan gum for binding.
- Dairy-free: While the recipe is already quite lean, you can ensure it is dairy-free by confirming your canola oil is processed without dairy.
- Spice it up: Add a pinch of cinnamon or nutmeg to the batter for a warm, comforting flavor.
- Citrus variations: Experiment with different citrus zests, such as orange or lime, for a unique twist.
- Chocolate pizzelles: Add a tablespoon of unsweetened cocoa powder to the batter for a chocolatey treat. You may need to add a little extra liquid to compensate for the added dry ingredient.
FAQs (Frequently Asked Questions)
Q: How do I prevent the pizzelles from sticking to the iron?
A: Make sure the pizzelle iron is preheated properly and sprayed generously with non-stick cooking spray before each batch.
Q: My pizzelles are too soft. What am I doing wrong?
A: Ensure the pizzelle iron is hot enough. Also, don’t stack the pizzelles while they are cooling, as this can trap moisture and make them soggy.
Q: Can I make the batter ahead of time?
A: Yes, you can prepare the batter up to 24 hours in advance. Store it in the refrigerator and whisk it gently before using.
Q: How do I get the perfect cup shape?
A: Work quickly while the pizzelle is still hot and pliable. Use a glass with a smooth, rounded bottom to ensure a neat shape.
Q: Can I freeze the pizzelle cups?
A: Yes, you can freeze unfilled pizzelle cups in an airtight container for up to 2 months. Thaw them at room temperature before filling.
Final Thoughts
These Pizzelle Dessert Cups are more than just a recipe; they’re a reminder of cherished traditions and the simple joys of sharing delicious food with loved ones. Whether you’re hosting a formal dinner party or simply looking for a sweet treat to brighten your day, these delicate cups are sure to impress. So, gather your ingredients, dust off your pizzelle iron, and embark on a culinary adventure that will transport you to the heart of Italy. Don’t be afraid to experiment with different fillings and toppings to create your own signature pizzelle cup masterpiece. And most importantly, remember to savor every moment – from the preparation to the first delightful bite. Buon appetito!