
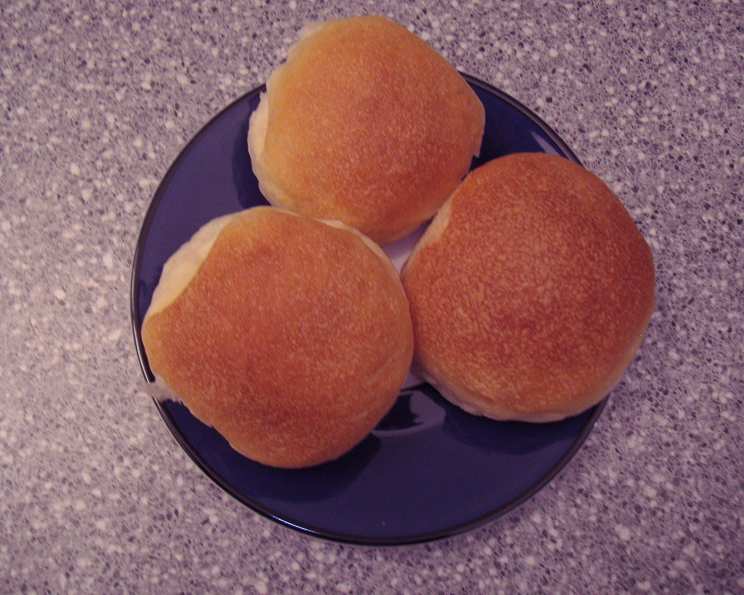
The Simple Joy of Homemade Plain Buns
The scent of freshly baked bread has always been a potent trigger for me, instantly transporting me back to childhood summers. I remember my grandmother’s kitchen, perpetually warm and filled with the comforting aroma of yeast and flour. She’d be there, her hands dusted white, humming a tuneless melody as she kneaded dough with practiced ease. Those weren’t fancy breads or elaborate pastries, but simple, honest buns, destined for lunchtime sandwiches or simply enjoyed warm with a smear of butter. The taste of those buns, soft and slightly sweet, is a memory I cherish, a reminder of simple pleasures and the love baked into every bite.
Recipe Overview
- Prep Time: 1 hour 15 minutes (includes yeast activation and initial rise)
- Rise Time: 2 hours 45 minutes (two separate rises)
- Cook Time: 10-12 minutes
- Total Time: 4 hours 12 minutes
- Yields: 40-50 buns
- Dietary Type: Vegetarian (easily adaptable to vegan)
Ingredients
- 2 tablespoons yeast
- 1 tablespoon sugar
- 1 cup water
- 1 cup oil (vegetable or canola oil recommended)
- 4 cups lukewarm water
- 1⁄4 cup sugar
- 1 1⁄2 teaspoons vinegar (white or apple cider vinegar work well)
- 2 tablespoons salt (level)
- 14-15 cups flour (all-purpose)
Equipment Needed
- Large mixing bowl
- Measuring cups and spoons
- Sifter (optional, but recommended)
- Warm oven (for proofing)
- Baking sheets
- Cooling rack
Instructions
-
Activate the Yeast: In a small bowl, dissolve 2 tablespoons of yeast and 1 tablespoon of sugar in 1 cup of water. Let stand for 5-10 minutes, or until the yeast mixture rises to the top, forming a frothy layer. This confirms that the yeast is active and ready to use.
-
Prepare the Dry Ingredients: Sift 14-15 cups of flour into a large mixing bowl. Sifting isn’t strictly necessary, but it helps to aerate the flour, resulting in a lighter, more tender bun.
-
Combine Wet and Dry Ingredients: In a separate large bowl, dissolve 1/4 cup of sugar and 2 tablespoons of salt (level) in 4 cups of lukewarm water. Add 1 1/2 teaspoons of vinegar and 1 cup of oil to the water mixture.
-
Mix the Dough: Pour the wet ingredients into the bowl with the sifted flour. Add the activated yeast mixture. Mix well until a shaggy dough forms.
-
Knead the Dough: Turn the dough out onto a lightly floured surface. Knead the dough for 8-10 minutes, or until it becomes smooth and elastic. Add more flour, a tablespoon at a time, if the dough is too sticky. Proper kneading develops the gluten, which gives the buns their structure.
-
First Rise: Place the kneaded dough in a lightly oiled bowl, turning to coat all sides. Cover the bowl with a clean kitchen towel or plastic wrap. Place the bowl in a warm oven (turned off) for 45 minutes, or until the dough has doubled in size. This first rise allows the yeast to work its magic and develop the flavor of the dough.
-
Punch Down and Second Rise: After the first rise, punch down the dough to release the trapped air. Let the dough rise again for 30 minutes in the warm oven. This second rise further enhances the flavor and texture.
-
Shape the Buns: After the second rise, punch down the dough again. Divide the dough into 40-50 equal pieces. Shape each piece into a round bun. Place the shaped buns on greased baking sheets, leaving some space between each bun for expansion.
-
Final Rise: Cover the baking sheets with a clean kitchen towel. Let the buns rise for 2 hours at room temperature. This final rise is crucial for achieving light and airy buns.
-
Bake the Buns: Preheat your oven to 400°F (200°C). Bake the buns for 10-12 minutes, or until they are golden brown on top. Keep a close eye on them, as oven temperatures can vary.
-
Cool and Enjoy: Remove the baked buns from the oven and transfer them to a cooling rack. Let them cool slightly before serving.
Expert Tips & Tricks
- Yeast Activation is Key: Ensure your yeast is fresh and active. If the yeast mixture doesn’t froth, the yeast may be expired.
- Don’t Over-Knead: Over-kneading can result in tough buns. Knead just until the dough is smooth and elastic.
- Warm Environment for Rising: A warm environment is essential for the dough to rise properly. A slightly warm oven (turned off) or a warm spot in your kitchen works well.
- Brush with Egg Wash: For a shinier crust, brush the buns with an egg wash (1 egg beaten with 1 tablespoon of water) before baking.
- Even Baking: Rotate the baking sheets halfway through baking to ensure even browning.
- Freezing for Later: These buns freeze beautifully. Once cooled, place them in a freezer-safe bag and store them in the freezer for up to 2 months.
Serving & Storage Suggestions
These plain buns are incredibly versatile. They can be used for sandwiches, sliders, or simply enjoyed warm with butter, jam, or honey. Serve them with soups, salads, or as a side to your favorite meal.
Storage:
- Room Temperature: Store the baked buns in an airtight container at room temperature for up to 2 days.
- Refrigerator: Store the baked buns in an airtight container in the refrigerator for up to 5 days.
- Freezer: As mentioned above, these buns freeze well.
Reheating:
- Oven: To reheat frozen or refrigerated buns, wrap them in foil and bake at 350°F (175°C) for 5-10 minutes, or until heated through.
- Microwave: You can also reheat the buns in the microwave for 15-30 seconds, but be careful not to overheat them, as they can become tough.
Nutritional Information
(Estimated values per bun, based on 45 buns from the recipe)
| Nutrient | Amount per Serving | % Daily Value |
|---|---|---|
| Calories | 195 kcal | 10% |
| Total Fat | 7g | 9% |
| Saturated Fat | 1g | 5% |
| Cholesterol | 0mg | 0% |
| Sodium | 175mg | 8% |
| Total Carbohydrate | 28g | 10% |
| Dietary Fiber | 1g | 4% |
| Sugars | 2g | 4% |
| Protein | 4g | 8% |
Variations & Substitutions
- Vegan Buns: Substitute the oil with melted coconut oil or vegan butter. Ensure no dairy ingredients are used.
- Whole Wheat Buns: Replace up to half of the all-purpose flour with whole wheat flour for a nuttier flavor and added fiber.
- Sweet Buns: Add an extra 1/4 cup of sugar to the dough for slightly sweeter buns.
- Herb Buns: Add 1-2 tablespoons of dried herbs, such as rosemary, thyme, or oregano, to the dough for a savory twist.
- Garlic Buns: Add 1-2 teaspoons of garlic powder to the dough for a subtle garlic flavor.
- Gluten-Free Buns: Replace all-purpose flour with a gluten-free all-purpose flour blend. Note that the texture may be slightly different, and you may need to adjust the amount of liquid.
- Potato Buns: Replace 1 cup of lukewarm water with 1 cup of mashed potatoes (cooled) for added moisture and flavor.
FAQs (Frequently Asked Questions)
Q: Why are my buns dense and not fluffy?
A: This could be due to several reasons, including using expired yeast, not kneading the dough enough, or not allowing enough time for the dough to rise.
Q: Can I use bread flour instead of all-purpose flour?
A: Yes, bread flour can be used. It will result in a slightly chewier bun due to the higher gluten content.
Q: How can I prevent the buns from drying out?
A: Ensure they are stored in an airtight container. You can also brush them with melted butter immediately after baking to add moisture.
Q: Can I make the dough ahead of time and bake it later?
A: Yes, you can refrigerate the dough after the first rise. Punch it down and store it in an airtight container in the refrigerator for up to 24 hours. Let it come to room temperature before shaping and baking.
Q: What is the best way to reheat the buns so they are soft again?
A: Wrapping the buns in foil and reheating them in a warm oven (350°F) is the best way to restore their softness.
Final Thoughts
There’s something truly special about baking your own bread, especially simple, comforting buns like these. The process itself is therapeutic, and the aroma that fills your kitchen is simply irresistible. I encourage you to give this recipe a try. Don’t be intimidated by the length; each step is straightforward, and the results are well worth the effort. Whether you use them for sandwiches, sliders, or simply enjoy them warm with butter, I hope these homemade plain buns bring a little bit of joy to your day. And if you try any variations or have any questions, please feel free to share your experience. Happy baking!