
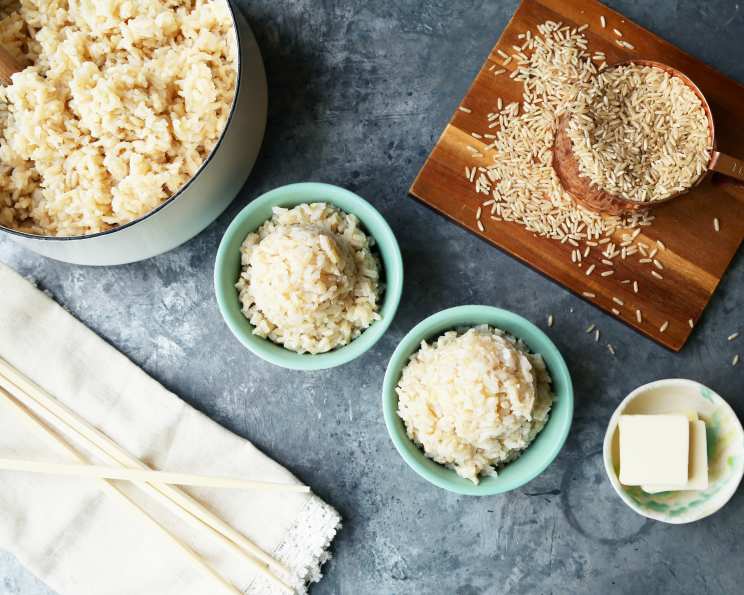
Plain but Perfect-Every-Time Brown Rice
There’s a certain comfort in simplicity, isn’t there? I remember being a wide-eyed culinary student, obsessed with foams and reductions, utterly convinced that the more complicated the dish, the better it tasted. Then came a week of grueling exams, late nights fueled by instant coffee, and a desperate craving for something…real. That’s when I discovered the profound satisfaction of perfectly cooked brown rice. Its nutty aroma filled my tiny apartment, promising warmth and sustenance. It was a reminder that sometimes, the most profound flavors are found in the simplest of things.
Recipe Overview
- Prep Time: 5 minutes
- Cook Time: 1 hour
- Total Time: 1 hour 5 minutes
- Servings: 3 cups cooked rice
- Yield: 3 cups
- Dietary Type: Vegan, Gluten-Free, Dairy-Free
Ingredients
- 2 1/4 cups water
- 1 cup brown rice
Equipment Needed
- Medium-sized saucepan with a tight-fitting lid
Instructions
- Begin by bringing 2 1/4 cups of water to a rolling boil in your saucepan. Use a saucepan that has a lid that fits well. This is key for perfectly steamed rice.
- Once the water is vigorously boiling, gently add 1 cup of brown rice. Be careful not to splash yourself with the hot water.
- Immediately cover the saucepan with the lid and reduce the heat to the lowest possible setting, so the liquid simmers very gently.
- Simmer the rice, covered, for 45 minutes. It is crucial to resist the urge to lift the lid during this time. Peeking releases steam and will affect the rice’s final texture. Trust the process.
- After the 45 minutes of simmering, turn off the heat completely. Do not remove the lid!
- Allow the rice to sit undisturbed, covered, for an additional 15 minutes. This final steaming period is essential for the rice to fully absorb the remaining moisture and achieve optimal fluffiness. Again, absolutely do not lift the lid!
- After the 15-minute rest, carefully remove the lid. You should see perfectly cooked brown rice.
- Use a fork to gently fluff the rice, separating the grains. This prevents the rice from clumping and gives it a light, airy texture.
Expert Tips & Tricks
- Washing the Rice: While this recipe doesn’t require rinsing the rice, some prefer to do so to remove excess starch. If you choose to rinse, be sure to drain the rice very well before adding it to the boiling water. You may need to adjust the amount of water slightly (adding a tablespoon or two) to compensate for the extra moisture.
- Toasting the Rice (Optional): For a nuttier flavor, lightly toast the brown rice in the dry saucepan over medium heat for a few minutes before adding the water. Watch it carefully to prevent burning!
- Preventing Sticking: While this method virtually eliminates sticking, a thin layer of rice may still adhere to the bottom of the pan. Avoid scraping the bottom when fluffing the rice to prevent incorporating any slightly crusty bits.
- Adjusting for Altitude: At higher altitudes, water boils at a lower temperature, which can affect cooking times. You may need to add a few extra minutes to the simmering time to ensure the rice is fully cooked.
- Using a Rice Cooker: While this recipe is designed for the stovetop, you can adapt it for a rice cooker. Follow the manufacturer’s instructions for brown rice, using the same water-to-rice ratio (2 1/4 cups water to 1 cup rice).
Serving & Storage Suggestions
Serve your perfectly cooked brown rice as a side dish with your favorite main courses. It’s a versatile grain that pairs well with everything from grilled chicken and fish to stir-fries and vegetable curries. It can also be used as a base for grain bowls or added to soups and salads.
Storage:
- Room Temperature: Cooked brown rice should not be left at room temperature for more than two hours due to the risk of bacterial growth.
- Refrigerator: Store leftover brown rice in an airtight container in the refrigerator for up to 4 days.
- Freezer: For longer storage, freeze the rice in freezer-safe bags or containers for up to 2 months. To reheat, thaw the rice in the refrigerator overnight or microwave directly from frozen, adding a tablespoon or two of water to help it steam.
Reheating:
- Microwave: Reheat individual portions in the microwave with a splash of water, covered, for 1-2 minutes, or until heated through.
- Stovetop: Reheat larger quantities in a saucepan over low heat with a little water, stirring occasionally, until heated through.
Nutritional Information
Note: Nutritional information is an estimate and may vary based on specific ingredients and portion sizes.
| Nutrient | Amount per Serving | % Daily Value |
|---|---|---|
| Calories | 228 kcal | N/A |
| Calories from Fat | 16 g | 7% |
| Total Fat | 1.8 g | 2% |
| Saturated Fat | 0.4 g | 1% |
| Cholesterol | 0 mg | 0% |
| Sodium | 9.7 mg | 0% |
| Total Carbohydrate | 47.6 g | 15% |
| Dietary Fiber | 2.2 g | 8% |
| Sugars | 0.5 g | 2% |
| Protein | 4.9 g | 9% |
Variations & Substitutions
- Broth Instead of Water: For added flavor, substitute chicken or vegetable broth for the water. Use a low-sodium broth to control the salt content.
- Coconut Milk Rice: Replace half of the water with coconut milk for a creamy, slightly sweet version. This is delicious with Asian-inspired dishes.
- Herb Infusion: Add a sprig of fresh rosemary, thyme, or bay leaf to the water while simmering for a subtle herbal flavor. Remove the herbs before serving.
- Spice It Up: Stir in a pinch of turmeric, cumin, or chili powder after the rice is cooked for a warm, aromatic twist.
- Wild Rice Blend: Combine brown rice with wild rice for a more complex flavor and texture. You may need to adjust the cooking time slightly, as wild rice typically takes longer to cook.
FAQs (Frequently Asked Questions)
Q: Why is it important not to lift the lid while the rice is cooking?
A: Lifting the lid releases steam, which lowers the temperature inside the pot and can disrupt the cooking process, resulting in unevenly cooked or undercooked rice.
Q: Can I use short-grain brown rice instead of long-grain?
A: Yes, but short-grain brown rice tends to be stickier than long-grain. You may need to slightly reduce the amount of water to prevent it from becoming mushy.
Q: What if the rice is still slightly crunchy after the recommended cooking time?
A: Add a little more water (about 1/4 cup) and continue simmering for a few more minutes, keeping the lid on tight. Check the rice every few minutes until it reaches your desired level of tenderness.
Q: Can I make a larger batch of rice using this method?
A: Yes, but you’ll need to adjust the amount of water accordingly. Maintain the same water-to-rice ratio (2 1/4 cups water to 1 cup rice). Also, use a larger saucepan to ensure the rice has enough room to cook evenly.
Q: How do I prevent the rice from sticking to the bottom of the pot?
A: Using a heavy-bottomed saucepan helps to distribute the heat more evenly and prevent sticking. Also, ensuring the heat is set to the lowest possible simmer is crucial.
Final Thoughts
Don’t be intimidated by cooking rice on the stovetop! With this simple, foolproof method, you can consistently achieve fluffy, perfectly cooked brown rice every time. Experiment with different variations and flavor combinations to make it your own. Share your creations and experiences – cooking is more fun when it’s a shared joy! Pair your perfect brown rice with a vibrant vegetable stir-fry or a comforting lentil stew for a complete and satisfying meal.