
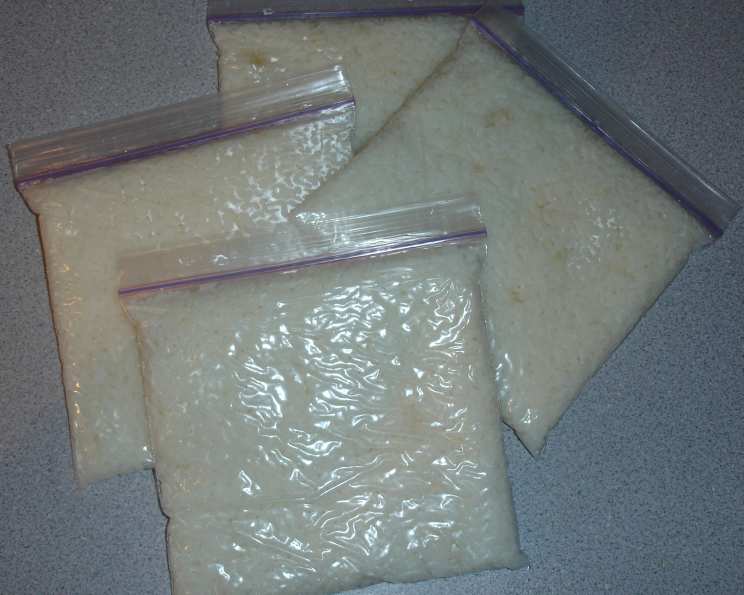
Plain Rice — Make Ahead OAMC Throw It in the Freezer!!
There’s something so wonderfully comforting about a bowl of perfectly cooked rice. For me, it always brings back memories of my grandmother’s kitchen, the aroma of steaming rice filling the air as she prepared our family meals. She always seemed to effortlessly have rice ready, and now I know her secret (or at least a version of it): batch cooking and freezing! This simple method allows you to enjoy fluffy, delicious rice anytime, without the last-minute rush.
Recipe Overview
- Prep Time: 5 minutes
- Cook Time: 30 minutes
- Total Time: 35 minutes
- Servings: 8
- Yield: 4 quart-sized bags
- Dietary Type: Vegan, Gluten-Free
Ingredients
- 3 cups rice (sushi rice recommended, but any variety works)
- Water (quantity depends on your preferred cooking method)
Equipment Needed
- Rice cooker (optional, but highly recommended) or saucepan with lid
- Strainer
- Quart-sized Ziploc bags (or smaller sandwich/snack bags, as needed)
Instructions
-
Cook the Rice: Prepare the rice according to your preferred method, whether using a rice cooker or a saucepan on the stovetop. If using a rice cooker, simply add the rice and the appropriate amount of water (refer to your rice cooker’s instructions) and let it cook. If using a saucepan, bring the water to a boil, add the rice, reduce the heat to low, cover, and simmer for the time specified on the rice package.
-
Rinse the Rice: Once the rice is cooked, immediately transfer it to a strainer. Rinse the rice thoroughly with cold water until the water runs clear. This step is crucial to stop the cooking process and prevent the rice from becoming sticky and mushy. Be generous with the rinsing! You want the rice to be completely cooled down.
-
Portion and Bag the Rice: Divide the cooled rice into quart-sized Ziploc bags. Aim for about 2 cups of rice per bag. If you prefer smaller portions, you can use sandwich or snack-sized bags, filling each with 1 cup of rice.
-
Flatten and Seal: Gently flatten each bag of rice to create an even layer. This helps the rice freeze and thaw more quickly and evenly. Press out as much air as possible before sealing the bags tightly. Removing air prevents freezer burn and helps preserve the quality of the rice.
-
Freeze: Place the filled and sealed bags of rice in the freezer. Lay them flat for the first few hours to ensure they freeze evenly. Once frozen solid, you can stack them to save space.
-
Thaw and Reheat: When you’re ready to use the rice, simply remove a bag from the freezer in the morning and place it in the refrigerator to thaw throughout the day. Alternatively, you can thaw it quickly in the microwave using the defrost setting, but be careful not to overheat it. Once thawed, reheat the rice in the microwave, on the stovetop with a little water, or by steaming it until heated through.
Expert Tips & Tricks
- Rice Variety Matters: While any type of rice can be used, I find that sushi rice works exceptionally well for this method. Its slightly stickier texture helps it retain moisture and stay fluffy even after freezing and thawing. Long-grain rice, like basmati or jasmine, will also work but may be slightly drier.
- Don’t Skip the Rinse: Rinsing the rice thoroughly after cooking is non-negotiable! This removes excess starch and prevents the rice from becoming a gluey mess when reheated.
- Portion Control: Consider your typical rice consumption when deciding on portion sizes. Individual or smaller portions can be incredibly convenient for single servings or quick lunches.
- Quick Thawing: If you forget to thaw the rice in advance, you can place the sealed bag in a bowl of cold water for a faster thaw.
- Reheating Perfection: When reheating, add a tablespoon or two of water to the rice to help it steam and retain moisture. Cover the rice while reheating to prevent it from drying out.
- Prevent Freezer Burn: Freezer burn is the enemy of frozen food. Ensure your bags are properly sealed and as much air as possible is removed to prevent it. If you are concerned about long term freezer storage, consider using a vacuum sealer for the bags.
- Adding Flavor Boost: Before freezing, consider adding a touch of flavor to the rice. A sprinkle of sesame oil, a dash of soy sauce, or a few chopped herbs can elevate the flavor and make it even more appealing.
- Label, Label, Label: Always label each bag with the contents and the date it was frozen. This helps you keep track of your inventory and ensures you use the oldest rice first.
Serving & Storage Suggestions
Serve the reheated rice as a side dish with your favorite meals. It’s a perfect accompaniment to stir-fries, curries, grilled meats, or roasted vegetables.
Store any leftover cooked rice in an airtight container in the refrigerator for up to 3-4 days. Reheat thoroughly before serving. Frozen rice, when properly stored, can last for up to 2-3 months in the freezer.
Nutritional Information
| Nutrient | Amount per Serving (approx. 2 cups) | % Daily Value |
|---|---|---|
| Calories | 400 kcal | 20% |
| Total Fat | 1g | 2% |
| Saturated Fat | 0g | 0% |
| Cholesterol | 0mg | 0% |
| Sodium | 5mg | 0% |
| Total Carbohydrate | 88g | 29% |
| Dietary Fiber | 2g | 8% |
| Sugars | 0g | 0% |
| Protein | 8g | 16% |
Note: Nutritional information is an estimate and may vary based on the specific type of rice used and cooking method.
Variations & Substitutions
- Brown Rice: Substitute white rice with brown rice for a nuttier flavor and higher fiber content. Adjust the cooking time accordingly, as brown rice typically requires a longer cooking time.
- Coconut Rice: Cook the rice with coconut milk instead of water for a richer, sweeter flavor. Reduce the amount of water by half and replace it with coconut milk.
- Herb-Infused Rice: Add fresh herbs, such as parsley, cilantro, or thyme, to the cooking water for a subtle herbal flavor.
- Vegetable Broth Rice: Cook the rice in vegetable broth instead of water for a more savory flavor.
- Fried Rice Starter: Use the frozen rice as a base for quick and easy fried rice. Simply thaw the rice and stir-fry it with your favorite vegetables, protein, and sauce.
- Cauliflower Rice: To increase your vegetable intake, mix cooked and cooled cauliflower rice in with the regular rice before freezing. This will allow you to have the nutrition of cauliflower with the familiar texture of regular rice.
FAQs (Frequently Asked Questions)
Q: Why do I need to rinse the rice after cooking?
A: Rinsing removes excess starch, preventing the rice from becoming sticky and clumpy when reheated. It ensures a fluffier texture.
Q: Can I freeze rice that has already been seasoned?
A: Yes, you can freeze seasoned rice. Just be mindful of the flavors and how they might change upon thawing and reheating.
Q: How long can I store frozen rice in the freezer?
A: Properly stored frozen rice can last for up to 2-3 months without significant quality loss.
Q: Can I reheat the rice directly from frozen?
A: While possible, it’s best to thaw the rice before reheating for more even heating and better texture.
Q: Is it safe to refreeze rice after it has been thawed?
A: Refreezing thawed rice is generally not recommended, as it can increase the risk of bacterial growth. It’s best to use the rice once it has been thawed.
Final Thoughts
This method for freezing rice is truly a game-changer for busy weeknights. It’s a simple, efficient way to ensure you always have perfectly cooked rice on hand. Give it a try and discover the convenience of having ready-to-go rice whenever you need it. Don’t hesitate to experiment with different rice varieties and flavorings to create your own personalized frozen rice stash. I’d love to hear about your experiences and any variations you come up with! Enjoy!