
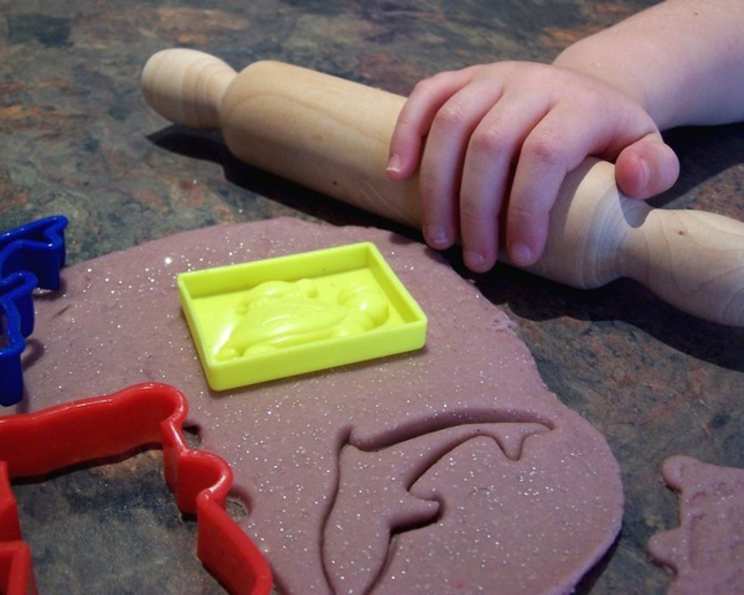
The Ultimate Homemade Play Dough Recipe: A Culinary Adventure for Kids (and Adults!)
I’ll never forget the slightly sour, vaguely sweet smell of play dough wafting through the kindergarten classroom. It was the scent of pure, unadulterated imagination. Rolling, squishing, and sculpting that pliable dough transported us to fantastical worlds, constructing towering castles and whimsical creatures. It wasn’t just a sensory experience; it was a bonding one, sharing creations and laughter with friends, all thanks to a simple ball of colorful dough. This recipe brings back those cherished memories, offering a chance to create new ones with the next generation.
Recipe Overview
- Prep Time: 5 minutes
- Cook Time: 5 minutes
- Total Time: 10 minutes
- Yields: 1 3/4 cups
- Serves: Multiple play sessions!
- Dietary Type: Vegan (easily)
Ingredients
- 1 cup flour
- 1/2 cup salt
- 1 cup water
- 1 tablespoon oil (vegetable, canola, or coconut work well)
- 2 teaspoons cream of tartar
- Food coloring (gel or liquid)
Equipment Needed
- Medium saucepan
- Wooden spoon or spatula
- Airtight container
Instructions
-
In a medium saucepan, combine the flour, salt, water, oil, and cream of tartar.
-
Place the saucepan over medium heat.
-
Continuously stir the mixture with a wooden spoon or spatula. This is important to prevent sticking and ensure even cooking.
-
As the mixture heats, it will begin to thicken. Continue stirring until the dough forms a ball and pulls away from the sides of the pan. This usually takes about 3-5 minutes.
-
Remove the saucepan from the heat.
-
Allow the dough to cool slightly, enough to handle comfortably.
-
Knead the dough on a lightly floured surface until it is smooth and pliable.
-
Divide the dough into portions depending on how many colors you want to create.
-
Add a few drops of food coloring to each portion and knead until the color is evenly distributed. If using gel food coloring, start with a tiny amount, as it’s more concentrated.
-
Store the play dough in an airtight container when not in use. This will prevent it from drying out.
Expert Tips & Tricks
- Cream of tartar is essential for the play dough’s elasticity and longevity. Don’t skip it!
- If your play dough is too sticky, add a little more flour, a tablespoon at a time, until you reach the desired consistency.
- If your play dough is too dry, add a few drops of water and knead until it becomes pliable again.
- For a smoother texture, try using bread flour instead of all-purpose flour.
- Get creative with your colors! Mix different food colorings to create unique shades.
- Add a few drops of essential oils like lavender or chamomile for a calming aromatherapy experience. Be sure they are kid-safe and used in small amounts.
- For a glittery effect, add a sprinkle of edible glitter to the dough.
Serving & Storage Suggestions
This play dough is best served at room temperature, ready for immediate play! To keep your play dough soft and pliable, store it in an airtight container. A Ziploc bag or a reusable container with a tight-fitting lid works best. Properly stored, this play dough should last for several weeks, or even months! If you notice the dough becoming dry or crumbly, try kneading in a few drops of water to restore its moisture.
Nutritional Information
This play dough is not intended for consumption, so nutritional information is not applicable. However, it is generally made with food-grade ingredients.
Variations & Substitutions
- Gluten-Free Play Dough: Substitute the all-purpose flour with a gluten-free flour blend. Be sure to add a binder like xanthan gum to improve the texture.
- Scented Play Dough: Add extracts like vanilla, almond, or peppermint for a delightful aroma.
- Natural Food Coloring: Use natural food colorings derived from fruits and vegetables like beet juice for pink, spinach juice for green, and turmeric for yellow.
- Salt-Free Play Dough: While salt helps preserve the play dough, you can reduce the amount or omit it entirely if needed. Be aware that the shelf life may be shorter.
- Sparkly Play Dough: Add some glitter to the dough for a festive touch. Make sure it’s non-toxic glitter!
FAQs (Frequently Asked Questions)
Q: Is this play dough edible?
A: While the ingredients are food-grade, this play dough is not intended for consumption. It contains a high amount of salt, which is not good for you.
Q: How long does this play dough last?
A: Stored in an airtight container, this play dough can last for several weeks, or even months.
Q: What if my play dough is too sticky?
A: If your play dough is too sticky, add a little more flour, a tablespoon at a time, until you reach the desired consistency.
Q: What if my play dough is too dry?
A: If your play dough is too dry, add a few drops of water and knead until it becomes pliable again.
Q: Can I use different types of oil?
A: Yes, you can use vegetable oil, canola oil, or even coconut oil in this recipe. The type of oil doesn’t significantly affect the final product.
Final Thoughts
Creating homemade play dough is a simple yet rewarding activity that fosters creativity and imagination. This recipe is a fantastic way to spend quality time with kids, teaching them basic cooking skills and unleashing their artistic potential. So, gather your ingredients, roll up your sleeves, and get ready for a world of colorful, squishy fun! Don’t hesitate to experiment with different colors, scents, and textures to create your own unique play dough masterpieces. Share your creations and let your imagination run wild!