
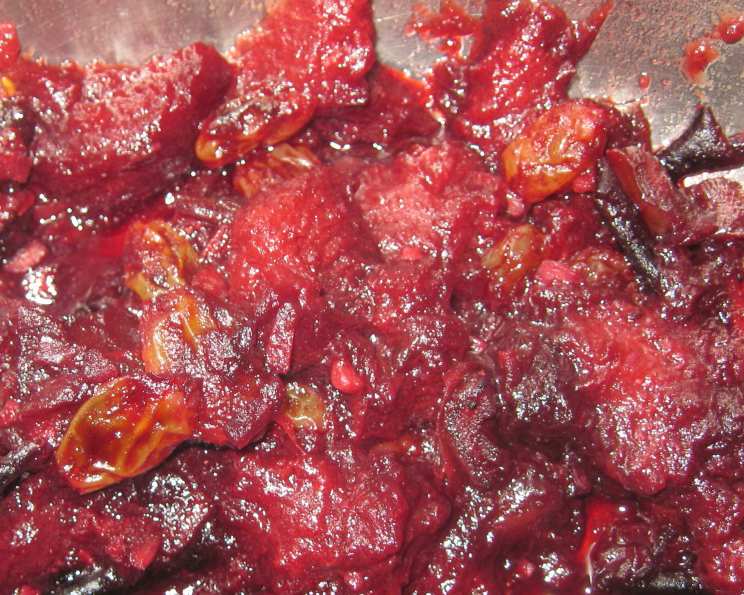
Plum-Date Chutney: A Taste of Autumn Sunshine
I remember the first time I tasted a truly exceptional chutney. It was at a small farm shop in the Cotswolds, England. The air was crisp with the promise of autumn, and the shelves groaned under the weight of homemade jams, pickles, and preserves. But it was the dark, glistening chutney, studded with jewel-toned fruits, that truly captured my attention. Its complex sweetness, tangy vinegar notes, and gentle spice were a revelation, transforming a simple cheddar ploughman’s lunch into something sublime. Since then, I’ve been on a quest to recreate that magic, and this Plum-Date Chutney comes incredibly close, bottling the essence of late summer’s bounty for enjoyment all year round.
Recipe Overview
- Prep Time: 30 minutes
- Cook Time: 1 hour 30 minutes
- Total Time: 2 hours
- Yields: Approximately 3 (1-pint) jars
- Dietary Type: Vegan, Gluten-Free
Ingredients
- 1 kg plums, stoned
- 250 g dates, chopped
- 2 cups sugar
- ¼ teaspoon chili powder
- 2 tablespoons ground ginger
- 500 g raisins
- 500 g carrots, finely grated
- 4 garlic cloves, finely chopped
- 1 tablespoon salt
- 2 cups vinegar
- 1 onion, finely chopped (optional)
Equipment Needed
- Large, heavy-bottomed saucepan or preserving pan
- Sterilized jars with lids
- Wooden spoon
- Measuring cups and spoons
- Chopping board
- Sharp knife
- Grater
Instructions
-
Begin by preparing your plums. Wash them thoroughly, halve them, and remove the stones. Don’t worry about being too precise with the cutting – they’ll break down during cooking.
-
In your large saucepan, combine the stoned plums, chopped dates, raisins, and finely grated carrots. This colorful combination forms the base of the chutney, each ingredient contributing its unique sweetness and texture.
-
Pour in the vinegar and bring the mixture to a gentle boil over medium heat. This initial boiling will help to soften the fruits and vegetables and allow their flavors to meld together.
-
Reduce the heat to low and simmer gently for approximately 45 minutes, or until the fruits and vegetables are quite soft. Stir occasionally to prevent sticking and ensure even cooking. The mixture will start to thicken slightly as the liquid evaporates.
-
Now, add the remaining ingredients: sugar, chili powder, ground ginger, finely chopped garlic, salt, and the optional finely chopped onion (if using). The sugar will add sweetness, the chili powder a subtle warmth, and the ginger a touch of spice. The garlic and salt enhance the overall flavor profile, while the onion provides a savory depth.
-
Continue to simmer gently, stirring frequently, for another 45 minutes, or until the chutney has thickened and reached a creamy consistency. This is a crucial step, as the chutney needs to be thick enough to hold its shape and prevent spoilage. The final texture should be similar to a thick jam or preserve.
-
Test for doneness by placing a small spoonful of chutney on a cold plate. Let it cool for a minute. If it wrinkles when you push it with your finger, it’s ready. If not, continue simmering for a few more minutes, checking again periodically.
-
While the chutney is simmering, sterilize your jars. There are several methods you can use. One easy way is to wash the jars and lids in hot, soapy water, rinse thoroughly, and then place them in a preheated oven at 250°F (120°C) for about 10 minutes. Alternatively, you can boil the jars and lids in water for 10 minutes. Make sure the jars are completely dry before filling them.
-
Once the chutney is ready and the jars are sterilized, carefully ladle the hot chutney into the jars, leaving about ¼ inch of headspace at the top.
-
Seal the jars immediately with the sterilized lids. Ensure the lids are properly tightened but not overly so.
-
To ensure a good seal, you can process the filled jars in a boiling water bath for 10 minutes. This step isn’t strictly necessary, but it will help to prolong the shelf life of the chutney. To do this, place the filled jars in a large pot filled with boiling water, making sure the water covers the jars by at least an inch. Bring the water back to a boil and boil for 10 minutes. Carefully remove the jars from the water bath and let them cool completely. As they cool, you should hear a “pop” sound as the lids seal.
-
Once the jars are completely cool, check the seals. The lids should be concave and not flex when pressed. If a jar doesn’t seal properly, you can either reprocess it with a new lid or store it in the refrigerator and use it within a few weeks.
Expert Tips & Tricks
- Spice It Up (or Down): Adjust the amount of chili powder to suit your taste. If you prefer a milder chutney, use less chili powder or omit it altogether. For a spicier chutney, add a pinch of cayenne pepper or a finely chopped chili pepper.
- Fruit Variations: Feel free to experiment with other fruits. Apples, pears, or cranberries would all work well in this chutney.
- Vinegar Variety: You can use different types of vinegar to add different flavor nuances. Apple cider vinegar or malt vinegar would be excellent alternatives to white vinegar.
- Don’t Rush: The simmering process is crucial for developing the rich flavor and thick texture of the chutney. Don’t be tempted to rush it.
- Stir, Stir, Stir: Regular stirring is essential to prevent the chutney from sticking to the bottom of the pan and burning.
Serving & Storage Suggestions
This Plum-Date Chutney is incredibly versatile and can be used in a variety of ways. Serve it as an accompaniment to cheese, cold meats, or pate. It’s also delicious with grilled sausages, roast chicken, or pork. Spread it on sandwiches or crackers for a flavorful snack. It makes a wonderful addition to a cheese board.
Store the sealed jars of chutney in a cool, dark place. Properly sealed jars will keep for up to a year. Once opened, store the chutney in the refrigerator and use it within a few weeks.
Nutritional Information
Note: Nutritional information is an estimate and may vary based on specific ingredients and portion sizes.
| Nutrient | Amount per Serving | % Daily Value |
|---|---|---|
| Calories | 300 kcal | 15% |
| Total Fat | 1g | 1% |
| Saturated Fat | 0g | 0% |
| Cholesterol | 0mg | 0% |
| Sodium | 600mg | 25% |
| Total Carbohydrate | 75g | 25% |
| Dietary Fiber | 5g | 20% |
| Sugars | 60g | – |
| Protein | 2g | 4% |
Variations & Substitutions
- Maple Syrup: Substitute some of the sugar with maple syrup for a richer, more complex flavor.
- Dried Apricots: Add chopped dried apricots for a tangy sweetness.
- Walnuts or Almonds: Stir in toasted chopped walnuts or almonds for added texture and nutty flavor.
- Star Anise or Cinnamon Stick: Add a star anise or cinnamon stick during simmering for a warm, aromatic spice. Remove before bottling.
FAQs (Frequently Asked Questions)
Q: Do I need to peel the plums?
A: No, you don’t need to peel the plums. The skins will soften during cooking and add to the texture of the chutney.
Q: Can I use frozen plums?
A: Yes, you can use frozen plums. Just make sure to thaw them completely before using them in the recipe.
Q: How do I know if the chutney is thick enough?
A: The chutney is thick enough when it coats the back of a spoon and leaves a clear trail when you run your finger through it. You can also test its consistency by placing a small spoonful on a cold plate. If it wrinkles when you push it with your finger, it’s ready.
Q: Why is my chutney too runny?
A: If your chutney is too runny, it means it hasn’t been cooked long enough. Continue simmering it until it reaches the desired consistency.
Q: Can I make this chutney in a slow cooker?
A: Yes, you can make this chutney in a slow cooker. Combine all the ingredients in the slow cooker and cook on low for 6-8 hours, or until the chutney has thickened.
Final Thoughts
This Plum-Date Chutney is more than just a condiment; it’s a taste of autumn sunshine, bottled and ready to brighten up any meal. The combination of sweet plums, chewy dates, and warm spices creates a flavor that is both comforting and complex. I encourage you to try this recipe and experience the magic for yourself. Don’t be afraid to experiment with different variations and find your perfect flavor combination. And most importantly, share your creation with friends and family – good food is always best enjoyed in good company.