
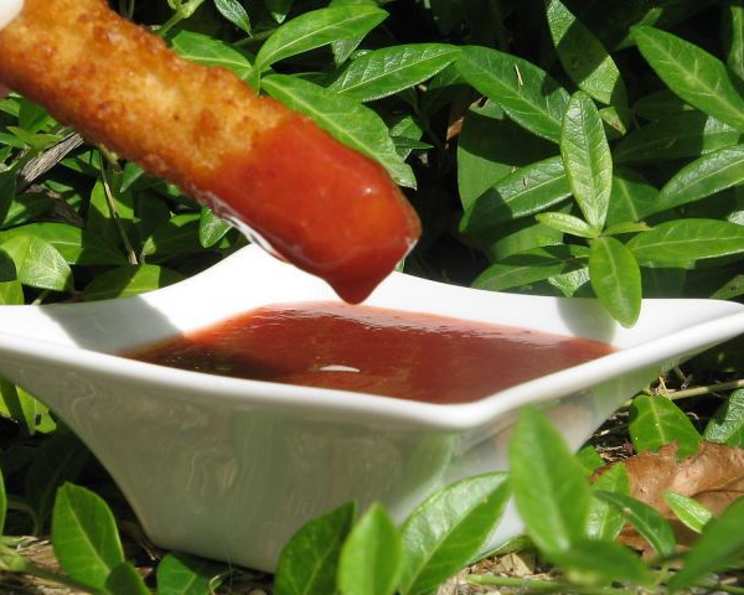
Homemade Plum Sauce: A Taste of Summer in Every Bite
I still remember the late summer days of my childhood, the air thick with the sweet, almost fermented scent of ripe plums. My grandmother had a sprawling plum tree in her backyard, and every year, we’d gather buckets full of the dark, juicy fruit. While some were destined for pies and jams, a significant portion always ended up transformed into her famous plum sauce. It wasn’t just a condiment; it was bottled sunshine, a taste of those carefree summer days that lingered long into the colder months. I’m excited to share a similar recipe with you today.
Recipe Overview
- Prep Time: 20 minutes
- Cook Time: 2 hours
- Total Time: 2 hours 20 minutes
- Yields: Approximately 6 bottles
- Dietary Type: Vegan, Gluten-Free
Ingredients
- 4 lbs plums
- 1 1/2 lbs sugar
- 1 teaspoon ground cloves
- 1 teaspoon ground ginger
- 1 teaspoon salt
- 1 teaspoon cayenne pepper (or to taste)
- 2 pints vinegar
- 2 ounces garlic
Equipment Needed
- Large, heavy-bottomed pot
- Sieve or food mill
- Sterilized airtight bottles or jars
- Wooden spoon
- Ladle
Instructions
-
Begin by preparing your plums. Wash them thoroughly and remove any stems or leaves. You don’t need to pit them at this stage, as the boiling process will help loosen the stones for later removal.
-
In a large, heavy-bottomed pot, combine the plums, sugar, ground cloves, ground ginger, salt, cayenne pepper, vinegar, and garlic. The cayenne pepper is crucial for that signature plum sauce kick, but adjust the amount to your preference. A pinch more won’t hurt if you like a bit more heat!
-
Bring the mixture to a boil over medium-high heat, stirring occasionally to prevent the sugar from sticking to the bottom of the pot. Once boiling, reduce the heat to low and simmer gently for 2 hours, stirring frequently. This long simmering time is essential to allow the plums to break down completely and the flavors to meld together beautifully. The sauce will thicken as it cooks.
-
During the simmering process, you’ll notice stones floating to the top. Use a slotted spoon or skimmer to remove these stones as they appear. Discard the stones.
-
After 2 hours of simmering, the plum mixture should be very soft and pulpy. Now it’s time to achieve that smooth, silky texture characteristic of a great plum sauce. Carefully strain the mixture through a sieve or pass it through a food mill. This step removes any remaining skins or fibers, resulting in a perfectly smooth sauce.
-
Return the strained sauce to the pot. Bring it to a gentle simmer over low heat. This final simmer ensures the sauce is properly thickened and ready for bottling.
-
While the sauce simmers, sterilize your bottles or jars. There are several methods for sterilization: boiling them in water, baking them in the oven, or using a dishwasher with a sterilization cycle. Properly sterilized containers are crucial for ensuring the sauce’s longevity.
-
Ladle the hot plum sauce into the sterilized bottles or jars, leaving about 1/4 inch of headspace at the top.
-
Seal the bottles or jars according to the manufacturer’s instructions. If you’re using canning jars, process them in a boiling water bath for 10 minutes to ensure a proper seal. This step is critical for long-term storage.
-
Let the bottles or jars cool completely. As they cool, you should hear a “popping” sound, indicating that the lids have sealed properly.
Expert Tips & Tricks
- Plum Variety: While this recipe works well with most types of plums, Italian plums (also known as prune plums) are particularly well-suited due to their high pectin content, which helps thicken the sauce naturally.
- Spice Level: Adjust the amount of cayenne pepper to your liking. If you prefer a milder sauce, start with a pinch and add more to taste. You can also add a small piece of dried chili for extra complexity.
- Sweetness: The sweetness of plums can vary, so taste the sauce towards the end of cooking and add a bit more sugar if needed. Remember, the flavor will intensify as it cools.
- Thickness: If your sauce is too thin after the initial simmering, continue to simmer it for a longer period, stirring frequently, until it reaches your desired consistency.
- Garlic Preference: Some people prefer a stronger garlic flavor. You can either add more garlic cloves or roast the garlic before adding it to the sauce for a deeper, sweeter flavor.
Serving & Storage Suggestions
This homemade plum sauce is incredibly versatile. It can be served as a dipping sauce for spring rolls, egg rolls, or dumplings. It also makes a fantastic glaze for grilled meats, poultry, or seafood. Try brushing it on pork tenderloin or chicken wings during the last few minutes of grilling for a sweet and savory finish. It’s also a delicious addition to stir-fries and noodle dishes.
Once cooled and properly sealed, the plum sauce can be stored in a cool, dark place for up to a year. Once opened, refrigerate the sauce, and it should last for several weeks. If you notice any signs of spoilage, such as mold or an off odor, discard the sauce immediately.
Nutritional Information
Note: Nutritional information is an estimate and can vary based on specific ingredients and portion sizes.
| Nutrient | Amount per Serving | % Daily Value |
|---|---|---|
| Calories | ~250 kcal | ~13% |
| Total Fat | ~0.5g | ~1% |
| Saturated Fat | ~0.1g | ~0% |
| Cholesterol | 0mg | 0% |
| Sodium | ~150mg | ~7% |
| Total Carbohydrate | ~65g | ~22% |
| Dietary Fiber | ~2g | ~8% |
| Sugars | ~60g | – |
| Protein | ~1g | ~2% |
Variations & Substitutions
- Spicy Plum Sauce: Increase the amount of cayenne pepper or add a finely chopped chili pepper for a spicier sauce.
- Ginger Plum Sauce: Add a knob of fresh ginger, peeled and grated, to the sauce during the simmering process.
- Asian-Inspired Plum Sauce: Incorporate a tablespoon of soy sauce or tamari and a teaspoon of sesame oil for a more complex Asian flavor profile.
- Vinegar Variety: Experiment with different types of vinegar, such as rice vinegar or apple cider vinegar, for subtle variations in flavor.
- Fruit Combinations: Add other fruits like peaches, apricots, or nectarines to the plums for a unique and flavorful twist.
FAQs (Frequently Asked Questions)
Q: Do I need to peel the plums before making the sauce?
A: No, you don’t need to peel the plums. The long simmering time softens the skins, and the straining process removes any remaining pieces.
Q: Can I use frozen plums?
A: Yes, you can use frozen plums. Just make sure to thaw them slightly before adding them to the pot. Be aware that frozen plums may release more liquid, so you might need to simmer the sauce for a longer time to achieve the desired thickness.
Q: How do I know if the jars are properly sealed?
A: After processing the jars in a boiling water bath, you should hear a “popping” sound as they cool, which indicates that the lids have sealed properly. You can also check the seal by pressing down on the center of the lid. If it doesn’t flex, it’s sealed.
Q: Can I reduce the amount of sugar?
A: You can reduce the amount of sugar slightly, but keep in mind that sugar acts as a preservative, so reducing it too much may affect the sauce’s shelf life. Taste the sauce during cooking and adjust the sweetness to your liking.
Q: What if I don’t have a sieve or food mill?
A: If you don’t have a sieve or food mill, you can use a blender or food processor to puree the plum mixture. Just be sure to do it in batches and let the mixture cool slightly before blending to avoid splattering.
Final Thoughts
Making your own plum sauce is a rewarding experience. Not only will you have a delicious and versatile condiment on hand, but you’ll also have the satisfaction of knowing exactly what went into it. This recipe is a wonderful way to preserve the flavors of summer and enjoy them throughout the year. So, gather your plums, fire up your stove, and get ready to create a taste sensation that will impress your family and friends. Don’t be afraid to experiment with variations and personalize the recipe to suit your own taste preferences. Share your creations and feedback – happy cooking!