
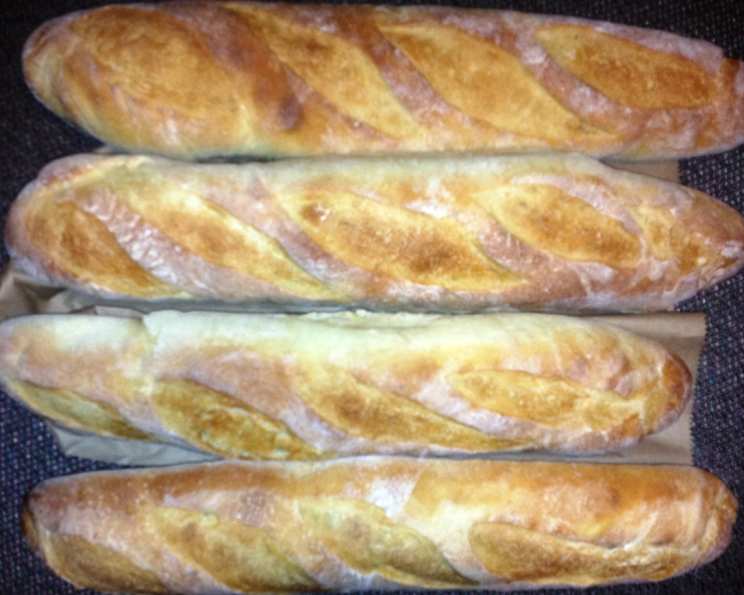
The Perfect Po’ Boy Bread: A Culinary Journey to New Orleans
The aroma of freshly baked bread always takes me back to my first trip to New Orleans. I remember wandering through the French Quarter, the air thick with the scent of spices and baking bread. It was there, nestled amongst wrought-iron balconies and vibrant jazz music, that I tasted my first truly authentic Po’ Boy. The star of that sandwich wasn’t just the perfectly fried shrimp or the creamy remoulade, but the bread itself – crusty on the outside, soft and airy within, a vessel that held the flavors of the city. Since then, I’ve been on a quest to recreate that perfect Po’ Boy bread, a journey that has led me to this recipe.
Recipe Overview
- Prep Time: 30 minutes (plus 8-9 hours for poolish)
- Cook Time: 18 minutes
- Total Time: 9 hours 48 minutes (including proofing and poolish)
- Yields: 4 16-inch baguettes
- Serves: 8
- Dietary Type: Vegetarian
Ingredients
Poolish
- 150 g all-purpose flour (1 1/4 cup)
- 150 g water (2/3 cup at room temperature)
- ⅛ teaspoon instant yeast
Dough
- 673 g all-purpose flour (5 1/4 cup)
- 340 g water (1 1/2 cup at room temperature)
- 36 g sugar (2 tablespoons)
- 7 g instant yeast (2 teaspoons rounded)
- 28 g shortening (2 tablespoons) or 28 g butter (2 tablespoons)
- 16 g table salt (scant tablespoon)
Equipment Needed
- Mixing bowl
- Dough hook (for stand mixer, optional)
- Lightly floured counter
- Straight-sided clear container
- Sprayed plastic film
- Baking sheet
- Floured cloth
- Steam pan (skillet or other oven-safe pan)
- Cooling rack
Instructions
-
Prepare the Poolish: In a mixing bowl, thoroughly mix the flour, water, and yeast for the poolish. Cover the bowl and let it sit at room temperature for 8 to 9 hours or until it becomes bubbly, has doubled in volume, and smells sweet. The poolish can be used immediately or refrigerated for up to 3 days. This slow fermentation process is crucial for developing the complex flavor of the bread.
-
Combine Ingredients: Add the poolish, along with all the remaining dough ingredients except the salt, to the bowl of a stand mixer fitted with a dough hook (or a large mixing bowl if kneading by hand). Knead until all the dry ingredients are moistened and incorporated.
-
Autolyse: Cover the bowl and let it rest for 20 minutes. This process, called autolyse, allows the flour to fully hydrate, resulting in a more extensible dough.
-
Add Salt: Add the salt to the dough and continue to knead for 8 to 10 minutes until the dough becomes smooth and elastic. If kneading by hand, this will require a bit more elbow grease, but the results are worth it!
-
First Rise (Bulk Fermentation): Tip the dough out onto a lightly floured counter. Stretch the dough into a rectangle. Fold the dough letter-style: top downward, bottom upward, and sides inward until a packet is formed. Place the folded dough into a straight-sided clear container that has been sprayed with oil. This helps monitor the rise. Cover the container and let the dough rest at room temperature until it has doubled in volume, approximately 1 1/2 hours.
-
Divide and Shape: Divide the dough into 4 equal pieces. Roll each piece into baguettes that are approximately 16 inches long. Aim for a uniform thickness along the entire length of each baguette.
-
Second Rise (Proofing): Place the shaped baguettes on a floured cloth, using the folds of the cloth to support each baguette and maintain its shape. Cover the baguettes with sprayed plastic film to prevent them from drying out. Let them rise for 45 minutes to 1 hour while the oven preheats to 400°F (200°C). Place a steam pan (a skillet works well) on the bottom rack of the oven.
-
Bake: Just before baking, score the top of each baguette with a sharp knife or lame. This controls how the bread expands in the oven and creates those characteristic slashes. Immediately after scoring, carefully add water to the steam pan. This creates a steamy environment in the oven, which helps the crust develop a beautiful sheen and crispness. Bake the baguettes in the steamy oven for 10 minutes.
-
Finish Baking: Remove the steam pan from the oven, rotate the loaves, and continue to bake for another 8 minutes, or until the internal temperature reaches 205°F (96°C).
-
Cool: Remove the baguettes from the oven and transfer them to a cooling rack. Allow them to cool for at least 20 minutes before slicing. This allows the crumb to set properly.
Expert Tips & Tricks
- The Poolish is Key: Don’t rush the poolish. The longer it ferments (within reason), the more flavor it will develop. Look for those telltale signs: bubbles, doubled volume, and a slightly sweet, almost beer-like aroma.
- Steam is Your Friend: Creating steam in the oven is crucial for achieving a crisp, golden-brown crust. If you don’t have a steam oven, the steam pan method works wonders. Alternatively, you can spray the oven with water several times during the first few minutes of baking.
- Scoring Like a Pro: Use a very sharp knife or a lame (a special bread-scoring tool) for clean, precise scores. Hold the blade at a 45-degree angle to the loaf.
- Don’t Over-knead: Over-kneading can result in a tough loaf. Aim for a smooth, elastic dough that springs back when poked.
- Listen to Your Dough: Baking times may vary depending on your oven. Get to know your oven and adjust the baking time accordingly. The best indicator of doneness is the internal temperature.
Serving & Storage Suggestions
This Po’ Boy bread is best served fresh, ideally within a few hours of baking. It’s perfect for, of course, Po’ Boys filled with fried shrimp, oysters, or roast beef. But it’s also fantastic with just butter and jam, or as a crusty accompaniment to soups and stews.
- Storage: Store leftover bread in a paper bag at room temperature for up to 2 days. For longer storage, wrap the bread tightly in plastic wrap and freeze for up to 2 months.
- Reheating: To refresh day-old bread, lightly dampen the crust with water and bake in a preheated 350°F (175°C) oven for 5-10 minutes, or until warmed through. Frozen bread can be thawed at room temperature or in the oven.
Nutritional Information
| Nutrient | Amount per Serving | % Daily Value |
|---|---|---|
| Calories | 425.9 kcal | N/A |
| Calories from Fat | N/A | N/A |
| Total Fat | 4.6 g | 7% |
| Saturated Fat | 1 g | 5% |
| Cholesterol | 0 mg | 0% |
| Sodium | 779.6 mg | 32% |
| Total Carbohydrate | 83.4 g | 27% |
| Dietary Fiber | 3 g | 12% |
| Sugars | 4.8 g | N/A |
| Protein | 11 g | 22% |
Variations & Substitutions
- Whole Wheat: Substitute up to 50% of the all-purpose flour with whole wheat flour for a nuttier flavor and added fiber.
- Sourdough: For a tangier flavor, try adding a tablespoon or two of active sourdough starter to the dough, reducing the amount of instant yeast accordingly.
- Garlic Herb: Add minced garlic and dried herbs (such as thyme, rosemary, or oregano) to the dough for an aromatic twist.
- Vegan: Ensure you use shortening or a vegan butter alternative in place of dairy butter.
FAQs (Frequently Asked Questions)
Q: Why is the poolish important?
A: The poolish is a pre-ferment that adds depth of flavor and improves the texture of the bread. It contributes to a lighter, more airy crumb and a more complex taste.
Q: Can I use active dry yeast instead of instant yeast?
A: Yes, but you’ll need to proof the active dry yeast in warm water before adding it to the dough. Use the water called for in the recipe, heated to around 105-115°F (40-46°C), and let the yeast sit for 5-10 minutes until foamy.
Q: How do I know when the dough has risen enough?
A: The dough should have doubled in volume and feel light and airy. A good test is to gently poke the dough; if the indentation slowly springs back, it’s ready.
Q: My crust isn’t as crispy as I’d like. What can I do?
A: Make sure you’re creating enough steam in the oven. Also, you can try brushing the loaves with an egg wash (if not vegan) or milk before baking for a glossier, more deeply colored crust.
Q: Can I make the dough ahead of time and bake it later?
A: Yes, you can refrigerate the dough after the first rise (bulk fermentation) for up to 24 hours. When ready to bake, remove the dough from the refrigerator, let it warm up slightly, then proceed with dividing, shaping, and proofing.
Final Thoughts
Making your own Po’ Boy bread might seem daunting at first, but trust me, the effort is well worth it. The satisfaction of pulling a perfectly baked baguette from your oven, its crust crackling and its aroma filling your kitchen, is simply unparalleled. So, roll up your sleeves, gather your ingredients, and embark on this culinary adventure. Share your creations with friends and family, and don’t be afraid to experiment and make it your own. I can’t wait to hear about your Po’ Boy bread triumphs!