
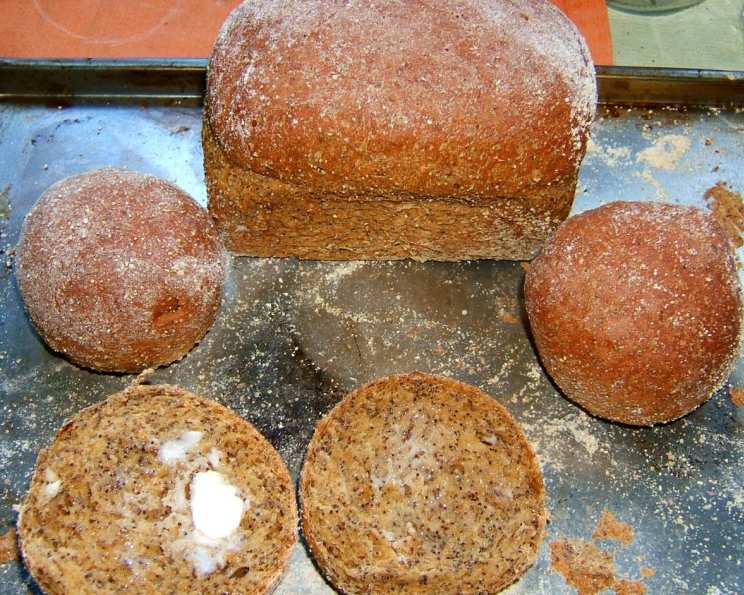
Exquisite Poppy Seed Buns: A Culinary Adventure
The scent of baking bread has always been my comfort. I remember my grandmother’s kitchen, perpetually warm and filled with the yeasty aroma of her homemade loaves. While her specialty was a simple sourdough, I experimented with adding poppy seeds one day, inspired by a trip to Eastern Europe. The result was a delightfully nutty, subtly crunchy bun that brought smiles to everyone at the table – a memory I cherish with every bite.
Recipe Overview
- Prep Time: 3 hours 10 minutes
- Cook Time: 45 minutes
- Total Time: 3 hours 55 minutes
- Servings: 8-12
- Yield: 8-12 buns
- Dietary Type: Vegetarian
Ingredients
- 1 1/4 cups water
- 1/4 cup honey
- 1 tablespoon milk (or 1 tablespoon evaporated milk)
- 1 1/2 teaspoons salt
- 3 cups bread flour
- 3 tablespoons flax seed meal
- 1/2 cup poppy seeds
- 2 teaspoons yeast
- 1 tablespoon caraway seeds
- Cooking spray
Equipment Needed
- Bread machine
- Baking sheet
- Wire rack
Instructions
-
Begin by adding the water, honey, milk (or evaporated milk), salt, bread flour, flax seed meal, poppy seeds, and yeast to your bread machine. It is crucial to add ingredients in the order recommended by your bread machine manufacturer for optimal mixing and yeast activation.
-
Set the bread machine to the dough cycle. This cycle typically involves mixing, kneading, and a period of rising, creating the perfect environment for the dough to develop.
-
Listen for the beep! Most bread machines have an audible signal to indicate when it’s time to add additional ingredients. At this point, carefully add the caraway seeds to the dough. These seeds will impart a distinct, aromatic flavor that complements the poppy seeds beautifully.
-
Once the dough cycle is complete, carefully remove the dough from the bread machine. Gently turn the dough out onto a lightly floured surface.
-
Now, the fun begins! Divide the dough into 8 to 12 equal pieces, depending on your desired bun size. For smaller, more delicate buns, aim for 12 pieces; for larger, heartier buns, 8 pieces will suffice.
-
Shape each piece into a smooth, round bun. A light touch is key here; avoid overworking the dough.
-
Lightly coat a baking sheet with cooking spray. This will prevent the buns from sticking during baking and ensure easy removal.
-
Arrange the shaped buns on the prepared baking sheet, leaving some space between each to allow for expansion during the second rise.
-
Lightly spray the tops of the buns with cooking spray. This will help to keep the surface moist and prevent a dry crust from forming during proofing.
-
Cover the buns loosely with plastic wrap or a clean kitchen towel. Allow them to rise in a warm place for at least 30 minutes, or until they have nearly doubled in size. This second rise is essential for creating light and airy buns.
-
Preheat your oven to 325°F (160°C). This lower temperature ensures even baking and prevents the poppy seeds from burning.
-
Bake the buns for 45 minutes, or until they are golden brown and sound hollow when tapped on the bottom. Keep a close eye on them during the last 15 minutes of baking to prevent over-browning. If the tops are browning too quickly, loosely tent them with foil.
-
Once baked, carefully remove the buns from the oven and transfer them to a wire rack to cool completely. This allows air to circulate, preventing the bottoms from becoming soggy.
-
Resist the temptation to dig in immediately! Allowing the buns to cool slightly will enhance their flavor and texture.
-
Finally, it’s time to enjoy! These poppy seed buns are delicious on their own, spread with butter, or served alongside your favorite soups and stews.
Expert Tips & Tricks
- For an extra glossy finish, brush the tops of the buns with a simple egg wash (1 egg beaten with 1 tablespoon of water) before baking.
- If you don’t have a bread machine, you can make the dough by hand or with a stand mixer. Just be sure to knead the dough for at least 8-10 minutes to develop the gluten.
- The amount of poppy seeds can be adjusted to your preference. If you prefer a less pronounced poppy seed flavor, reduce the amount to 1/4 cup.
- To ensure even baking, rotate the baking sheet halfway through the baking time.
- If your kitchen is cool, create a warm environment for proofing the dough by placing the baking sheet in a slightly warm oven (turned off) or near a warm stovetop.
- Don’t over-bake the buns, or they will become dry. Test for doneness by tapping on the bottom; a hollow sound indicates they are ready.
Serving & Storage Suggestions
These poppy seed buns are fantastic served warm with a pat of butter or a drizzle of honey. They also pair beautifully with savory dishes like creamy soups, hearty stews, or even as a side to a roast chicken.
To store, allow the buns to cool completely before placing them in an airtight container or zip-top bag. At room temperature, they will stay fresh for 2-3 days. For longer storage, freeze the buns for up to 2 months. To reheat frozen buns, thaw them at room temperature and then warm them in a low oven (300°F/150°C) for 5-10 minutes.
Nutritional Information
| Nutrient | Amount per Serving | % Daily Value |
|---|---|---|
| Calories | 270.7 kcal | N/A |
| Calories from Fat | 51 g | 19% |
| Total Fat | 5.7 g | 8% |
| Saturated Fat | 0.7 g | 3% |
| Cholesterol | 0.3 mg | 0% |
| Sodium | 442.3 mg | 18% |
| Total Carbohydrate | 48.2 g | 16% |
| Dietary Fiber | 3.4 g | 13% |
| Sugars | 10.1 g | 40% |
| Protein | 7.5 g | 15% |
Note: Nutritional information is an estimate and may vary based on specific ingredients and portion sizes.
Variations & Substitutions
- Gluten-Free: Substitute the bread flour with a gluten-free bread flour blend. You may need to add a binder like xanthan gum to improve the texture.
- Vegan: Ensure that the honey you use is plant-based or substitute it with maple syrup or agave nectar.
- Sesame-Poppy Blend: Incorporate sesame seeds alongside the poppy seeds for a more complex flavor profile. Use 1/4 cup of each.
- Spice It Up: Add a pinch of ground cardamom or anise to the dough for a warm, aromatic twist.
- Sweet Buns: Increase the amount of honey for a sweeter treat. You could also add a simple glaze after baking.
FAQs (Frequently Asked Questions)
Q: Can I use active dry yeast instead of instant yeast?
A: Yes, you can. However, you’ll need to proof the active dry yeast in warm water with a teaspoon of sugar for about 5-10 minutes before adding it to the other ingredients.
Q: Why are my buns dense and not fluffy?
A: This could be due to several factors, including using old yeast, not kneading the dough enough (if making it by hand), or not allowing the dough to rise sufficiently. Make sure your yeast is fresh, knead thoroughly, and give the dough ample time to rise in a warm place.
Q: Can I make these buns ahead of time?
A: Yes, you can prepare the dough the day before and store it in the refrigerator overnight. Allow it to come to room temperature before shaping and baking.
Q: What if I don’t have caraway seeds?
A: While caraway seeds add a distinctive flavor, you can omit them if you don’t have any on hand. The buns will still be delicious with just the poppy seeds.
Q: How do I prevent the poppy seeds from falling off the buns after baking?
A: Press the buns gently on baking sheet after shaping to embed the poppy seeds into the dough. You can also lightly brush the tops of the buns with milk or egg wash before sprinkling on the poppy seeds.
Final Thoughts
These poppy seed buns are more than just bread; they’re a little piece of comfort, a taste of tradition, and a celebration of simple pleasures. I encourage you to try this recipe and experience the joy of baking something truly special. Don’t hesitate to experiment with variations and make it your own. Share your creations and feedback, and let’s keep the tradition of homemade baking alive! These buns would be particularly delightful paired with a warm cup of herbal tea or a glass of cold milk.