
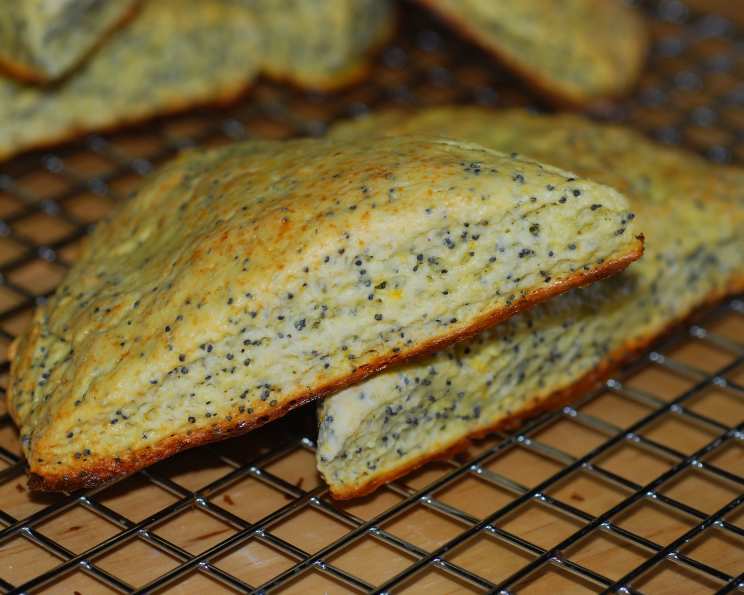
Poppy Seed Scones: A Bite of Nostalgia
The aroma of freshly baked scones has a unique power to transport me back to my grandmother’s kitchen. Every Sunday, without fail, she would whip up a batch, the star of the show being her signature poppy seed scones. The subtle nuttiness of the poppy seeds mingling with the warm, buttery crumb was a symphony of flavor that always felt like a hug. These weren’t just scones; they were edible memories, and every time I bake them, I feel a little closer to her.
Recipe Overview
- Prep Time: 15 minutes
- Cook Time: 15-20 minutes
- Total Time: 30-35 minutes
- Servings: Varies (approx. 11)
- Yield: Approximately 11 scones
- Dietary Type: Not specified
Ingredients
- 250 g flour
- 6 teaspoons baking powder
- 60 g soft butter
- 50 g poppy seeds
- 30 g sugar
- 1 pinch salt
- 1 egg
- 100 ml milk
For the Glaze:
- 1 egg yolk (beaten)
- 2 tablespoons milk
Equipment Needed
- Mixing bowl
- Mixer with dough hooks (optional)
- Lightly floured surface
- Rolling pin
- 7.5 cm diameter cookie cutter or glass
- Baking sheet
- Parchment paper (or baking liner)
- Pastry brush
Instructions
- Preheat your oven to 200°C (392°F). Line a baking sheet with parchment paper or a silicone baking liner.
- In a large mixing bowl, combine the flour, baking powder, soft butter, poppy seeds, sugar, egg, milk, and salt.
- Using the dough hooks of your mixer, begin to combine the ingredients. If you don’t have a mixer, you can use your hands.
- Continue mixing until the dough comes together and is relatively smooth. Be careful not to overmix the dough, as this can lead to tough scones. A few streaks of butter are acceptable.
- Turn the dough out onto a lightly floured surface.
- Using a rolling pin, gently roll out the dough to approximately 1 cm (about 1/2 inch) thickness.
- Using a 7.5 cm (approximately 3 inch) diameter cookie cutter or a glass of similar size, cut out the scones. Try to minimize scraps when cutting to avoid re-rolling the dough too much, which toughens them.
- Place the cut-out scones onto the prepared baking sheet, leaving a small space between each scone.
- In a small bowl, whisk together the egg yolk and 2 tablespoons of milk to create the glaze.
- Using a pastry brush, gently brush the tops of the scones with the egg-milk mixture. This will give them a beautiful golden-brown color.
- Bake in the preheated oven for approximately 15-20 minutes, or until the scones are golden brown and have risen. Check for doneness by inserting a toothpick into the center; it should come out clean.
- Once baked, remove the scones from the oven and transfer them to a cooling rack to cool slightly before serving.
Expert Tips & Tricks
- Cold Butter is Key: While the recipe calls for “soft butter,” it shouldn’t be melted. Using cold butter, cut into small cubes, helps create pockets of air that result in a flakier scone. Try grating the butter if it’s very cold.
- Don’t Overmix: Overmixing develops gluten, which leads to tough scones. Mix until just combined.
- Cold Ingredients: Using cold milk and a cold egg also helps to keep the butter cold and prevents the gluten from developing too much.
- Egg Wash Alternatives: If you don’t have an egg, you can use milk or cream for the glaze. A sprinkle of coarse sugar on top before baking also adds a nice touch.
- Make-Ahead Tip: You can prepare the dough up to the point of cutting out the scones. Wrap the dough tightly in plastic wrap and refrigerate for up to 24 hours. When ready to bake, cut out the scones and bake as directed, adding a few minutes to the baking time if needed.
- Freezing Dough: Freeze the cut-out, unbaked scones on a baking sheet until solid. Then, transfer them to a freezer bag. Bake from frozen, adding 5-10 minutes to the baking time.
- Preventing Dryness: To prevent scones from drying out in the oven, place a pan of hot water on the bottom rack. The steam will help keep the scones moist.
Serving & Storage Suggestions
These poppy seed scones are best served warm, ideally within a few hours of baking. They are delicious on their own, but even better with a dollop of clotted cream, a spoonful of your favorite jam, or a smear of lemon curd.
Storage:
- Room Temperature: Store cooled scones in an airtight container at room temperature for up to 2 days.
- Refrigerator: For longer storage, store them in an airtight container in the refrigerator for up to 5 days. Reheat gently in a low oven or microwave before serving.
- Freezer: Scones can be frozen for up to 2 months. Wrap them individually in plastic wrap and then place them in a freezer bag. Thaw at room temperature or in the refrigerator before reheating.
Nutritional Information
(Please note that these are approximate values and can vary based on specific ingredients and portion sizes.)
| Nutrient | Amount per Serving | % Daily Value |
|---|---|---|
| Calories | ~175 kcal | ~9% |
| Total Fat | ~8 g | ~12% |
| Saturated Fat | ~4 g | ~20% |
| Cholesterol | ~45 mg | ~15% |
| Sodium | ~265 mg | ~11% |
| Total Carbohydrate | ~23 g | ~8% |
| Dietary Fiber | ~2 g | ~7% |
| Sugars | ~3 g | N/A |
| Protein | ~4 g | ~8% |
Variations & Substitutions
- Lemon Poppy Seed Scones: Add the zest of one lemon to the dough for a bright, citrusy flavor.
- Orange Poppy Seed Scones: Substitute orange zest for lemon zest, or use orange juice instead of milk for a subtle orange flavor.
- Gluten-Free: Use a gluten-free flour blend specifically designed for baking. You may need to add a binder like xanthan gum.
- Dairy-Free: Substitute the butter with a dairy-free butter alternative, and use almond milk, soy milk, or oat milk in place of regular milk.
- Vegan: To make these scones vegan, replace the butter with a vegan butter alternative, the egg with an apple sauce or flax egg substitute (1 tablespoon ground flaxseed mixed with 3 tablespoons water, let sit for 5 minutes to thicken), and use a plant-based milk. For the glaze, use plant-based milk or maple syrup.
- Spice it Up: Add a pinch of cinnamon, nutmeg, or cardamom to the dough for a warm, comforting flavor.
FAQs (Frequently Asked Questions)
Q: Can I use margarine instead of butter?
A: While margarine can be used, butter provides a richer flavor and a more tender crumb.
Q: My scones are dry. What did I do wrong?
A: Overbaking or using too much flour can cause dry scones. Be sure to measure the flour accurately and bake until just golden brown.
Q: Can I make these scones ahead of time?
A: Yes, you can prepare the dough ahead of time and refrigerate it for up to 24 hours. You can also freeze the unbaked scones.
Q: Why are my scones flat and not rising?
A: Expired baking powder, overmixing the dough, or not using cold ingredients can prevent scones from rising properly.
Q: How do I get the scones to have a golden-brown top?
A: Brushing the tops of the scones with an egg-milk mixture before baking will give them a beautiful golden-brown color.
Final Thoughts
Now it’s your turn! I urge you to try this delightful poppy seed scone recipe. Embrace the process, don’t be afraid to experiment with variations, and most importantly, enjoy the aroma and the delicious reward. Whether you savor them with a cup of tea on a quiet afternoon or share them with loved ones for a special breakfast, these scones are sure to become a cherished part of your own culinary traditions. Let me know how they turn out – I love hearing about your baking adventures!