
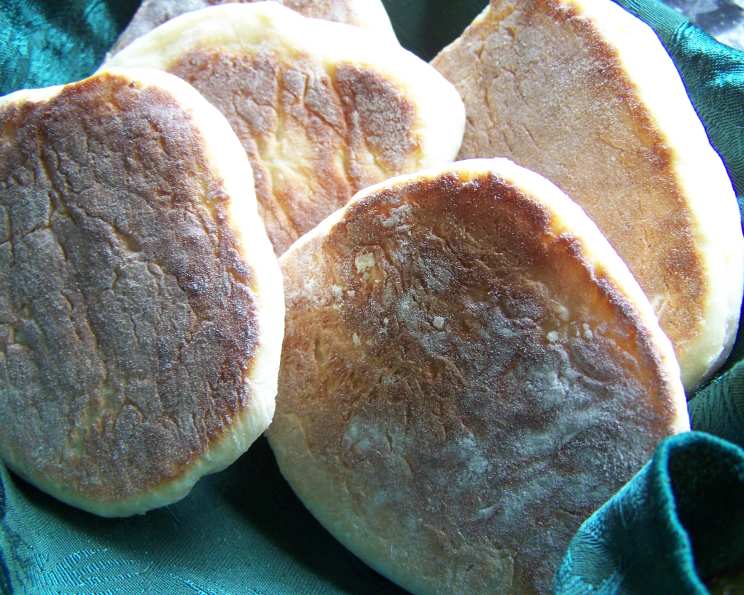
Bolo Levedo: A Taste of the Azores in Every Bite
The first time I tasted Bolo Levedo, I was wandering through a bustling market in Ponta Delgada, São Miguel Island. The aroma of sweet, slightly tangy bread, mingled with the salty sea air, was irresistible. I bought one still warm from the pan, its slightly chewy texture and subtly sweet flavor an unexpected delight. Sitting on a bench overlooking the harbor, I devoured it, the vibrant flavors of the Azores transporting me. It wasn’t just a bread; it was a taste of the island’s heart and soul. Since then, I’ve been on a quest to recreate that taste of the Azores. This recipe is my humble attempt to bring that magic to your kitchen.
Recipe Overview
- Prep Time: 30 minutes
- Cook Time: 20-30 minutes
- Total Time: 2 hours 30 minutes (including rising time)
- Servings: 15-20
- Yield: 15-20 Bolo Levedos
- Dietary Type: Not specified (Contains gluten, dairy, and eggs)
Ingredients
- 7 g dry active yeast
- 4 tablespoons warm water
- 200 g caster sugar
- 3 eggs
- 1/2 teaspoon salt
- 750 g plain flour
- 275 ml skim milk
- 50 g cooled melted butter
Equipment Needed
- Large mixing bowl
- Small mixing bowl
- Measuring spoons and cups
- Clean kitchen towel
- Floured surface
- Heavy, ungreased frying pan or griddle
- Spatula
Instructions
-
In a small bowl, dissolve the dry active yeast in the warm water along with a pinch of the caster sugar. This feeds the yeast and helps it activate. Set aside for about 10 minutes, or until the mixture becomes foamy. This indicates that the yeast is alive and ready to leaven the dough.
-
Transfer the foamy yeast mixture to a large bowl. Stir in the remaining caster sugar, eggs, salt, plain flour, and skim milk. Mix everything together until a dough starts to form. Don’t worry if it seems a bit sticky at this stage.
-
Add the cooled melted butter to the dough. This adds richness and contributes to the soft texture of the Bolo Levedo.
-
Turn the dough out onto a lightly floured surface. Knead the dough for about 10 minutes, or until it becomes smooth and elastic. Kneading develops the gluten in the flour, which gives the bread its structure and chewiness.
-
Place the kneaded dough back into the large bowl. Cover the bowl with a clean kitchen towel. Set aside in a warm place to rise for about 45 minutes, or until the dough has doubled in bulk. This is where the yeast does its work, creating air pockets that make the bread light and airy.
-
Once the dough has doubled, divide it into approximately 15 to 20 pieces.
-
Shape each piece of dough into flat, round cakes about 1 cm (1/2 inch) thick. Aim for a uniform shape and thickness for even cooking.
-
Dust a clean kitchen towel generously with flour. This prevents the cakes from sticking during their second rise. Arrange the shaped cakes on the floured towel, leaving enough space between them to allow for rising.
-
Cover the cakes with another clean kitchen towel and let them sit for about 1 1/2 hours. This second proofing allows the cakes to relax and develop even more flavor and lightness.
-
Place the cakes in a heavy, ungreased frying pan or griddle. Cook over low heat. It’s crucial to use low heat to ensure the cakes cook through evenly without burning on the outside.
-
Fry the cakes on each side until they are golden brown. This will take several minutes per side. Watch them carefully to prevent burning, adjusting the heat as needed. Flip them gently with a spatula.
Expert Tips & Tricks
- Yeast Activation: Ensure your water isn’t too hot or too cold when activating the yeast. Hot water will kill the yeast, while cold water won’t activate it properly. Aim for lukewarm water, around 105-115°F (40-46°C).
- Kneading Technique: If you find the dough too sticky to knead by hand, try using a stand mixer with a dough hook attachment.
- Even Cooking: To ensure even cooking, use a heavy-bottomed frying pan or griddle that distributes heat evenly.
- Temperature Control: Keep a close eye on the heat while frying the Bolo Levedos. If they’re browning too quickly, reduce the heat further.
- Make Ahead: You can prepare the dough ahead of time and refrigerate it after the first rise. This will slow down the rising process and allow the flavors to develop further. When ready to bake, let the dough come to room temperature before shaping and proofing.
Serving & Storage Suggestions
Bolo Levedo is best served warm, either on its own or with a pat of butter. It’s also delicious filled with cheese, ham, or jam. In the Azores, it’s often served alongside a hearty stew or soup.
Storage: Store leftover Bolo Levedo in an airtight container at room temperature for up to 2 days. For longer storage, you can freeze them for up to 2 months. To reheat, thaw completely and warm in a skillet or oven until heated through.
Nutritional Information
(Estimated, per Bolo Levedo)
| Nutrient | Amount per Serving | % Daily Value |
|---|---|---|
| Calories | 150 kcal | 8% |
| Total Fat | 3g | 4% |
| Saturated Fat | 2g | 10% |
| Cholesterol | 20mg | 7% |
| Sodium | 60mg | 3% |
| Total Carbohydrate | 25g | 8% |
| Dietary Fiber | 1g | 4% |
| Sugars | 7g | – |
| Protein | 3g | 6% |
Variations & Substitutions
- Sweetness Adjustment: Adjust the amount of caster sugar to your liking. For a less sweet version, reduce the sugar by 25-50 grams.
- Milk Alternatives: You can substitute the skim milk with almond milk, soy milk, or oat milk for a dairy-free option. The flavor profile will change slightly, but the bread will still be delicious.
- Flour Alternatives: While plain flour (all-purpose flour) is recommended for its gluten content, you could experiment with a blend of all-purpose and whole wheat flour for a nuttier flavor and added fiber.
- Spice Infusion: Add a pinch of ground cinnamon or nutmeg to the dough for a warm, aromatic twist.
- Savory Version: Reduce the amount of sugar significantly and add some chopped herbs like rosemary or thyme for a savory Bolo Levedo.
FAQs (Frequently Asked Questions)
Q: Why is my dough not rising?
A: There could be several reasons. Ensure your yeast is fresh and active. Also, make sure the water you use to activate the yeast isn’t too hot, as this can kill the yeast. A warm environment is also essential for rising.
Q: Can I use bread flour instead of plain flour?
A: Yes, you can use bread flour. It will result in a slightly chewier Bolo Levedo.
Q: How do I know when the Bolo Levedos are cooked through?
A: The Bolo Levedos are cooked through when they are golden brown on both sides and spring back slightly when pressed gently.
Q: Can I freeze the Bolo Levedo dough after the first rise?
A: Yes, you can freeze the dough. After the first rise, punch down the dough, wrap it tightly in plastic wrap, and freeze it for up to 2 months. Thaw it in the refrigerator overnight before shaping and proofing.
Q: My Bolo Levedos are burning on the outside but still raw inside. What am I doing wrong?
A: Reduce the heat to low and cook them for a longer period. A lower temperature allows the inside to cook through without burning the outside.
Final Thoughts
I hope this recipe allows you to experience the simple joy of Bolo Levedo, bringing a little piece of the Azores to your table. Don’t be afraid to experiment with flavors and fillings to create your own unique version. Embrace the process, enjoy the aroma of baking bread, and share your creations with friends and family. Maybe serve it with a glass of Vinho Verde or a comforting bowl of Caldo Verde. Most importantly, savor every bite!