
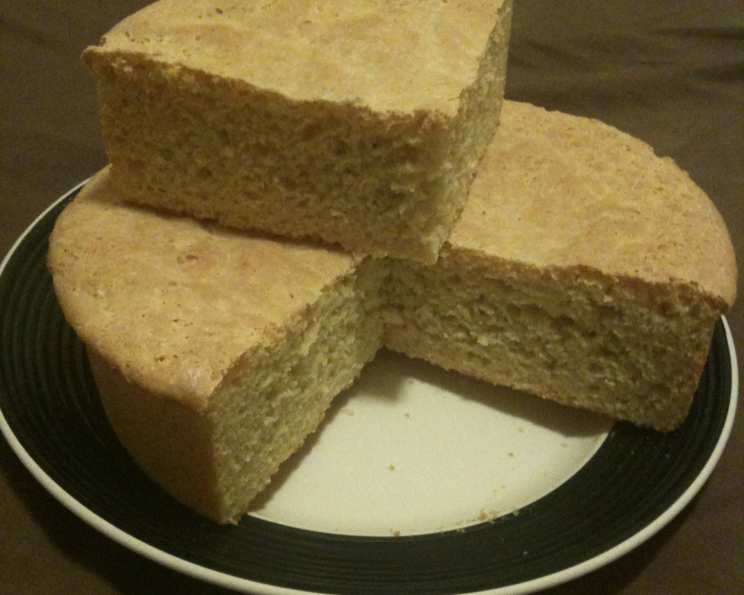
Broa: A Taste of Portugal in Every Slice
My grandmother, a first-generation Portuguese-American, always had a loaf of broa on her table. It wasn’t the soft, sweet cornbread I knew from my American friends’ houses. This was something different, something earthy and substantial. I remember the dense, slightly crumbly texture and the subtle sweetness playing against the hearty corn flavor. It was the perfect accompaniment to her robust kale soup, a taste of home that always made me feel connected to my heritage. The aroma alone could transport me back to her cozy kitchen, filled with warmth, laughter, and the comforting scent of freshly baked bread.
Recipe Overview
- Prep Time: 2 hours 15 minutes
- Cook Time: 40 minutes
- Total Time: 2 hours 55 minutes
- Yields: 1 loaf
- Serves: 6
- Dietary Type: Vegetarian
Ingredients
- 1 (1/4 ounce) package active dry yeast
- 1 teaspoon sugar
- 1 1/4 cups water, warm
- 3/4 cup milk, warm
- 1 teaspoon salt
- 1 tablespoon olive oil
- 2 cups yellow cornmeal
- 3 cups all-purpose flour
Equipment Needed
- Small bowl
- Large bowl
- Measuring cups and spoons
- Greased bowl
- 9-inch round pie pan
- Cooling rack
Instructions
-
Begin by activating the yeast. In a small bowl, combine the package of active dry yeast with 1 teaspoon of sugar and 1/4 cup of the warm water. Set this mixture aside to proof for about 5-10 minutes, until it becomes foamy. This indicates that the yeast is alive and ready to use.
-
In a large bowl, prepare the base for the broa. Stir together the remaining 1 cup of warm water, 3/4 cup of warm milk, 1 teaspoon of salt, 1 tablespoon of olive oil, and 2 cups of yellow cornmeal. Mix until well combined. The mixture will be somewhat thick and grainy at this stage.
-
Add the proofed yeast mixture to the cornmeal mixture in the large bowl. Stir until everything is thoroughly combined.
-
Gradually incorporate the all-purpose flour. Slowly add the 3 cups of flour, a little at a time, to the wet ingredients. Mix continuously. The goal is to create a soft dough that is manageable and not overly sticky. You may need to adjust the amount of flour slightly depending on the humidity and the exact type of flour you are using. Add more flour, one tablespoon at a time, if the dough is too sticky, or a touch more water if it becomes too dry.
-
Turn the dough out onto a lightly floured surface. Knead the dough for about 5 minutes, working it until it becomes smooth and elastic. This step is crucial for developing the gluten in the flour, which will give the broa its structure.
-
Place the kneaded dough in a greased bowl. Turn the dough to coat it lightly with the grease, which will prevent it from drying out. Cover the bowl with plastic wrap or a clean kitchen towel.
-
Allow the dough to rise in a warm place for about 1 hour, or until it has doubled in bulk. This is the first proofing stage, and it’s essential for creating a light and airy texture. A warm environment helps the yeast to thrive and produce carbon dioxide, which causes the dough to rise.
-
Once the dough has doubled, punch it down gently to release the accumulated gases. Turn the dough out onto a lightly floured surface and knead it again for about 5 minutes. This second kneading helps to redistribute the yeast and further develop the gluten.
-
Grease a 9-inch round pie pan. This will prevent the broa from sticking to the pan during baking.
-
Form the dough into a round loaf that will fit comfortably inside the greased pie pan. Place the loaf in the pan, cover it loosely with plastic wrap or a clean kitchen towel, and allow it to rise again in a warm place for another hour, or until it has doubled in bulk. This is the second proofing stage, and it will result in a lighter, more tender broa.
-
Preheat the oven to 350°F (175°C). Make sure the oven is fully preheated before placing the broa inside.
-
Bake the broa in the preheated oven for 40 minutes, or until it sounds hollow when tapped on the bottom. The top should also be golden brown. If the top starts to brown too quickly, you can tent it loosely with foil to prevent it from burning.
-
Once baked, remove the broa from the oven and transfer it to a cooling rack. Allow it to cool completely before slicing and serving. This will prevent the broa from becoming gummy.
Expert Tips & Tricks
- For a more intense corn flavor, try using a coarse-ground cornmeal.
- If you live in a dry climate, you might need to add a little more water to the dough to achieve the right consistency.
- The dough can also be baked in a cast-iron skillet for a rustic presentation. Just be sure to grease the skillet well.
- To check for doneness, insert a toothpick into the center of the broa. If it comes out clean, the bread is done.
- If your oven tends to bake unevenly, rotate the pan halfway through the baking time.
Serving & Storage Suggestions
Broa is traditionally served with hearty soups, such as caldo verde (Portuguese kale soup), or alongside grilled meats and cheeses. It’s also delicious simply toasted with butter or a drizzle of olive oil.
Store leftover broa in an airtight container at room temperature for up to 3 days. For longer storage, wrap it tightly in plastic wrap and freeze it for up to 2 months. To reheat frozen broa, thaw it overnight in the refrigerator and then warm it in a 350°F (175°C) oven for about 10 minutes, or until heated through. You can also slice it and toast it for a quick and easy snack.
Nutritional Information
| Nutrient | Amount per Serving | % Daily Value |
|---|---|---|
| Calories | 420.3 kcal | N/A |
| Calories from Fat | 49 g | 12% |
| Total Fat | 5.5 g | 8% |
| Saturated Fat | 1.3 g | 6% |
| Cholesterol | 4.3 mg | 1% |
| Sodium | 419.6 mg | 17% |
| Total Carbohydrate | 81.5 g | 27% |
| Dietary Fiber | 4.9 g | 19% |
| Sugars | 1.1 g | 4% |
| Protein | 11.2 g | 22% |
Note: Nutritional information is an estimate and may vary based on specific ingredients and preparation methods.
Variations & Substitutions
- For a slightly sweeter broa, add 1/4 cup of honey or maple syrup to the dough.
- If you don’t have milk on hand, you can substitute it with water or a non-dairy milk alternative.
- To make a gluten-free version, use a gluten-free all-purpose flour blend and add 1 teaspoon of xanthan gum to help bind the dough.
- Add herbs like rosemary or thyme to the dough for an extra layer of flavor.
- For a spicier broa, add a pinch of red pepper flakes to the dough.
FAQs (Frequently Asked Questions)
Q: Why is my broa so dense?
A: This can happen if the yeast isn’t active, if the dough isn’t allowed to rise long enough, or if too much flour is added. Make sure your yeast is fresh, give the dough ample time to rise, and be careful not to overwork the dough.
Q: Can I use a bread machine to make broa?
A: Yes, you can use a bread machine. Follow your machine’s instructions for a basic bread recipe, adding the ingredients in the order recommended by the manufacturer.
Q: What is the best way to store broa?
A: The best way to store broa is in an airtight container at room temperature. For longer storage, you can freeze it.
Q: Can I make broa without milk?
A: Yes, you can substitute the milk with water or a non-dairy milk alternative. The flavor and texture might be slightly different, but it will still be delicious.
Q: Why does my broa crack on top?
A: Cracking on top is perfectly normal and gives it a rustic look. It happens when the loaf expands quickly in the oven. If you prefer a smoother top, you can score the top of the loaf with a sharp knife before baking.
Final Thoughts
I hope this recipe inspires you to create your own version of this classic Portuguese bread. Whether you serve it with a steaming bowl of soup or enjoy it simply toasted with butter, I’m sure it will become a family favorite. Feel free to experiment with different variations and share your feedback. Bom apetite!