
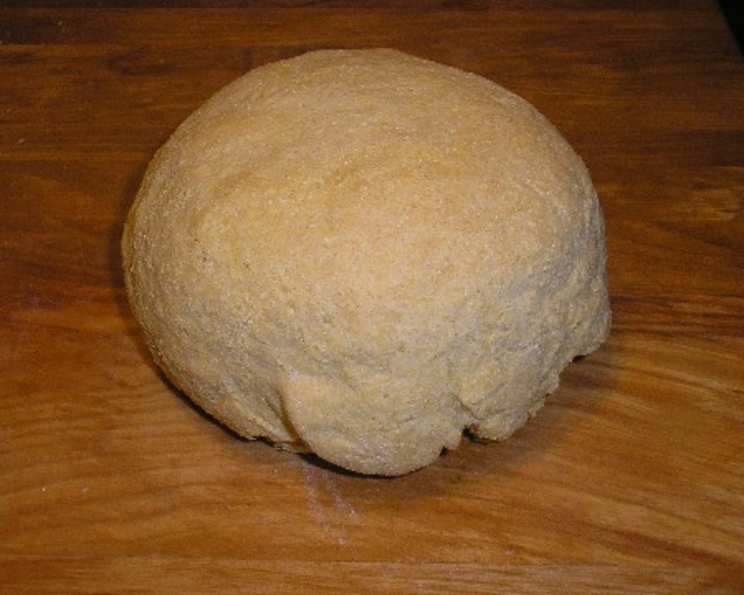
Portuguese Cornbread (Broa): A Taste of Home
The aroma of warm cornbread always transports me back to my grandmother’s kitchen in Lisbon. I remember her standing by the wood-fired oven, her hands dusted with flour, carefully shaping the dough into a rustic loaf. The slightly sweet, slightly savory scent of the broa baking was a promise of simple pleasures: a comforting meal with family and stories shared around the table. This recipe, though adapted for a modern kitchen, holds that same spirit of tradition and home.
Recipe Overview
- Prep Time: 30 minutes
- Cook Time: 30-40 minutes
- Total Time: 1 hour 10 minutes
- Yield: 1 loaf
- Dietary Type: Vegetarian
Ingredients
- 1 1⁄2 cups yellow cornmeal
- 1 1⁄2 teaspoons salt
- 1 1⁄4 cups boiling water
- 1 tablespoon olive oil
- 2 (1/4 ounce) packages dry yeast
- 2 cups bread flour, approximately
Equipment Needed
- Food processor (optional)
- Large mixing bowl
- Measuring cups and spoons
- Clean kitchen towel
- Baking sheet
Instructions
-
Begin by preparing the cornmeal. If desired, grind the cornmeal to a finer powder using a food processor. This step is optional, but it will result in a smoother final texture for your broa. If you prefer a more rustic, coarse texture, skip this step.
-
In a large mixing bowl, combine 1 cup of the (powdered) cornmeal with the salt. Gradually pour in the boiling water, mixing continuously until a smooth mixture forms. Be careful as you add the boiling water to avoid any splashes.
-
Add the olive oil to the mixture and stir to incorporate. Allow the mixture to cool to lukewarm. This is crucial, as hot temperatures can kill the yeast.
-
Once the mixture is lukewarm, blend in the dry yeast. Stir gently until the yeast is dissolved and the mixture is slightly frothy.
-
Gradually add the remaining cornmeal (1/2 cup) and 1 cup of the bread flour, mixing constantly. Continue adding the bread flour, a little at a time, until a soft dough forms. The amount of flour needed may vary depending on the humidity and the type of flour used.
-
If the dough is still sticky, add more flour, a tablespoon at a time, until it becomes manageable and slightly tacky but not overly sticky.
-
Place the dough in a lightly oiled bowl, turning to coat. Cover the bowl with a clean kitchen towel and let it rise in a warm place until doubled in volume, about 1-1.5 hours. This step is important for developing the flavor and texture of the bread.
-
Once the dough has doubled, gently punch it down to release the air.
-
Turn the dough out onto a lightly floured surface and knead it for a few minutes until it becomes firm and smooth. This will help to develop the gluten and give the bread a good structure.
-
Shape the dough into a round loaf. Place the loaf on a greased or parchment-lined baking sheet.
-
Cover the loaf loosely with a clean kitchen towel and let it rise again until doubled in size, about 30-45 minutes.
-
Preheat your oven to 350°F (175°C).
-
Bake the loaf in the preheated oven for about 30 to 40 minutes, or until golden brown and the internal temperature reaches 200-210°F (93-99°C). You can check for doneness by inserting a wooden skewer into the center of the loaf; if it comes out clean, the bread is ready.
-
Once baked, remove the broa from the oven and let it cool on a wire rack before slicing and serving.
Expert Tips & Tricks
- For a richer flavor: Try using a high-quality, stone-ground cornmeal. The coarser texture will add depth and complexity to the bread.
- To prevent the crust from getting too dark: Tent the loaf with aluminum foil during the last 15 minutes of baking.
- If your kitchen is cold: Place the dough in a slightly warm oven (turned off) to help it rise.
- Make-ahead tip: You can prepare the dough the night before, let it rise in the refrigerator overnight, and then bake it in the morning.
Serving & Storage Suggestions
Serve the broa warm or at room temperature. It’s delicious on its own, spread with butter or olive oil, or alongside soups, stews, or grilled meats. In Portugal, it’s often enjoyed with caldo verde, a traditional potato and kale soup.
Store leftover broa in an airtight container at room temperature for up to 3 days, or in the refrigerator for up to a week. You can also freeze it for longer storage. To reheat, wrap the bread in foil and bake at 350°F (175°C) for about 10-15 minutes, or until warmed through.
Nutritional Information
| Nutrient | Amount per Serving | % Daily Value |
|---|---|---|
| Calories | 347 kcal | 17% |
| Total Fat | 3g | 4% |
| Saturated Fat | 0.4g | 2% |
| Cholesterol | 0mg | 0% |
| Sodium | 893mg | 37% |
| Total Carbohydrate | 67g | 22% |
| Dietary Fiber | 4g | 16% |
| Sugars | 0.3g | 1% |
| Protein | 7g | 14% |
Note: Nutritional information is an estimate and may vary based on specific ingredients and portion sizes.
Variations & Substitutions
- Gluten-Free Broa: Substitute the bread flour with a gluten-free blend designed for bread making. You may need to adjust the amount of liquid to achieve the right consistency.
- Sweet Broa: Add 1-2 tablespoons of honey or maple syrup to the dough for a sweeter version.
- Herbaceous Broa: Incorporate chopped fresh herbs like rosemary, thyme, or oregano into the dough for added flavor. About 1-2 tablespoons of chopped herbs should be sufficient.
- Spicy Broa: Add a pinch of red pepper flakes or a dash of hot sauce to the dough for a touch of heat.
FAQs (Frequently Asked Questions)
Q: Why is my broa so dense?
A: This could be due to several factors, including using too much flour, not allowing the dough to rise sufficiently, or using old yeast. Make sure to use fresh yeast and allow the dough ample time to rise in a warm place.
Q: Can I use instant yeast instead of active dry yeast?
A: Yes, you can substitute instant yeast for active dry yeast. You don’t need to proof instant yeast in water first; simply add it directly to the dry ingredients.
Q: How can I tell if my broa is done baking?
A: The best way to check for doneness is to insert a wooden skewer into the center of the loaf. If it comes out clean, the bread is ready. You can also check the internal temperature with a thermometer; it should reach 200-210°F (93-99°C).
Q: Can I freeze broa?
A: Yes, broa freezes well. Wrap the loaf tightly in plastic wrap and then in aluminum foil, or place it in a freezer-safe bag. It can be stored in the freezer for up to 2-3 months.
Q: Why is my broa crumbly?
A: This could be because you used too much cornmeal or not enough gluten development. Ensure the dough is kneaded well to activate gluten, and follow the recipe measurements closely.
Final Thoughts
I hope this recipe brings the warmth and comfort of Portuguese cuisine into your kitchen. Don’t be intimidated by the yeast or the kneading; it’s a truly rewarding experience to bake your own broa. Share it with loved ones, savor each bite, and let the simple flavors transport you to the sun-drenched shores of Portugal. Experiment with variations, adapt it to your taste, and most importantly, enjoy the process. Bom apetite!