
The Art of Portuguese Egg Tarts: A Culinary Journey to Lisbon (and Your Kitchen)
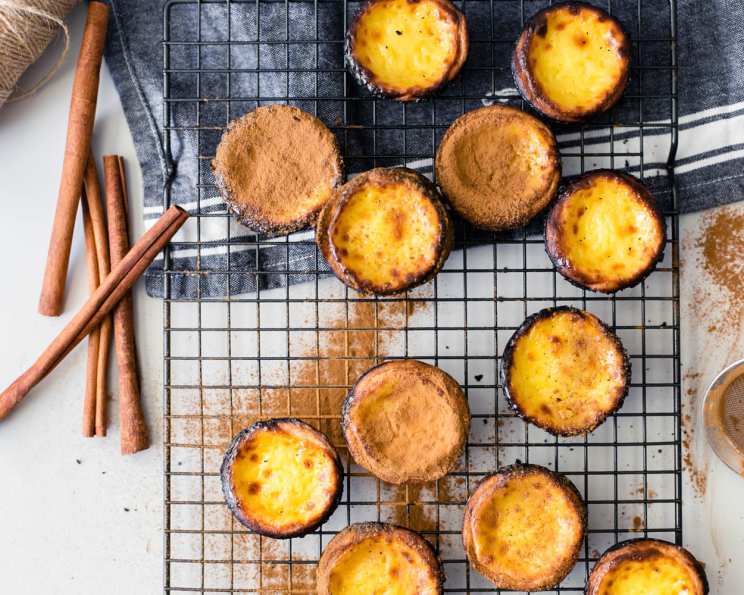
The first time I bit into a Portuguese egg tart, or Pastel de Nata, I was standing on a sun-drenched street corner in Lisbon. The warm, flaky crust shattered in my mouth, giving way to a creamy, custard filling with just a hint of cinnamon. The caramelized, slightly burnt top added a delightful bitterness that balanced the sweetness perfectly. It was a sensory explosion, an edible postcard that instantly transported me to the heart of Portugal. Ever since, I’ve been chasing that perfect Pastel de Nata, and this recipe gets me pretty darn close.
Recipe Overview
- Prep Time: 45 minutes (includes chilling time)
- Cook Time: 15 minutes
- Total Time: 1 hour
- Servings: 20
- Yield: 20 tarts
- Dietary Type: Not suitable for Vegan, Dairy-Free, or Gluten-Free diets
Ingredients
For the Oil Dough:
- 30 g shortening
- 30 g pastry margarine
- 60 g Hong Kong flour (a type of low-protein flour)
For the Dough:
- 60 g plain flour
- 12 g eggs
- 5 g shortening
- 1/2 teaspoon caster sugar
- 1 1/2 tablespoons water
- 1 drop yellow food coloring (optional)
For the Egg Filling:
- 5 egg yolks
- 90 g caster sugar
- 75 g evaporated milk
- 175 g dairy whipping cream
- 250 ml UHT milk (full cream milk)
Equipment Needed
- Mixing bowls
- Measuring cups and spoons
- Rolling pin
- Pastry brush
- Tart molds
- Oven
Instructions
- Prepare the Egg Filling: In a mixing bowl, thoroughly mix the egg yolks and caster sugar until well combined and slightly pale. This step is crucial for a smooth and creamy filling.
- Incorporate the Dairy: Add the evaporated milk, dairy whipping cream, and UHT milk to the egg yolk mixture. Mix gently until everything is fully incorporated. Set the filling aside for later use. Don’t overmix, as this can introduce air and affect the texture.
- Make the Oil Dough: In a separate mixing bowl, combine the shortening, pastry margarine, and Hong Kong flour. Mix all ingredients together until a smooth dough forms. This dough will create the flaky layers of the tart crust.
- Chill the Oil Dough: Wrap the oil dough in plastic wrap and refrigerate it for about 15 minutes. This chilling period allows the gluten to relax, making the dough easier to work with.
- Prepare the Dough: In another mixing bowl, combine the plain flour, eggs, shortening, caster sugar, water, and yellow food coloring (if using). Mix all the ingredients together until a cohesive dough forms. The yellow food coloring is optional, used to enhance the color of the dough.
- Assemble the Dough: Roll the dough to approximately 1 cm thick. Place the chilled oil dough in the center of the rolled dough.
- Enclose the Oil Dough: Fold the dough over the oil dough, encasing it completely. This is similar to creating a laminated dough.
- Roll and Fold (Single and Double): Roll the dough out again and perform two single folds and two double folds. This lamination process is key to achieving the characteristic flaky layers of the Portuguese egg tart crust.
- Chill Again: Wrap the laminated dough in plastic wrap and refrigerate for at least 30 minutes. This allows the gluten to relax further, preventing the dough from shrinking during baking.
- Prepare for Baking: Roll the chilled dough to approximately 1/2 cm thick. Cut the dough into circles of the size required to fit your tart molds.
- Shape the Tarts: Press the dough circles into the tart molds, ensuring they fit snugly and evenly.
- Fill the Tarts: Pour the prepared egg filling into the tart shells, filling them almost to the top.
- Bake: Bake the tarts in a preheated oven at 180°C (350°F) for approximately 15 minutes, or until the crust is golden brown and the filling is set with characteristic dark spots on top. The “burnt” spots are a key element of the authentic Pastel de Nata appearance.
Expert Tips & Tricks
- Hong Kong Flour: Using Hong Kong flour, or a similar low-protein flour, is essential for achieving the desired texture in the oil dough. It creates a more tender and flaky crust. If you can’t find Hong Kong flour, you can substitute it with cake flour.
- Chilling is Key: Don’t skip the chilling steps! These are crucial for relaxing the gluten in the dough, preventing shrinkage, and creating a flaky crust.
- Oven Temperature: Oven temperatures can vary, so keep a close eye on the tarts during baking. If the crust is browning too quickly, lower the oven temperature slightly. If the tops aren’t developing the characteristic dark spots, you can briefly broil them at the end of baking, but watch carefully to prevent burning.
- Even Filling: Ensure the egg filling is evenly distributed in each tart for consistent baking and appearance.
- Resting the Filling: Allowing the egg filling to rest before pouring into the tart shells can help reduce air bubbles.
Serving & Storage Suggestions
Serve the Portuguese egg tarts warm, preferably fresh from the oven. A dusting of cinnamon or powdered sugar is a classic finishing touch. They are best enjoyed on the day they are made. Leftovers can be stored in an airtight container in the refrigerator for up to 2 days. To reheat, warm them gently in a preheated oven at 150°C (300°F) for a few minutes, or until heated through. They can also be reheated in an air fryer. While freezing is possible, it can affect the texture of the crust.
Nutritional Information
Here’s an approximate nutritional breakdown per tart (estimated):
| Nutrient | Amount per Serving | % Daily Value |
|---|---|---|
| Calories | 125 kcal | N/A |
| Total Fat | 8 g | N/A |
| Saturated Fat | 4 g | N/A |
| Cholesterol | 60 mg | N/A |
| Sodium | 30 mg | N/A |
| Carbohydrates | 11 g | N/A |
| Fiber | 0 g | N/A |
| Sugar | 5 g | N/A |
| Protein | 2 g | N/A |
Note: Nutritional information is an estimate and may vary based on specific ingredients and portion sizes.
Variations & Substitutions
- Dairy-Free: While this recipe relies heavily on dairy, experimenting with dairy-free alternatives like full-fat coconut milk and plant-based whipping cream could yield interesting results. Keep in mind that the texture and flavor will be different.
- Gluten-Free: A gluten-free crust could be made using a blend of gluten-free flours, but achieving the same flakiness will be challenging.
- Flavor Variations: Experiment with adding citrus zest (lemon or orange) to the egg filling for a subtle aromatic twist. A dash of vanilla extract can also enhance the flavor.
FAQs (Frequently Asked Questions)
Q: Why are the tops of my egg tarts not getting burnt?
A: The “burnt” spots are a result of caramelization from the high heat. Ensure your oven is hot enough, and consider briefly broiling the tarts at the end of baking, watching closely to prevent actual burning.
Q: Can I use regular milk instead of UHT milk?
A: UHT milk has a slightly different flavor profile and stability. Regular milk can be used, but the result may not be exactly the same.
Q: My crust is shrinking during baking. What am I doing wrong?
A: This is likely due to gluten development. Ensure you are chilling the dough adequately at each stage to relax the gluten. Avoid overworking the dough.
Q: Can I make the dough ahead of time?
A: Yes! The dough can be made a day or two in advance and stored in the refrigerator, tightly wrapped.
Q: What’s the best way to reheat these tarts?
A: Reheating in a preheated oven at a low temperature (around 300°F or 150°C) will help maintain the crust’s crispness. Avoid microwaving, as it will make the crust soggy.
Final Thoughts
Making Portuguese egg tarts at home might seem a little daunting, but the reward is well worth the effort. The combination of flaky crust and creamy, caramelized filling is simply irresistible. Don’t be afraid to experiment and adjust the recipe to your liking. And most importantly, have fun! Share your creations with friends and family, and let the flavors transport you to the sunny streets of Lisbon. Bom apetite!