
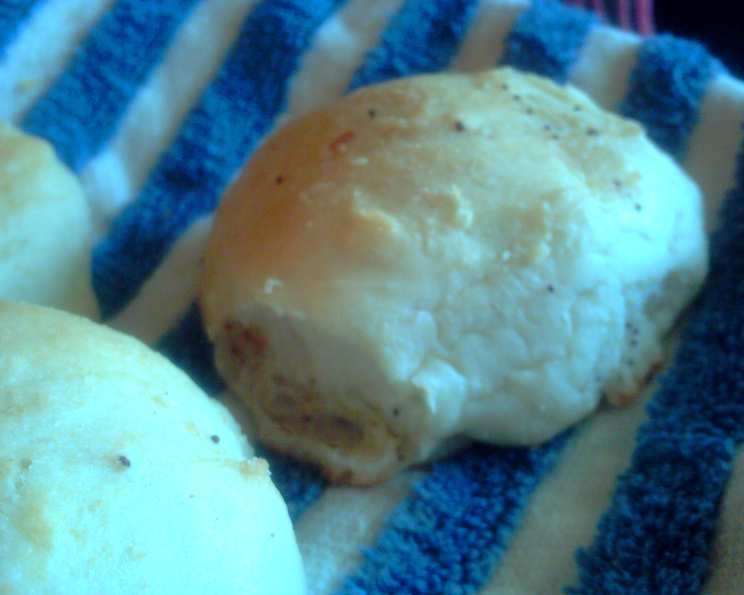
Soft & Savory: Bread Machine Potato Buns
The aroma still takes me back. Growing up, my grandmother, a woman who could coax magic from the simplest ingredients, always had a batch of potato buns rising on the counter. Their subtle sweetness, their incredibly soft crumb – they were the perfect blank canvas for summer barbecues, and I remember sneaking warm ones straight from the cooling rack, slathered in butter and feeling utterly content. While I can’t quite replicate her hug, this recipe comes incredibly close to capturing that feeling of pure, unadulterated comfort in a bun.
Recipe Overview
- Prep Time: 5 minutes
- Cook Time: 15-20 minutes
- Total Time: 1 hour 10 minutes
- Servings: 12
- Yield: 12 buns
- Dietary Type: Dairy-Free, Soy-Free
Ingredients
- 1 ¾ cups water
- 4 cups bread flour
- 3 tablespoons olive oil
- 1 ¼ teaspoons salt
- 2 tablespoons sugar
- ½ cup potato flakes
- 1 ¾ teaspoons bread machine yeast
Equipment Needed
- Bread Machine
- Large Baking Sheet
- Parchment Paper
- Measuring Cups and Spoons
Instructions
- Begin by adding all the ingredients to the bread machine pan in the order listed: water, bread flour, olive oil, salt, sugar, potato flakes, and finally, bread machine yeast. Make sure the yeast does not come into direct contact with the liquid at first, burying it slightly in the flour is helpful.
- Secure the bread machine pan into the machine, close the lid, and set the machine to the dough setting. This setting will mix and knead the dough, then allow it to rise once.
- Once the dough cycle is complete (approximately 50 minutes), carefully remove the dough from the bread machine pan. Do not let it rise a second time inside the bread machine.
- Lightly flour a clean work surface. Turn the dough out onto the floured surface and gently deflate it.
- Divide the dough into 12 equal portions. For accuracy, you can use a kitchen scale to ensure each piece is roughly the same weight.
- Shape the buns according to your preference. For hot dog buns, roll each portion of dough between your hands until it forms a log shape, roughly the diameter and length of a hot dog. For hamburger buns, gently flatten each dough ball into a round, slightly flattened shape. Aim for a uniform thickness for even baking.
- Line a large baking sheet with parchment paper. This prevents sticking and makes for easy cleanup.
- Arrange the shaped buns on the prepared baking sheet, leaving a little space between each to allow for expansion during baking.
- Preheat your oven to 375°F (190°C).
- Allow the shaped buns to rise for 15 minutes while the oven preheats. This second, short rise will contribute to a lighter, airier texture. You can lightly cover the baking sheet with plastic wrap to prevent the buns from drying out, but be sure to remove the plastic wrap before baking.
- Bake the buns in the preheated oven for 15-20 minutes, or until the tops turn a light golden brown. Keep a close watch during the last few minutes of baking to prevent over-browning. If the tops are browning too quickly, you can tent the baking sheet with aluminum foil.
- Once baked, remove the buns from the oven and transfer them to a wire rack to cool slightly before slicing and serving.
Expert Tips & Tricks
- For extra soft buns, try adding a tablespoon of honey or molasses to the dough.
- To achieve a richer color, brush the tops of the buns with melted butter or an egg wash (for a non-vegan option) before baking.
- If your kitchen is cold, the dough may take longer to rise. Place the baking sheet in a warm place, such as near a preheating oven, to encourage rising.
- Adjust the hydration based on your flour: Bread flour varies. If your dough looks too dry, add water 1 tbsp at a time. If it’s too wet, add flour in small amounts.
- Don’t overmix: Overmixing can lead to tough buns. Trust the bread machine to do its job.
- Get ahead: The dough can be made a day ahead of time. After the first rise in the bread machine, punch it down, wrap it tightly in plastic wrap, and refrigerate it overnight. Let it come to room temperature for about 30 minutes before shaping and baking.
Serving & Storage Suggestions
These potato buns are incredibly versatile. Serve them warm with your favorite burgers, hot dogs, or sandwich fillings. They’re also delicious toasted and topped with butter or jam.
To store leftover buns, allow them to cool completely before placing them in an airtight container or resealable plastic bag. They can be stored at room temperature for up to 2 days, in the refrigerator for up to 5 days, or in the freezer for up to 3 months.
To defrost frozen buns, simply thaw them at room temperature or in the refrigerator. For a quick defrost, toast them in a bagel-friendly toaster or microwave them for approximately 20 seconds. You can also refresh slightly stale buns by wrapping them in a damp paper towel and microwaving them for 10-15 seconds.
Nutritional Information
Please note that nutritional information is an estimate and may vary based on specific ingredients and portion sizes.
| Nutrient | Amount per Serving | % Daily Value |
|---|---|---|
| Calories | 200 kcal | 10% |
| Total Fat | 4g | 5% |
| Saturated Fat | 0.5g | 3% |
| Cholesterol | 0mg | 0% |
| Sodium | 250mg | 11% |
| Total Carbohydrate | 36g | 13% |
| Dietary Fiber | 1g | 4% |
| Sugars | 2g | N/A |
| Protein | 5g | 10% |
Variations & Substitutions
- Whole Wheat Potato Buns: Substitute up to half of the bread flour with whole wheat flour for a nuttier flavor and increased fiber.
- Sweet Potato Buns: Replace half of the potato flakes with sweet potato flakes for a slightly sweeter and more vibrant bun.
- Gluten-Free Potato Buns: Use a high-quality gluten-free bread flour blend. You may need to add a binder such as xanthan gum to improve the texture.
- Herb-Infused Potato Buns: Add 1-2 tablespoons of chopped fresh herbs, such as rosemary, thyme, or chives, to the dough for a savory twist.
- Vegan Butter Option: Use vegan butter in melted form for brushing the top of the buns to enhance the golden crust.
- Dairy-Free Milk Variation: You can substitute the water in the recipe with non-dairy milk like almond, oat or cashew milk to create a more flavourful bun.
FAQs (Frequently Asked Questions)
Q: Can I use instant yeast instead of bread machine yeast?
A: Yes, you can. Instant yeast and bread machine yeast are essentially the same thing. Just be sure to check the expiration date.
Q: My buns are coming out dense. What am I doing wrong?
A: Ensure your yeast is fresh and active. Also, avoid over-measuring the flour. Too much flour can result in dense buns.
Q: Can I make these buns without a bread machine?
A: Yes, you can. Combine the ingredients in a large bowl and knead by hand for 8-10 minutes, or until the dough is smooth and elastic. Allow to rise in a warm place for 1-1.5 hours, or until doubled in size, then proceed with shaping and baking.
Q: Can I add a glaze to these buns after baking?
A: Absolutely! A simple glaze of melted butter and honey or maple syrup would be delicious. Brush it on the warm buns as soon as they come out of the oven.
Q: How can I prevent the buns from sticking to the baking sheet even with parchment paper?
A: Lightly grease the parchment paper with cooking spray or a little bit of olive oil before placing the shaped buns on it.
Final Thoughts
These bread machine potato buns are a testament to the fact that simple ingredients, combined with a little time and care, can create something truly special. Whether you’re grilling burgers for a crowd or simply craving a comforting snack, these buns are sure to hit the spot. Don’t be afraid to experiment with different variations and flavors to create your own signature bun. I encourage you to try this recipe and share your feedback – and perhaps pair them with a hearty chili or pulled pork for a truly satisfying meal. Happy baking!