
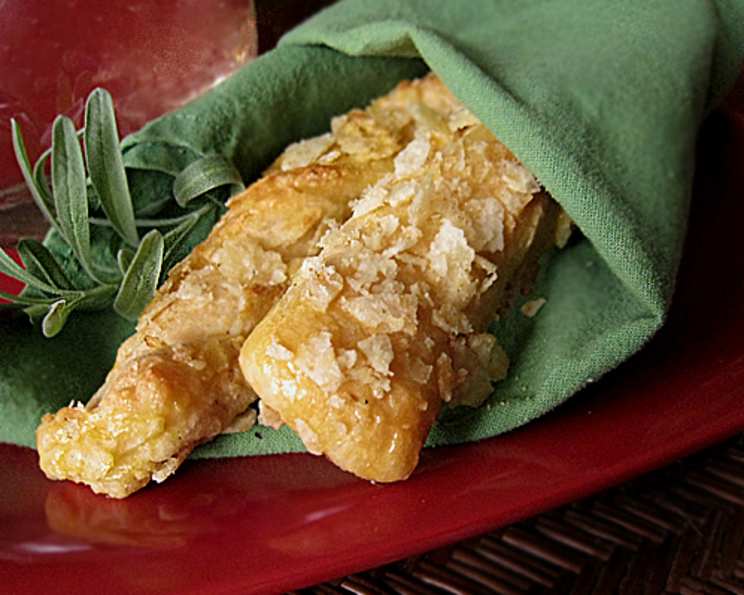
Potato Chip Breadsticks: A Crunchy, Savory Delight
There’s something incredibly comforting about the smell of baking bread, a warmth that fills the kitchen and promises a delicious reward. But sometimes, you crave that bready goodness with a playful twist. I remember one particularly hectic week when I was juggling deadlines and a toddler. I needed a quick win, something fun and satisfying to put on the table. That’s when I stumbled upon the idea of incorporating crushed potato chips into breadsticks. The result? A surprisingly addictive combination of soft, chewy bread and salty, savory crunch that was an instant hit with everyone, especially my little one. The joyful sounds of crunching filled the room, and I knew I’d struck gold.
Recipe Overview
- Prep Time: 5 minutes
- Cook Time: 16-18 minutes
- Total Time: 23 minutes
- Servings: 12
- Yield: 12 breadsticks
- Dietary Type: Comfort Food
Ingredients
- 1 (11 ounce) package refrigerated breadstick dough
- 1 egg, slightly beaten
- ¼ cup sour cream and onion potato chips, crushed
Equipment Needed
- Baking sheets
- Pastry brush (optional)
Instructions
-
Begin by preheating your oven to 350°F (175°C). This ensures even baking and prevents the breadsticks from becoming overly browned on the bottom before they’re cooked through.
-
Carefully unroll the refrigerated breadstick dough on a clean work surface.
-
Separate the dough into 12 individual breadsticks, following the perforations.
-
Now, the fun part! Take each breadstick and gently twist it about 3 times. This not only gives them an appealing spiral shape but also helps create more surface area for the crunchy potato chip topping.
-
Place the twisted breadsticks on ungreased baking sheets, spacing them slightly apart to allow for proper air circulation.
-
In a small bowl, lightly beat the egg. This will act as an adhesive, helping the crushed potato chips stick to the breadsticks.
-
Using a pastry brush (or even your fingertips), carefully brush each breadstick with the beaten egg. Be sure to apply a thin, even layer for optimal results.
-
Evenly sprinkle the crushed sour cream and onion potato chips over the egg-washed breadsticks. Gently press the chips into the dough to ensure they adhere well. If you’re feeling adventurous, consider using other potato chip flavors for a unique twist!
-
Bake at 350°F (175°C) for 16-18 minutes, or until the breadsticks are golden brown and cooked through. Keep a close eye on them towards the end of the baking time to prevent burning. Ovens can vary, so adjust the baking time accordingly.
-
Once baked, remove the breadsticks from the oven and let them cool slightly on the baking sheets before serving.
-
Serve warm and enjoy the satisfying crunch!
Expert Tips & Tricks
- Chip Flavor Experimentation: Don’t limit yourself to sour cream and onion! BBQ, cheddar, or even spicy chips can add exciting new dimensions to these breadsticks.
- Dough Temperature Matters: For easier handling, let the refrigerated dough sit at room temperature for about 5-10 minutes before unrolling. This will make it more pliable and less prone to tearing.
- Even Crushing: Aim for a mix of fine and slightly larger potato chip pieces. The finer pieces will create a more even coating, while the larger pieces will provide a satisfying crunch.
- Enhance the Egg Wash: For a richer color and flavor, add a pinch of salt and a splash of milk or cream to the egg wash.
- Preventing Soggy Chips: To prevent the potato chips from becoming soggy during baking, make sure the breadsticks are not overcrowded on the baking sheet.
Serving & Storage Suggestions
These potato chip breadsticks are best served warm, straight from the oven. They make a fantastic appetizer, side dish, or snack.
Serving Suggestions:
- Pair them with a warm bowl of soup or chili.
- Serve alongside a simple green salad for a satisfying lunch.
- Offer them as a party snack with a variety of dipping sauces, such as ranch dressing, marinara sauce, or a creamy cheese dip.
Storage:
- Room Temperature: Store leftover breadsticks in an airtight container at room temperature for up to 2 days. They will lose some of their crispness, but still taste delicious.
- Refrigerator: For longer storage, refrigerate the breadsticks in an airtight container for up to 4 days.
- Freezer: For extended storage, freeze the breadsticks in a freezer-safe bag or container for up to 2 months. To reheat, bake them in a preheated oven at 350°F (175°C) for a few minutes until warmed through.
Nutritional Information
Here is an estimated nutritional breakdown per breadstick:
| Nutrient | Amount per Serving | % Daily Value |
|---|---|---|
| Calories | 90 kcal | 5% |
| Total Fat | 4g | 5% |
| Saturated Fat | 1g | 5% |
| Cholesterol | 15mg | 5% |
| Sodium | 250mg | 11% |
| Total Carbohydrate | 12g | 4% |
| Dietary Fiber | 0g | 0% |
| Sugars | 1g | – |
| Protein | 2g | 4% |
Note: Nutritional information is an estimate and may vary based on specific ingredients and portion sizes.
Variations & Substitutions
- Gluten-Free: Use gluten-free refrigerated breadstick dough for a gluten-free version. Be sure to check the ingredients of the potato chips to ensure they are also gluten-free.
- Vegan: Use vegan refrigerated breadstick dough and a plant-based egg wash substitute, such as aquafaba (the liquid from a can of chickpeas) or a mixture of plant-based milk and maple syrup. Ensure the potato chips are also vegan-friendly.
- Spice it Up: Add a pinch of red pepper flakes to the crushed potato chips for a spicy kick.
- Cheese Lover’s Delight: Sprinkle grated parmesan cheese over the breadsticks along with the potato chips for an extra layer of savory flavor.
- Herbaceous Twist: Add dried herbs like rosemary, thyme, or oregano to the crushed potato chips for an aromatic variation.
FAQs (Frequently Asked Questions)
Q: Can I use a different type of potato chip?
A: Absolutely! Feel free to experiment with different potato chip flavors to find your favorite combination. BBQ, cheddar, or even spicy chips can all work well.
Q: Do I have to use an egg wash?
A: The egg wash helps the potato chips adhere to the breadsticks. If you’re vegan or have an egg allergy, you can use a plant-based milk or a mixture of oil and maple syrup as a substitute.
Q: Can I make these ahead of time?
A: While these are best served fresh, you can assemble the breadsticks ahead of time and store them in the refrigerator until you’re ready to bake them.
Q: How do I prevent the potato chips from burning?
A: Keep a close eye on the breadsticks during baking and reduce the oven temperature if the potato chips start to brown too quickly.
Q: What dipping sauces go well with these breadsticks?
A: Ranch dressing, marinara sauce, honey mustard, and creamy cheese dips are all excellent choices for dipping.
Final Thoughts
These potato chip breadsticks are a fun and easy way to add a little excitement to your bread routine. The combination of soft, chewy bread and crunchy, savory potato chips is simply irresistible. Whether you’re looking for a quick snack, a crowd-pleasing appetizer, or a creative side dish, these breadsticks are sure to be a hit. So go ahead, gather your ingredients, preheat your oven, and get ready to enjoy a truly unique and delicious treat. And don’t forget to share your creations with friends and family! They’ll thank you for it.