
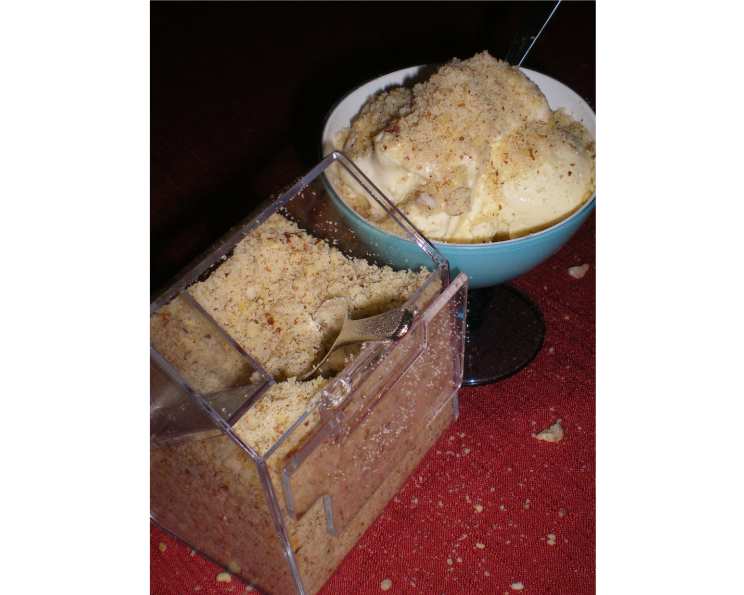
Elevate Your Desserts: Mastering the Art of Praline Dust
The memory is so vivid: the clatter of pans in my grandmother’s bustling kitchen, the warm, sweet aroma hanging in the air like a comforting blanket, and the sound of her humming as she carefully sprinkled a golden, nutty dust over a freshly baked tart. It wasn’t just any dust; it was praline, a magical ingredient that transformed even the simplest dessert into something extraordinary. Years later, I understand the secret – it’s the perfect marriage of toasty nuts and caramelized sugar, ground to a texture that adds a delightful crunch and an irresistible flavor.
Recipe Overview
- Prep Time: 10 minutes
- Cook Time: 15-20 minutes
- Total Time: 30-35 minutes
- Yields: Approximately 2 cups
- Dietary Type: Gluten-Free, Vegetarian
Ingredients
- 100 g almonds, shelled
- 100 g hazelnuts, shelled
- 60 ml water
- 200 g sugar
Equipment Needed
- Baking sheet
- Baking parchment
- Oven
- Rolling pin or food processor
- Airtight container
Instructions
-
Preheat your oven to 350°F (175°C). Spread the almonds and hazelnuts evenly on a baking sheet. Lightly brown the nuts in the preheated oven for about 10-15 minutes, keeping a close watch to prevent burning. The nuts are ready when they are fragrant and lightly golden. Remove from the oven and let them cool slightly.
-
While the nuts are cooling, combine the water and sugar in a heavy-bottomed saucepan. Place the saucepan over medium heat and cook the water and sugar without stirring. Allow the sugar to dissolve completely.
-
Continue to cook the mixture, watching carefully as it transforms into a beautiful amber caramel. This step requires patience and attention. Do not stir the mixture, but you can gently swirl the pan occasionally to ensure even heating. The caramel is ready when it reaches a deep amber color.
-
Once the caramel reaches the desired color, immediately mix in the lightly browned nuts. Stir quickly but gently to ensure all the nuts are coated evenly with the caramel.
-
Immediately turn out the mixture onto a baking sheet lined with baking parchment that has been lightly oiled. Spread the caramelized nuts into a thin, even layer. The oil on the parchment prevents sticking, making it easier to work with later.
-
Allow the praline to become quite cold and hard. This usually takes about 20-30 minutes at room temperature. You can speed up the process by placing the baking sheet in the refrigerator for a shorter period.
-
Once the praline is completely cooled and hardened, you have two options for creating the praline dust. For a coarser texture, crush the praline to a coarse sand texture with a rolling pin. Place the hardened praline in a sturdy zip-top bag and crush it with the rolling pin until it reaches your desired consistency.
-
Alternatively, if you prefer a finer dust, break the praline into chunks and place them in a food processor with a blade attachment. Pulse the processor until the praline is finely ground. Be careful not to over-process, as this can release the oils from the nuts and create a paste.
-
Once the praline is crushed or ground to your liking, store it in an airtight container at room temperature. Properly stored, praline dust will keep for several weeks.
Expert Tips & Tricks
-
Toasting the Nuts: Toasting the nuts beforehand is crucial. It intensifies their flavor and ensures a crispier praline. Keep a close eye on them in the oven, as they can burn quickly.
-
Caramelization is Key: Achieving the perfect caramel color is essential for the flavor of the praline. Under-caramelized sugar will lack depth, while over-caramelized sugar will taste bitter. Aim for a deep amber color.
-
Don’t Stir the Caramel: While the sugar is dissolving in the water, avoid stirring. Stirring can cause the sugar to crystallize, resulting in a grainy caramel. Gently swirl the pan instead.
-
Even Distribution: When spreading the caramelized nuts on the baking sheet, ensure an even distribution. This will make it easier to crush or grind the praline later.
-
Prevent Sticking: Lining the baking sheet with lightly oiled parchment paper prevents the praline from sticking and makes it easier to remove once it has cooled and hardened.
-
Pulse, Don’t Process: When using a food processor, pulse the praline rather than processing it continuously. This helps to prevent the nuts from releasing their oils and turning the mixture into a paste.
Serving & Storage Suggestions
Praline dust is incredibly versatile and can be used to elevate a wide range of desserts and baked goods. Sprinkle it over ice cream, cakes, tarts, and pastries for added texture and flavor. It also makes a delicious addition to coffee or hot chocolate.
To store, keep the praline dust in an airtight container at room temperature. Properly stored, it will maintain its flavor and texture for several weeks. Avoid storing it in the refrigerator, as the moisture can cause it to become sticky.
Nutritional Information
| Nutrient | Amount per Serving | % Daily Value |
|---|---|---|
| Calories | 270 kcal | 14% |
| Total Fat | 18g | 28% |
| Saturated Fat | 1.5g | 8% |
| Cholesterol | 0mg | 0% |
| Sodium | 10mg | 0% |
| Total Carbohydrate | 25g | 8% |
| Dietary Fiber | 3g | 12% |
| Sugars | 20g | – |
| Protein | 5g | 10% |
Note: Nutritional information is an estimate and may vary based on specific ingredients and portion sizes.
Variations & Substitutions
-
Different Nuts: Feel free to experiment with different nuts, such as pecans, walnuts, or macadamia nuts. Each nut will impart a unique flavor to the praline dust. You can use a single type of nut or a combination of your favorites.
-
Spiced Praline: Add a touch of warmth and complexity by incorporating spices like cinnamon, nutmeg, or cardamom to the sugar and water mixture while making the caramel.
-
Citrus Zest: Grated citrus zest, such as orange or lemon, can add a bright and refreshing element to the praline dust. Add the zest to the caramelized nuts before spreading them on the baking sheet.
-
Salted Praline: For a sweet and salty treat, add a pinch of sea salt to the caramelized nuts. The salt enhances the sweetness of the caramel and adds a delightful contrast of flavors.
FAQs (Frequently Asked Questions)
Q: Can I use pre-roasted nuts?
A: Yes, you can use pre-roasted nuts, but be careful not to over-toast them in the oven. Reduce the baking time accordingly.
Q: What if my caramel crystallizes?
A: Crystallization can occur if sugar crystals form in the caramel. Try adding a teaspoon of lemon juice or corn syrup to the sugar and water mixture to prevent this.
Q: Can I make praline dust without a food processor?
A: Absolutely! Simply place the cooled praline in a zip-top bag and crush it with a rolling pin until it reaches your desired consistency.
Q: How long does praline dust last?
A: Properly stored in an airtight container at room temperature, praline dust will last for several weeks.
Q: Can I use this to make a praline buttercream?
A: Yes, you can! Finely ground praline dust can be added to your favorite buttercream recipe for a delicious praline flavor.
Final Thoughts
Now it’s your turn to create some magic in the kitchen! Armed with this recipe and these tips, you’re well on your way to crafting praline dust that will elevate your desserts to new heights. Don’t be afraid to experiment with different nuts, spices, and flavor combinations to create your own signature praline dust. I encourage you to try this recipe and share your feedback. Pair it with a scoop of vanilla bean ice cream or use it to garnish a decadent chocolate cake. Happy cooking, and may your desserts always be sprinkled with a little bit of magic!