
Southern Comfort: Mastering the Art of Homemade Pralines
The first time I tasted a praline, I was visiting my grandmother in Savannah. She had a little candy dish on her sideboard, always filled with an assortment of treats, but it was the pralines that caught my eye. Their creamy, melt-in-your-mouth texture, punctuated by the satisfying crunch of pecans, was unlike anything I had ever experienced. That sweet, nutty aroma still transports me back to her sunny kitchen, the air thick with the scent of sugar and warmth. Making pralines now isn’t just about the candy; it’s about recapturing that memory and sharing that taste of home with others.
Recipe Overview
- Prep Time: 5 minutes
- Cook Time: 27 minutes
- Total Time: 32 minutes
- Yields: 2 dozen
- Dietary Type: Vegetarian
Ingredients
- 3 cups firmly packed light brown sugar
- 1 cup whipping cream
- 2 tablespoons light corn syrup
- 1/4 teaspoon salt
- 1/4 cup butter or margarine
- 2 cups chopped pecans
- 1 teaspoon vanilla extract
Equipment Needed
- 3-quart saucepan
- Candy thermometer
- Wooden spoon
- Wax paper
Instructions
- In a 3-quart saucepan over medium heat, combine the brown sugar, whipping cream, light corn syrup, and salt. It’s crucial to use a heavy-bottomed saucepan to prevent scorching.
- Bring the mixture to a boil, stirring constantly to dissolve the sugar and prevent sticking. This initial stirring is vital to achieve a smooth, consistent texture.
- Once boiling, continue cooking, stirring occasionally, for 6-8 minutes, or until a candy thermometer registers 236°F (soft ball stage). Accuracy with the candy thermometer is essential for praline perfection. If you don’t have one, test the mixture by dropping a small amount into a glass of cold water. If it forms a soft, pliable ball, it’s ready.
- Remove the saucepan from the heat. Add the butter or margarine, but do not stir. This allows the butter to cool the mixture slightly and adds richness.
- Let the mixture stand, undisturbed, until the candy thermometer reaches 150°F. This cooling period is critical for developing the proper crystal structure that gives pralines their characteristic texture.
- Using a wooden spoon, stir in the chopped pecans and vanilla extract.
- Continue stirring constantly with the wooden spoon until the candy begins to thicken. This is the most crucial step – you’ll notice the glossy sheen starts to dull and the mixture becomes more opaque. Be patient and keep stirring!
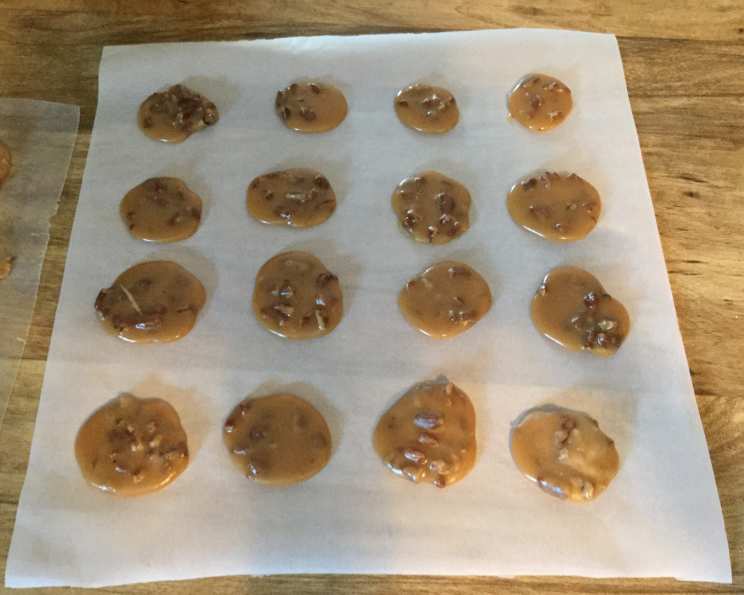
- Working rapidly, drop the mixture by heaping teaspoonfuls onto wax paper. The pralines will spread slightly as they cool.
- Let the pralines stand until firm. This usually takes about 30 minutes to an hour, depending on the humidity.
Expert Tips & Tricks
- Pecan Prep: Toasting the pecans lightly before adding them to the candy base will amplify their nutty flavor and add an extra layer of texture. Simply spread them on a baking sheet and bake at 350°F (175°C) for 5-7 minutes, or until fragrant.
- Humidity Factor: Humidity can wreak havoc on praline making. On humid days, consider extending the cooking time slightly to ensure the sugar reaches the correct temperature. You can also add a tiny pinch of cream of tartar to help prevent crystallization.
- The Perfect Stir: The stirring process is key to achieving the ideal praline texture. Too little stirring, and the pralines will be grainy. Too much stirring, and they’ll be hard. The sweet spot is constant stirring after the cooling period until the mixture visibly thickens and loses its glossy appearance.
- Don’t Overcook: Be careful not to overcook the sugar mixture, or the pralines will be hard and brittle. The soft ball stage is crucial.
- Fixing Grainy Pralines: If your pralines turn out grainy, don’t despair! You can often salvage them by adding a tablespoon or two of cream or milk to the saucepan, reheating the mixture, and starting the cooling and stirring process again.
- Flavor Variations: Experiment with different extracts, such as almond or maple, to create unique flavor profiles. You can also add a pinch of cinnamon or nutmeg for a warm, spiced praline.
Serving & Storage Suggestions
Pralines are best enjoyed at room temperature. Serve them as a sweet treat after a meal, alongside a cup of coffee or tea, or as a delicious addition to a dessert platter. They also make wonderful gifts.
To store, place the pralines in an airtight container lined with wax paper. They will keep at room temperature for up to a week. For longer storage, you can freeze them for up to 2 months. Thaw them at room temperature before serving. Do not refrigerate, as this can cause them to become sticky.
Nutritional Information
Note: Nutritional information is an estimate and may vary based on specific ingredients and portion sizes.
| Nutrient | Amount per Serving | % Daily Value |
|---|---|---|
| Calories | 112 kcal | 6% |
| Total Fat | 6.7g | 10% |
| Saturated Fat | 2.3g | 12% |
| Cholesterol | 9.4mg | 3% |
| Sodium | 27mg | 1% |
| Total Carbohydrate | 12.8g | 4% |
| Dietary Fiber | 0.4g | 2% |
| Sugars | 11.7g | |
| Protein | 0.5g | 1% |
Variations & Substitutions
- Spiced Pralines: Add 1/2 teaspoon of ground cinnamon, 1/4 teaspoon of ground nutmeg, and a pinch of ground cloves to the mixture along with the vanilla extract.
- Chocolate Pralines: Melt 2 ounces of semi-sweet chocolate and drizzle over the cooled pralines.
- Bourbon Pralines: Add 1-2 tablespoons of bourbon to the mixture along with the vanilla extract for a hint of Southern charm.
- Nut Variations: Experiment with different nuts, such as walnuts or almonds, for a unique twist. You can even combine different types of nuts.
- Dairy-Free Pralines: Substitute the whipping cream with coconut cream for a dairy-free version. Note that the texture may be slightly different. Be sure to use full-fat coconut cream for the best results. The butter can be replaced with a plant-based butter alternative.
FAQs (Frequently Asked Questions)
Q: Why are my pralines grainy?
A: Grainy pralines are often caused by improper sugar crystallization. Make sure you cook the mixture to the correct temperature (soft ball stage) and avoid stirring the mixture until after it has cooled to 150°F.
Q: Can I use a stand mixer instead of stirring by hand?
A: While a stand mixer might seem convenient, stirring by hand with a wooden spoon allows you to feel the texture change and ensure proper thickening. This is crucial for praline success.
Q: How do I know when the pralines are ready to drop onto the wax paper?
A: The mixture should be noticeably thickened and have lost its glossy sheen. It should be thick enough to hold its shape slightly when dropped from a spoon.
Q: Can I make pralines in advance?
A: Yes, pralines can be made a few days in advance. Store them in an airtight container at room temperature. Avoid refrigerating them, as this can affect their texture.
Q: What if I don’t have a candy thermometer?
A: While a candy thermometer is the most accurate way to determine doneness, you can use the cold water test. Drop a small amount of the mixture into a glass of cold water. If it forms a soft, pliable ball, it’s ready.
Final Thoughts
Pralines are more than just a sweet treat; they’re a taste of Southern hospitality and a reminder of simpler times. Don’t be intimidated by the candy-making process. With a little patience and attention to detail, you can create these creamy, nutty delights in your own kitchen. So, gather your ingredients, put on some good music, and embark on a praline-making adventure. Share your creations with friends and family and let the sweet taste of Southern comfort fill your home. I encourage you to experiment with variations and make this recipe your own. I’d love to hear about your praline successes (and any troubleshooting tips you discover along the way!) so feel free to leave a comment below. Pair these delicious pralines with a strong cup of chicory coffee for the ultimate Southern experience.