
The Easiest, Fastest Homemade Pressure Cooker Chicken Stock
The scent of chicken stock simmering on the stove always takes me back to my grandmother’s kitchen. I remember her meticulously saving every chicken bone, every scrap of carrot peel, and every onion end. Her stock was liquid gold, the foundation for countless comforting soups and savory stews. While I don’t always have hours to dedicate to simmering stock on the stovetop, I’ve discovered the magic of the pressure cooker, and now I can have that same rich, flavorful stock in a fraction of the time. This recipe is a modern take on a classic, delivering incredible flavor with minimal effort.
Recipe Overview
- Prep Time: 15 minutes
- Cook Time: 25 minutes
- Total Time: 50 minutes
- Yields: 7 cups
- Dietary Type: Dairy-Free, Gluten-Free
Ingredients
- 2 1/2 lbs chicken parts, such as bones, backs, wings, and necks
- 2 chicken feet (optional, but adds richness and collagen)
- 2 large carrots, cut into 1-inch pieces
- 1 large celery rib, cut into 1-inch pieces
- 1 medium onion, unpeeled, quartered
- 4 whole peppercorns
- 8 cups water
Equipment Needed
- Pressure Cooker
- Fine-mesh strainer or cheesecloth-lined colander
- Large bowl or pot
- Storage containers for stock (jars, freezer-safe bags, or containers)
Instructions
- Prep the ingredients: Roughly chop the carrots and celery into 1-inch pieces. Quarter the onion, leaving the skin on for added color and flavor. Having everything prepped and ready to go will make the process smooth and efficient.
- Combine ingredients in the pressure cooker: Place all the ingredients – the chicken parts, chicken feet (if using), carrots, celery, onion, and peppercorns – into the pressure cooker.
- Add water: Pour 8 cups of water over the ingredients in the pressure cooker. Ensure the chicken parts are mostly submerged; you may need slightly more or less water depending on the size of your pressure cooker.
- Pressure cook: Close the pressure cooker lid securely and bring it up to high pressure (15 lbs). Follow your pressure cooker’s instructions for bringing it to pressure.
- Cook at pressure: Once the control is jiggling vigorously, indicating it has reached high pressure, reduce the heat to low so the control jiggles gently about 2-4 times per minute. Cook for 25 minutes. This relatively short cooking time extracts maximum flavor without overcooking the stock.
- Release pressure: After 25 minutes, release the pressure. You can do this in one of two ways:
- Natural Release: Let the pressure cooker sit undisturbed until the pressure is naturally released. This can take 15-30 minutes. This method is preferred because it allows the flavors to meld further.
- Quick Release: Carefully run cold water over the pressure cooker (avoiding the steam vent) until the pressure is released. Use oven mitts to protect your hands and clear the sink of any obstructions before releasing pressure this way.
- Strain the stock: Once the pressure is fully released, carefully open the pressure cooker. Place a fine-mesh strainer (or a colander lined with cheesecloth) over a large bowl or pot. Pour the contents of the pressure cooker through the strainer, separating the solids from the liquid stock.
- Cool and refrigerate: Allow the strained stock to cool slightly before transferring it to a container. Refrigerate the stock for several hours, or preferably overnight. This allows the fat to solidify on the surface.
- Remove fat: Once the fat has solidified, use a spoon or spatula to skim it off the top of the stock. Removing the fat creates a clearer and healthier stock. The reserved fat can be used for cooking other dishes, like sautéing vegetables.
- Store the stock: The defatted chicken stock can be refrigerated for up to 3 days or frozen for longer storage.
Expert Tips & Tricks
- Don’t skip the chicken feet! While they might seem intimidating, chicken feet are packed with collagen, which adds richness and body to the stock.
- Use vegetable scraps: Save vegetable scraps like carrot peels, onion ends, and celery leaves in a freezer bag and add them to the stock for extra flavor. Avoid cruciferous vegetables like broccoli and cabbage, as they can make the stock bitter.
- Roast the chicken bones first: For a deeper, richer flavor, roast the chicken bones in a 400°F (200°C) oven for 30-40 minutes before adding them to the pressure cooker.
- Don’t overcook: Overcooking stock can make it bitter. The pressure cooker helps prevent this by cooking it quickly and efficiently.
- Seasoning: While this recipe doesn’t include salt, feel free to add it to taste after the stock is finished. Adding salt during cooking can sometimes concentrate the flavor too much.
Serving & Storage Suggestions
Serve your homemade pressure cooker chicken stock as a base for soups, stews, sauces, and gravies. It’s also delicious used to cook rice or grains, adding depth and flavor.
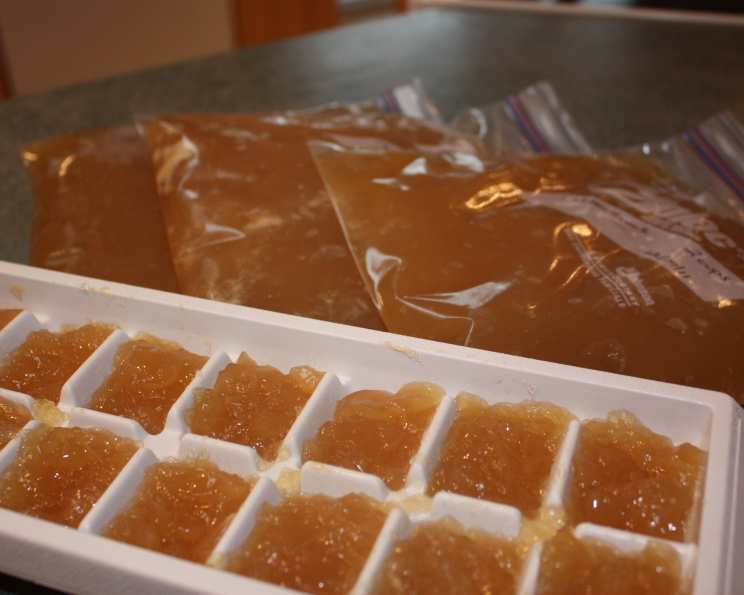
Store the stock in airtight containers in the refrigerator for up to 3 days. For longer storage, freeze the stock in freezer-safe bags or containers for up to 3 months. Consider freezing it in smaller portions (ice cube trays or 1-cup containers) for easy use. Reheat the stock gently on the stovetop or in the microwave.
Nutritional Information
| Nutrient | Amount per Serving | % Daily Value |
|---|---|---|
| Calories | 358 kcal | 18% |
| Total Fat | 19.5g | 30% |
| Saturated Fat | 5.4g | 27% |
| Cholesterol | 125.9mg | 41% |
| Sodium | 147.6mg | 6% |
| Total Carbohydrate | 3.8g | 1% |
| Dietary Fiber | 1g | 4% |
| Sugars | 1.8g | 7% |
| Protein | 39.5g | 78% |
Note: Nutritional information is an estimate and may vary based on specific ingredients and portion sizes.
Variations & Substitutions
- Vegetarian Stock: Substitute the chicken parts with a variety of vegetables such as mushrooms, leeks, parsnips, and turnips for a delicious vegetable stock.
- Spiced Stock: Add herbs and spices like bay leaves, thyme, rosemary, or ginger to customize the flavor profile of your stock.
- Bone Broth: For a more concentrated and collagen-rich broth, increase the amount of chicken bones and cook for a longer period (about 45 minutes) in the pressure cooker.
- Low-Sodium Stock: Omit the salt completely for a low-sodium version. You can always add salt later when using the stock in recipes.
FAQs (Frequently Asked Questions)
Q: Can I use a different type of pressure cooker?
A: Yes, this recipe works well with both electric and stovetop pressure cookers. Follow your pressure cooker’s specific instructions for bringing it to pressure and releasing it.
Q: Can I skip the chicken feet?
A: Yes, the chicken feet are optional. However, they add a significant amount of collagen, which gives the stock a richer, more gelatinous texture.
Q: How long does the stock last in the freezer?
A: Properly stored, frozen chicken stock can last for up to 3 months without significant loss of quality.
Q: Can I use leftover cooked chicken bones?
A: Yes, using leftover roasted chicken bones is a great way to reduce waste and add extra flavor to your stock.
Q: Why is it important to remove the fat from the stock?
A: Removing the fat creates a clearer, healthier stock and prevents it from becoming cloudy when refrigerated. It also improves the stock’s flavor and shelf life.
Final Thoughts
Making your own chicken stock at home is a rewarding culinary experience. Not only does it taste far superior to store-bought varieties, but you also have complete control over the ingredients and flavor. This pressure cooker method is incredibly convenient, allowing you to create a flavorful and nourishing stock in under an hour. So, gather your chicken scraps, embrace the magic of the pressure cooker, and prepare to elevate your cooking to a whole new level. Don’t hesitate to experiment with different herbs and spices to create your own signature stock. I encourage you to try this recipe and share your feedback. Imagine a comforting bowl of chicken noodle soup made with your own homemade stock – pure culinary bliss!