
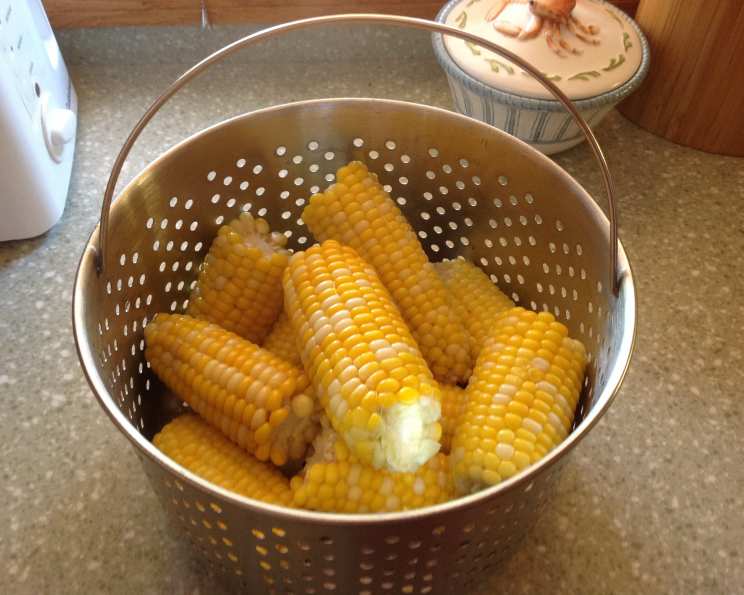
Pressure Cooker Corn on the Cob: Summer Perfection in Minutes
I can still picture my grandmother’s sun-drenched porch, overflowing with freshly picked corn. Every summer, we’d shuck mountains of ears, the sweet kernels gleaming like tiny jewels. While the traditional method of boiling corn on the cob always felt like a summer ritual, standing over a steaming pot on a sweltering day was, shall we say, less than ideal. That’s why discovering the pressure cooker method felt like a culinary revelation – all the deliciousness, none of the heat! This recipe captures that same summery sweetness in a fraction of the time and effort.
Recipe Overview
- Prep Time: 5 minutes
- Cook Time: 2 minutes
- Release Time: ~3 minutes
- Total Time: 10 minutes
- Servings: 3 ears
- Dietary Type: Vegetarian, Vegan, Gluten-Free, Dairy-Free
Ingredients
- 3 ears sweet corn, halved
- 1 cup water
Equipment Needed
- Pressure Cooker (Instant Pot or similar)
- Steamer Basket
Instructions
- Pour 1 cup of water into the bottom of your pressure cooker.
- Insert the steamer basket. I prefer a vegetable steamer that folds up like a little flying saucer when closed, but any type of steamer basket will work. Make sure the basket doesn’t touch the bottom of the pot once the water is added.
- Arrange the halved corn in the steamer basket. In my 5-quart pressure cooker, I can comfortably fit 3 ears of corn, halved. If you have a larger cooker, you can increase the amount of corn and increase the water to 1 ½ cups, or as needed based on the manufacture’s recommendations.
- Secure the pressure cooker lid and ensure it’s properly sealed.
- Cook on high pressure for 2 minutes. Once the pressure cooker reaches high pressure (15 psi), set a timer for precisely 2 minutes.
- After the 2 minutes are up, immediately release the pressure by carefully running the pressure cooker under cold water in your sink until the pressure is fully released and the pin drops. This is known as a quick release.
- Carefully remove the lid and take out the corn. Be cautious of any remaining steam.
- Serve immediately and enjoy!
Expert Tips & Tricks
- Choosing the Right Corn: Look for corn with bright green husks that are tightly wrapped around the cob. The silk (the stringy tassels at the top) should be brown and slightly sticky. Feel the kernels through the husk – they should be plump and abundant.
- Sweetness Factor: For the sweetest corn, cook it as soon as possible after purchase. The sugars in corn convert to starch over time, diminishing its sweetness.
- Don’t Overcook: Two minutes is the magic number for perfectly cooked corn in the pressure cooker. Overcooking will result in mushy corn.
- Customization: Before cooking, you can brush the corn with melted butter (or a vegan alternative) and your favorite seasonings for added flavor. Try garlic powder, chili powder, or smoked paprika.
- Pressure Cooker Size: Adjust the water level according to your pressure cooker’s manual. Ensure the water doesn’t touch the corn in the steamer basket.
- Natural Release vs. Quick Release: While this recipe uses a quick release, you could opt for a natural pressure release (letting the pressure dissipate on its own). However, this will likely result in slightly softer corn. If you prefer a firmer bite, stick to the quick release.
- Preventing Burn Notice: Since we’re using a relatively small amount of liquid, ensure the steamer basket prevents the corn from directly touching the bottom of the pressure cooker pot. This helps prevent a “burn notice” on your Instant Pot.
Serving & Storage Suggestions
Serve your pressure cooker corn on the cob immediately for the best flavor and texture. Slather it with butter, sprinkle it with salt and pepper, or get creative with your favorite toppings. Leftover corn can be stored in an airtight container in the refrigerator for up to 3 days. To reheat, you can steam it again for a minute or two, microwave it briefly, or even grill it for a smoky char. While freezing corn on the cob is possible, it can affect the texture. If you do freeze it, blanch it first for a few minutes, then freeze in a single layer on a baking sheet before transferring to a freezer bag.
Nutritional Information
Note: Nutritional information is an estimate and may vary based on specific ingredients and portion sizes.
| Nutrient | Amount per Serving | % Daily Value |
|---|---|---|
| Calories | 77 kcal | 4% |
| Total Fat | 1.1g | 2% |
| Saturated Fat | 0.2g | 1% |
| Cholesterol | 0mg | 0% |
| Sodium | 16mg | 1% |
| Total Carbohydrate | 17g | 6% |
| Dietary Fiber | 2.4g | 9% |
| Sugars | 3g | – |
| Protein | 3g | 6% |
Variations & Substitutions
- Mexican Street Corn (Elote) Style: After cooking, brush the corn with mayonnaise (or vegan mayo), sprinkle with cotija cheese (or a vegan alternative like crumbled tofu), chili powder, and a squeeze of lime juice.
- Grilled Corn Flavor: For a smoky flavor, grill the pressure-cooked corn for a few minutes after cooking.
- Herb Butter: Before pressure cooking, rub the corn with a compound butter made with fresh herbs like parsley, thyme, and chives.
- Spicy Corn: Add a pinch of cayenne pepper or a dash of hot sauce to the water in the pressure cooker for a subtle kick.
- Different Seasonings: Experiment with different spice blends. Try Cajun seasoning, Italian seasoning, or even a simple blend of garlic powder and onion powder.
FAQs (Frequently Asked Questions)
Q: Can I use frozen corn on the cob?
A: Yes, you can, but you might need to adjust the cooking time slightly. Add an extra minute to the pressure cooking time.
Q: My pressure cooker doesn’t have a steamer basket. What can I use?
A: You can use a trivet to elevate the corn above the water level. Alternatively, create a makeshift steamer basket by crumpling aluminum foil into a ball and placing it in the bottom of the pot.
Q: What if I don’t have a pressure cooker?
A: You can still boil the corn on the cob using the traditional method. Simply bring a pot of water to a boil, add the corn, and cook for 5-7 minutes, or until tender.
Q: Can I cook more than 3 ears of corn at a time?
A: Yes, but make sure not to overcrowd the pressure cooker. If you’re using a larger pressure cooker, you can increase the amount of corn and the amount of water accordingly. The water should not touch the corn.
Q: Why use a pressure cooker instead of boiling?
A: Pressure cooking is faster and more energy-efficient than boiling. It also helps retain more of the corn’s natural sweetness and nutrients.
Final Thoughts
This pressure cooker corn on the cob recipe is a game-changer for busy weeknights and summer barbecues. It delivers perfectly cooked, juicy, and flavorful corn in a fraction of the time compared to traditional methods. I encourage you to try this recipe and experience the magic of pressure cooking for yourself. Feel free to experiment with different seasonings and toppings to create your own signature corn on the cob masterpiece. And please, share your feedback and variations – I’m always eager to learn from fellow culinary adventurers! This corn would pair perfectly with grilled chicken or fish and a refreshing summer salad. Enjoy!