
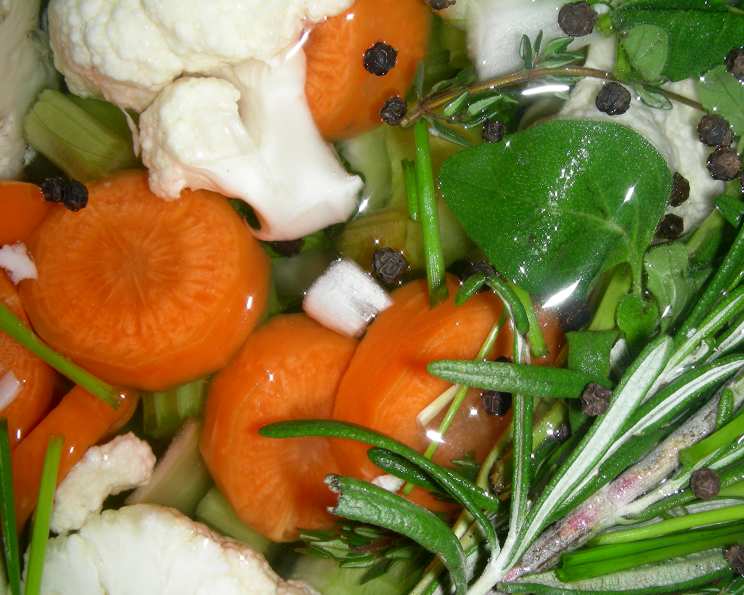
Pressure Cooker Vegetable Stock: A Chef’s Secret for Flavorful Dishes
The aroma of a simmering stock pot is one of my earliest and fondest kitchen memories. My grandmother, a woman who could coax flavor from anything, always had a pot bubbling away on her stove. The scent of carrots, celery, and herbs mingled with the warmth of her kitchen, creating an atmosphere of pure comfort and love. Now, with the convenience of a pressure cooker, I can recreate that same depth of flavor in a fraction of the time, allowing me to nourish my family with homemade goodness, just like she did.
Recipe Overview
- Prep Time: 15 minutes
- Cook Time: 40 minutes
- Total Time: 1 hour
- Yields: Varies depending on pressure cooker size
- Dietary Type: Vegan, Gluten-Free, Dairy-Free, Vegetarian
Ingredients
- 2 tablespoons olive oil
- 4 medium onions, diced
- 3 celery ribs, diced
- 3 garlic cloves, minced
- 3 large carrots, diced
- 6 sprigs rosemary
- 10 sprigs thyme
- 1 teaspoon salt
- Fresh ground pepper to taste
- 20 peppercorns
- 2 cups cauliflower, diced (optional)
- 2 cups green beans, sliced (optional)
Equipment Needed
- Pressure Cooker
- Large Pot
- Fine-mesh sieve or strainer
Instructions
- Begin by setting your pressure cooker to the sauté function. Add the olive oil and let it heat up for a minute or two.
- Add the diced onions, celery, and minced garlic to the pressure cooker. Sauté gently, stirring occasionally, until the vegetables are softened and fragrant, about 5-7 minutes. This step builds a crucial flavor base for the stock.
- Add the diced carrots, rosemary, thyme, salt, fresh ground pepper, and peppercorns to the pressure cooker. If using, add the diced cauliflower and sliced green beans as well.
- Fill the pressure cooker with water until it reaches about 3/4 full. It is extremely important not to overfill the pressure cooker, as this can be a safety hazard. The 3/4 mark allows for proper steam generation and prevents the liquid from sputtering through the pressure release valve.
- Secure the pressure cooker lid, ensuring it is properly sealed. Bring the pressure cooker up to high pressure according to the manufacturer’s instructions.
- Once the pressure cooker reaches high pressure, reduce the heat to maintain pressure and cook for 40 minutes.
- After 40 minutes, turn off the heat and allow the pressure to release naturally. Do not force the pressure release, as this can affect the flavor and clarity of the stock.
- Once the pressure has completely released, carefully open the pressure cooker lid.
- Place a fine-mesh sieve or strainer over a large pot. Carefully pour the contents of the pressure cooker through the sieve, separating the liquid from the vegetables and herbs.
- Once most of the liquid has passed through the sieve, use a spoon or spatula to gently press the vegetables and herbs, extracting as much liquid as possible. This ensures you capture all the delicious flavor. Discard the strained vegetables and herbs.
- Allow the stock to cool completely before storing.
Expert Tips & Tricks
- Roasting the Vegetables: For an even richer, deeper flavor, consider roasting the onions, carrots, and celery in the oven at 400°F (200°C) for about 20-25 minutes before adding them to the pressure cooker. Roasting caramelizes the sugars in the vegetables, adding complexity to the stock.
- Herb Bouquet: Tie the rosemary and thyme sprigs together with kitchen twine to create a simple herb bouquet. This makes it easier to remove them after cooking.
- Mushroom Magic: Adding a handful of dried mushrooms (such as shiitake or porcini) to the stock during cooking will impart an earthy, umami flavor.
- Deglazing the Pot: Before adding the water, deglaze the bottom of the pressure cooker with a splash of white wine or vegetable broth to scrape up any browned bits that have accumulated during the sautéing process. These bits are packed with flavor.
- Fat Skimming: After the stock has cooled, any fat will solidify on the surface. Skim off this layer before storing to create a clearer, healthier stock.
Serving & Storage Suggestions
This homemade vegetable stock is a versatile ingredient that can be used in a variety of dishes, including soups, stews, sauces, risottos, and braised dishes. It can also be used as a flavorful base for vegetarian gravy.
- Refrigerating: Store the cooled stock in an airtight container in the refrigerator for up to 5 days.
- Freezing: For longer storage, freeze the stock in ice cube trays for smaller portions or in freezer-safe containers for larger quantities. Frozen stock will keep for up to 3 months.
- Reheating: Reheat the stock gently on the stovetop or in the microwave until heated through.
Nutritional Information
(Estimated values, will vary based on specific ingredients used)
| Nutrient | Amount per Serving (1 cup) | % Daily Value |
|---|---|---|
| Calories | 30 kcal | 2% |
| Total Fat | 2g | 3% |
| Saturated Fat | 0g | 0% |
| Cholesterol | 0mg | 0% |
| Sodium | 200mg | 8% |
| Total Carbohydrate | 4g | 1% |
| Dietary Fiber | 1g | 4% |
| Sugars | 2g | – |
| Protein | 1g | 2% |
Variations & Substitutions
- Spicy Stock: Add a pinch of red pepper flakes or a small chili pepper to the stock for a touch of heat.
- Asian-Inspired Stock: Use ginger, garlic, lemongrass, and soy sauce to create an Asian-inspired vegetable stock.
- Mediterranean Stock: Add sun-dried tomatoes, oregano, and basil for a Mediterranean twist.
- No-Salt Stock: Omit the salt altogether for a low-sodium option. You can always add salt to your dishes later, as needed.
- Root Vegetable Medley: Instead of just carrot, consider adding parsnip, turnip, or celeriac for enhanced sweetness and earthiness.
FAQs (Frequently Asked Questions)
Q: Can I use vegetable scraps in this recipe?
A: Yes, absolutely! This is a great way to use up vegetable scraps such as onion skins, carrot peels, and celery ends. Just be sure to wash them thoroughly before adding them to the stock. Avoid using cruciferous vegetable scraps (like broccoli and cabbage) as they can make the stock bitter.
Q: Do I need to peel the carrots and onions?
A: No, you don’t need to peel the carrots or onions. However, be sure to wash them thoroughly to remove any dirt or debris.
Q: Can I use dried herbs instead of fresh herbs?
A: Yes, you can substitute dried herbs for fresh herbs. Use about 1 teaspoon of dried herbs for every tablespoon of fresh herbs.
Q: How long does it take for the pressure to release naturally?
A: The amount of time it takes for the pressure to release naturally will vary depending on the pressure cooker and the amount of liquid in the pot. It typically takes between 15 and 30 minutes.
Q: My stock is cloudy. What did I do wrong?
A: Cloudy stock is usually caused by over-boiling or not skimming off the foam and impurities during the simmering process. It doesn’t affect the flavor, but to avoid cloudiness in the future, be sure to keep the heat low and skim off any foam that forms on the surface.
Final Thoughts
Making your own vegetable stock is a simple and rewarding way to elevate your cooking and reduce food waste. It’s far superior to store-bought options, offering a depth of flavor and nutritional value that simply can’t be matched. I encourage you to try this recipe and experiment with different vegetable and herb combinations to create your own signature stock. Don’t be afraid to be creative! And please, share your feedback and any successful variations you discover – I’m always eager to learn from fellow cooks. Happy cooking!