
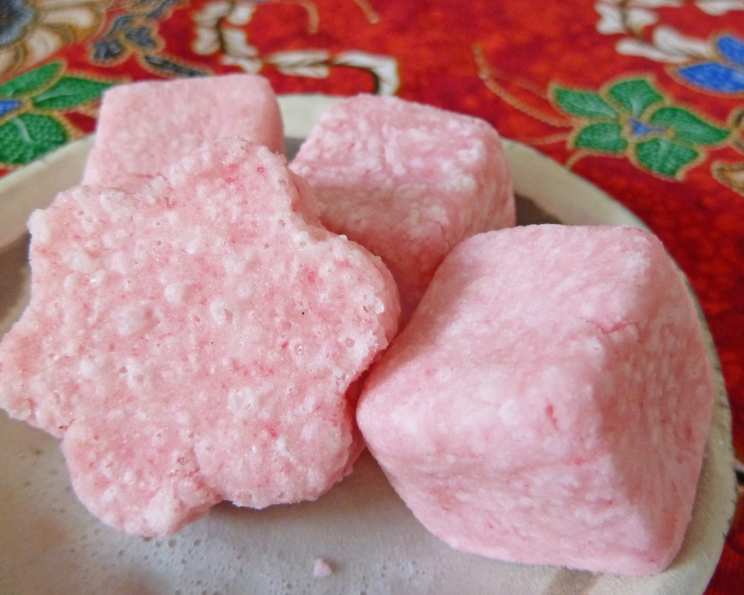
Pretty, Pretty, Well Defined Shaped Fizzy Bath Bombs
I remember when my niece, Lily, was around eight years old, she was obsessed with all things sparkly and colorful. One year for her birthday, instead of another plastic toy, I decided to make her something special: a batch of homemade bath bombs shaped like butterflies and stars. The sheer joy on her face as she watched them fizz and bubble in the tub, turning the water a vibrant pink with glitter swirling around, is a memory I’ll always cherish. It wasn’t just a bath; it was a magical experience, and I knew I had stumbled upon the perfect gift that was both creative and useful. Ever since, I’ve been refining my bath bomb making skills, always on the lookout for the best molds and fragrance combinations to create little moments of bubbly bliss.
Recipe Overview
- Prep Time: 10 minutes
- Dry Time: 48 hours
- Total Time: 48 hours 10 minutes
- Yields: 6 small bombs
- Serves: 6
- Category: DIY Beauty
Ingredients
- 10 tablespoons baking soda
- 5 tablespoons cornstarch
- 5 tablespoons citric acid (can be found in wine-making shops)
- 5 drops fragrance oil (5 droppers full) or 5 drops essential oils (5 droppers full)
- 2 tablespoons cocoa butter, melted
- 2 tablespoons almond oil
- Food coloring
Equipment Needed
- Mixing bowl
- Fork
- Soap or candy molds (avoid shallow designs)
- Parchment paper
- Droppers
- Freezer
Instructions
- Begin by combining all the dry ingredients in a large mixing bowl: the baking soda, cornstarch, and citric acid.
- Carefully remove any lumps from the citric acid and cornstarch. You can do this by either sifting the ingredients through a fine-mesh sieve or by thoroughly stirring them with a fork until they are smooth and evenly distributed. This step ensures a consistent fizzing action in the final bath bomb.
- In a separate, microwave-safe bowl, melt the cocoa butter. This can be done in short intervals (about 30 seconds each), stirring in between, to prevent burning. Once melted, combine it with the almond oil, food coloring, and the fragrance oil or essential oil of your choice. This mixture will add moisturizing properties, scent, and visual appeal to your bath bombs.
- Slowly drizzle the wet ingredients into the mixing bowl with the dry ingredients. The key here is to add the liquid gradually while simultaneously mixing with a fork. This gradual incorporation will “bind” the dry ingredients together without activating the fizzing reaction prematurely.
- Continue to mush and mix the ingredients together with a fork until they are very well combined. Aim for a consistency where the mixture just begins to cling together when pressed, forming a loose ball. It should feel like slightly damp sand. If the mixture is too dry, add a few extra drops of almond oil at a time until you reach the desired consistency. If it’s too wet and starts to fizz, add a bit more baking soda to absorb the excess moisture.
- Now it’s time to pack the mixture into your chosen molds. Soap and candy molds work exceptionally well for this, allowing you to create a variety of shapes and designs. However, avoid using molds with very shallow surfaces or delicate features, such as small leaves or petal tips, as these are more likely to break during handling.
- Firmly pack the mixture into the molds, pressing down to ensure that it is tightly compacted. This will help the bath bombs hold their shape and prevent them from crumbling.
- Once the molds are filled, place them in the freezer for about 2 hours. This step helps to solidify the mixture quickly, making it easier to remove the bath bombs from the molds without damaging them.
- After 2 hours, remove the molds from the freezer. Gently pop the bath bombs out of the molds. If they are sticking, try tapping the mold lightly on a hard surface or gently twisting it to loosen the edges.
- Place the freshly unmolded bath bombs on a sheet of parchment paper. Allow them to dry out completely for 2-3 days in a cool, dry place. This drying period is crucial for ensuring that the bath bombs are fully hardened and will not crumble when used. The longer they dry, the harder they will become.
Expert Tips & Tricks
- Control the fizz: To make your bath bombs extra fizzy, store your citric acid in an airtight container with a desiccant pack (like the ones found in vitamin bottles). Citric acid readily absorbs moisture from the air, which can cause premature fizzing during the mixing process.
- Add some sparkle: For a touch of extra magic, incorporate a pinch of cosmetic-grade glitter into the dry ingredients before adding the wet ingredients.
- Layered effect: Create stunning layered bath bombs by dividing the dry mixture into separate bowls and coloring each with a different shade of food coloring. Then, carefully layer the colored mixtures into the molds.
- Troubleshooting crumbling bath bombs: If your bath bombs are crumbling, it’s likely because they are too dry. Try adding a teaspoon of almond oil or melted cocoa butter at a time to the mixture until it reaches the desired consistency.
- Epsom Salt inclusion: For added muscle relaxation, incorporate 1-2 tablespoons of Epsom salts to your dry ingredients. This offers therapeutic benefits when the bath bomb is used.
Serving & Storage Suggestions
To use your beautiful, handmade bath bombs, simply drop one into a warm bath and watch it fizz and release its fragrance. For optimal storage, keep your bath bombs in an airtight container in a cool, dry place away from direct sunlight. Properly stored, they should last for several months without losing their fizz or fragrance. Avoid storing them in humid environments, such as the bathroom, as this can cause them to prematurely activate.
Nutritional Information
While bath bombs aren’t ingested, here’s an estimated breakdown of the ingredients for informational purposes only:
| Nutrient | Amount per Serving | % Daily Value |
|---|---|---|
| Calories | ~105 kcal | ~5% |
| Total Fat | ~9g | ~14% |
| Saturated Fat | ~3g | ~15% |
| Sodium | ~6260mg | ~260% |
| Total Carbohydrate | ~6g | ~2% |
| Dietary Fiber | ~0g | ~0% |
| Sugars | ~0g | ~0% |
| Protein | ~0g | ~0% |
Note: These values are estimates and can vary based on specific ingredient brands and quantities.
Variations & Substitutions
- Scent Variations: Experiment with different combinations of essential oils to create unique aromatherapy experiences. Lavender and chamomile offer calming benefits, while peppermint and eucalyptus can help to clear sinuses.
- Oil Swaps: If you don’t have almond oil, you can substitute it with other carrier oils, such as jojoba oil, apricot kernel oil, or even olive oil. Each oil has its own unique properties and may affect the final texture of the bath bomb slightly.
- Coloring: Use natural food powders like beetroot powder for pink or spirulina for green for a natural alternative to artificial food coloring.
- Herbal Infusion: Infuse your bath bombs with dried herbs or flower petals for added visual appeal and therapeutic benefits. Add a tablespoon of dried lavender buds, rose petals, or calendula flowers to the dry ingredients before mixing.
FAQs (Frequently Asked Questions)
Q: Why are my bath bombs cracking?
A: Cracking usually indicates that the mixture is too dry. Add a few more drops of almond oil or melted cocoa butter until the mixture is slightly damp.
Q: My bath bombs are fizzing before I even put them in the water! What did I do wrong?
A: This means too much moisture was introduced during the mixing process. Ensure the citric acid and baking soda are completely dry, and add the wet ingredients very gradually.
Q: Can I use regular food coloring instead of cosmetic-grade colorants?
A: While you can use regular food coloring, keep in mind that it may stain your bathtub or skin. Cosmetic-grade colorants are specifically designed to be safe for use in bath products and are less likely to cause staining.
Q: How long will my bath bombs last?
A: When stored in an airtight container in a cool, dry place, your bath bombs should last for several months without losing their fizz or fragrance.
Q: Can I use other types of molds besides soap or candy molds?
A: Absolutely! Get creative with your molds. Cookie cutters pressed into a layer of the mixture or even silicone ice cube trays can work well. Just ensure they are easy to pack and release.
Final Thoughts
Now, go forth and create your own little explosions of fizzy, fragrant joy! Bath bombs are a wonderful way to pamper yourself or to create thoughtful, personalized gifts for friends and family. Don’t be afraid to experiment with different scents, colors, and shapes to discover your own signature bath bomb recipes. I can’t wait to see the beautiful creations you come up with. Share your experiences and feedback – happy fizzing!