
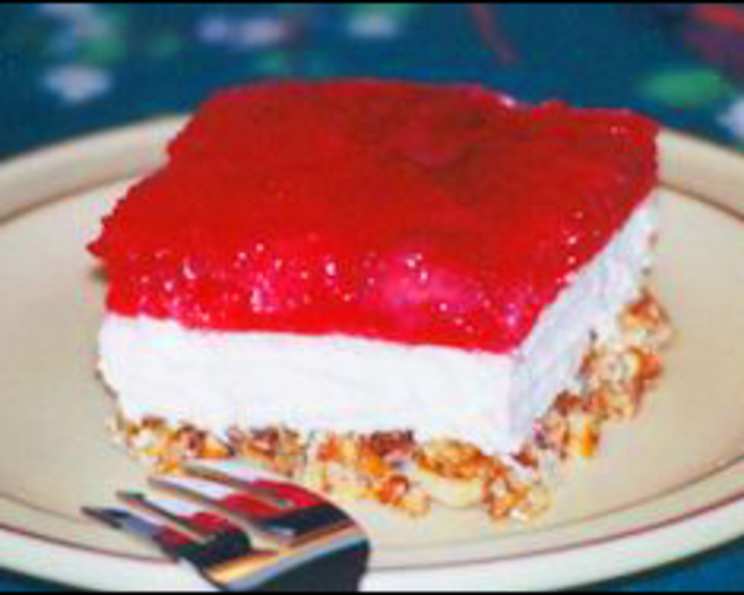
Pretzel Jello Dessert: A Sweet & Salty Nostalgia Trip
I’ll never forget the first time I encountered this quirky concoction. It was at a family reunion, a sea of picnic blankets and boisterous laughter under a scorching summer sun. Amidst the potato salad and grilled burgers, a pink, layered dish stood out like a beacon of sugary delight. That was Pretzel Jello Dessert, and from that moment, it was etched in my memory as the taste of pure, unadulterated joy, a perfect harmony of salty and sweet. Every bite was a reminder of shared moments, playful teasing, and the simple pleasure of being together. This recipe isn’t just about ingredients and instructions; it’s about recreating that feeling of warmth and happiness with every spoonful.
Recipe Overview
- Prep Time: 20 minutes
- Cook Time: 10 minutes (for the pretzel crust)
- Total Time: At least 5 hours (including chilling time, ideally overnight)
- Servings: 12-16
- Yield: One 9×13 inch pan
- Dietary Type: Not suitable for Vegan (contains dairy), can be made Gluten-Free with gluten-free pretzels
Ingredients
- 2 (3 ounce) packages strawberry Jell-O gelatin dessert
- 2 (10 ounce) packages frozen strawberries
- 3-4 cups crushed pretzels
- 3/4 cup melted butter
- 3 tablespoons sugar
- 8 ounces cream cheese, softened
- 1 cup sugar
- 8 ounces Cool Whip, thawed
Equipment Needed
- 9×13 inch baking dish
- Mixing bowls
- Whisk
- Measuring cups and spoons
- Spatula
- Fork (for crushing pretzels)
Instructions
-
Prepare the Jello: In a large bowl, prepare the strawberry Jell-O gelatin dessert according to the package directions, but use a bit less water than recommended, subtracting approximately 1/2 cup total. Add the frozen strawberries to the hot Jello mixture. This will help the strawberries thaw and slightly thicken the Jello. Gently stir until the strawberries are partially thawed and evenly distributed. Place the Jello mixture in the refrigerator until it’s almost set (thickened but not solid). This usually takes about 2-3 hours. Keep a close eye on it; you want it to be thick enough to suspend the other layers without seeping.
-
Make the Pretzel Crust: Preheat your oven to 350°F (175°C). While the oven is heating, crush the pretzels. You can use a food processor for a finer crumb or place them in a zip-top bag and crush them with a rolling pin or the bottom of a glass for a more rustic texture. In a medium bowl, combine the crushed pretzels, melted butter, and 3 tablespoons of sugar. Mix well until all the pretzels are coated with butter and sugar.
-
Bake the Crust: Press the pretzel mixture evenly into the bottom of the 9×13 inch baking dish. Bake in the preheated oven for 8-10 minutes, or until the crust is lightly golden brown and fragrant. Remove from the oven and let the crust cool completely before adding the next layer. This step is crucial; a warm crust will melt the cream cheese layer.
-
Prepare the Cream Cheese Layer: In a large mixing bowl, beat the softened cream cheese with an electric mixer until smooth and creamy. Gradually add the 1 cup of sugar and continue to beat until the mixture is light and fluffy. Gently fold in the thawed Cool Whip until everything is evenly combined. Be careful not to overmix, as this can deflate the Cool Whip.
-
Assemble the Dessert: Once the pretzel crust is completely cooled and the Jello is almost set, you can start assembling the dessert. First, spread the cream cheese mixture evenly over the cooled pretzel crust. Make sure to spread it to the edges to create a nice seal.
-
Add the Jello Layer: Carefully pour the almost-set Jello mixture over the cream cheese layer, spreading it evenly. Gently smooth the top with a spatula.
-
Chill: Cover the dish with plastic wrap and refrigerate for at least 4 hours, or preferably overnight, to allow all the layers to set completely. The longer it chills, the better the flavors will meld together and the easier it will be to slice.
Expert Tips & Tricks
- Don’t skip the “almost set” stage for the Jello: If you pour the Jello on too soon, it will seep into the cream cheese layer, creating a muddy appearance. Patience is key!
- Use high-quality pretzels: The type of pretzel you use will impact the flavor of the crust. Opt for a reputable brand and avoid overly salty pretzels.
- Prevent a soggy crust: Make sure the crust is completely cooled before adding the cream cheese layer. You can even pop it into the freezer for a few minutes to speed up the cooling process.
- Easy slicing: Run a knife under hot water and dry it before each slice to get clean, neat cuts.
- Make ahead: This dessert is perfect for making ahead of time. It can be made up to 2 days in advance and stored in the refrigerator.
Serving & Storage Suggestions
To serve, cut the Pretzel Jello Dessert into squares and arrange them on a platter. You can garnish with fresh strawberries or a dollop of whipped cream for an extra touch. This dessert is best served chilled.
Store any leftovers in the refrigerator, covered tightly with plastic wrap. It will keep for up to 3 days. While freezing is not recommended due to the Jello and Cool Whip affecting the texture, it can be stored in the refrigerator.
Nutritional Information
| Nutrient | Amount per Serving | % Daily Value |
|---|---|---|
| Calories | 355 kcal | 18% |
| Total Fat | 20g | 31% |
| Saturated Fat | 13g | 65% |
| Cholesterol | 45mg | 15% |
| Sodium | 450mg | 19% |
| Total Carbohydrate | 42g | 14% |
| Dietary Fiber | 1g | 4% |
| Sugars | 28g | N/A |
| Protein | 4g | 8% |
Nutritional information is an estimate and may vary based on specific ingredients and portion sizes.
Variations & Substitutions
- Gluten-Free: Use gluten-free pretzels to make this dessert suitable for those with gluten sensitivities.
- Different Fruit: Substitute the strawberry Jell-O and frozen strawberries with other flavors like raspberry, cherry, or even a combination of mixed berries. Adjust the amount of sugar in the cream cheese layer as needed based on the sweetness of the fruit.
- Lower Sugar: Use sugar-free Jell-O and a sugar substitute in the cream cheese layer to reduce the overall sugar content.
- Dairy-Free: Substitute the cream cheese with a plant-based cream cheese alternative, and use a dairy-free whipped topping like coconut whipped cream. Note that the taste and texture may be slightly different.
- Pecan Crust: Add some chopped pecans to the pretzel mixture for a nuttier, richer crust.
- Layered Dessert Cups: For individual servings, layer the pretzel crust, cream cheese mixture, and Jello in clear dessert cups.
FAQs (Frequently Asked Questions)
Q: Can I use fresh strawberries instead of frozen?
A: Yes, you can use fresh strawberries, but make sure to slice them thinly. Using frozen strawberries helps to slightly thicken the Jello and prevents it from becoming too watery.
Q: Can I make this dessert without Cool Whip?
A: While Cool Whip provides the best texture, you can substitute it with homemade whipped cream. However, be aware that homemade whipped cream may not hold its shape as well.
Q: How do I prevent the pretzel crust from getting soggy?
A: Ensuring the crust is completely cooled before adding the cream cheese layer is crucial. You can also brush the cooled crust with a thin layer of melted white chocolate to create a barrier.
Q: Can I use a different size baking dish?
A: Yes, you can use an 8×8 inch baking dish for a thicker dessert. However, you may need to adjust the baking time for the crust.
Q: How long does this dessert last in the refrigerator?
A: Pretzel Jello Dessert will last for up to 3 days in the refrigerator, covered tightly with plastic wrap.
Final Thoughts
Pretzel Jello Dessert is more than just a recipe; it’s a trip down memory lane, a sweet and salty embrace that evokes feelings of nostalgia and comfort. Whether you’re serving it at a summer picnic, a holiday gathering, or simply craving a taste of something special, this dessert is sure to be a crowd-pleaser. So, gather your ingredients, embrace the process, and prepare to be transported back to those cherished moments. Don’t be afraid to experiment with variations and substitutions to create your own unique twist on this classic treat. And most importantly, share it with the people you love, because food is always best enjoyed in good company!