
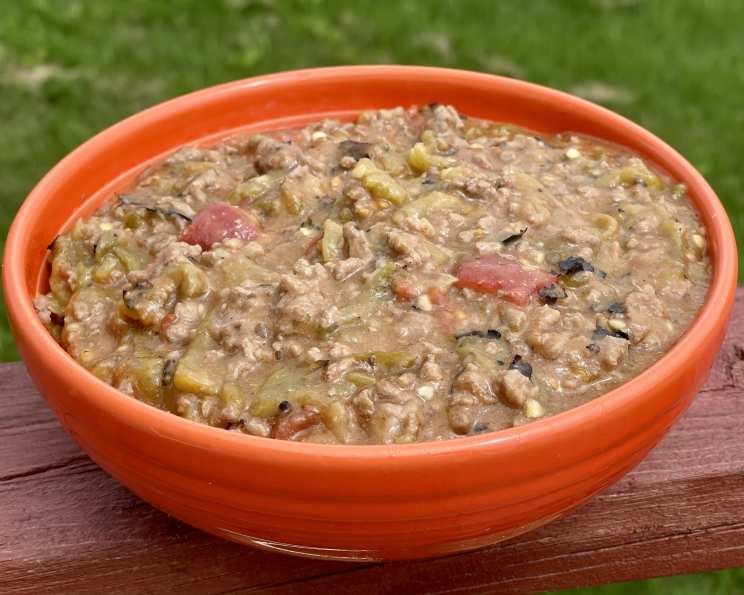
Pueblo Colorado Green Chile: A Taste of Home
The scent alone transports me back to my childhood. I remember standing on a small stool in my grandmother’s kitchen, the air thick with the smoky perfume of roasted green chiles. She’d hum a gentle tune as she carefully peeled the blistered skins, her hands moving with practiced ease. It wasn’t just cooking; it was a ritual, a passing down of heritage, and a pure expression of love poured into every delicious bite of her Pueblo green chile. This recipe, passed down through generations, is more than just a dish; it’s a taste of home.
Recipe Overview
- Prep Time: 20 minutes
- Cook Time: 30 minutes
- Total Time: 50 minutes
- Servings: 8
- Yield: 5-6 cups
- Dietary Type: Varies (can be made gluten-free)
Ingredients
- 1 lb ground beef or 1 lb steak
- 12 Hatch chiles or 12 Pueblo green chilies, roasted and peeled
- 1 (14 ounce) can tomatoes with juice
- 8-10 ounces water
- 1/4 cup oil
- 2 tablespoons flour (can substitute with gluten-free flour)
- Garlic (fresh minced or garlic powder)
- Salt
Equipment Needed
- Large skillet or Dutch oven
- Fork or knife for shredding/chopping chiles
Instructions
-
First, brown and cook the ground beef (or steak, if using) in a large skillet over medium-high heat. If using steak, cut into small, bite-sized pieces before browning. Once cooked through, remove the meat from the skillet and set it aside in a dish. Drain any excess grease from the skillet.
-
Return the skillet to medium heat and add the oil.
-
Stir in the flour to create a roux. This will thicken the chile.
-
Brown the roux to a golden brown color, stirring occasionally to prevent burning. Patience is key here! The darker the roux, the richer the flavor. Do not burn or break the roux – it should be a smooth, consistent color.
-
Once the roux is a beautiful golden brown, add the cooked meat back to the skillet, still on medium heat.
-
Now for the star of the show: the roasted green chiles. Shred the peeled chiles with a fork, or chop them into smaller pieces using a knife. Don’t be afraid to leave some larger pieces for texture.
-
Add the shredded chiles to the skillet with the meat and stir well to combine.
-
Break up the canned tomatoes with your hands or a spoon. Add approximately 2/3 to 3/4 of the tomatoes and their juice to the skillet. Reserve the rest of the tomatoes for another use, or add them to the chile if you prefer a more tomato-forward flavor. Stir well to incorporate the tomatoes.
-
Add 8 ounces of water to the skillet. Stir to combine. If the chile appears too thick, add more water, a little at a time, until you reach your desired consistency. Remember, it will thicken slightly as it simmers.
-
Season the chile with garlic (minced fresh garlic or garlic powder) and salt to taste. Start with a smaller amount and adjust to your preference.
-
Bring the chile to a simmer, then reduce the heat to low. Let the chile simmer gently, stirring occasionally, for at least 10 minutes, or longer for a deeper, more developed flavor. The longer it simmers, the better the flavors meld together.
-
After simmering, remove the chile from the heat and it’s ready to serve!
Expert Tips & Tricks
- Roasting the chiles is crucial for that signature smoky flavor. If you don’t have access to fresh Pueblo or Hatch chiles, you can sometimes find pre-roasted chiles in jars or cans.
- Don’t be afraid to adjust the heat! Pueblo chiles can vary in spiciness. If you prefer a milder chile, remove the seeds and membranes from the chiles before shredding. For more heat, leave them in.
- The roux is a crucial step for thickening the chile. Don’t rush the browning process, as this step adds depth and richness to the overall flavor.
- For a vegetarian version, substitute the ground beef with cooked beans (pinto, black, or kidney beans all work well) or crumbled tofu.
- If you find your chile is too acidic, add a pinch of sugar to balance the flavors.
Serving & Storage Suggestions
Pueblo green chile is incredibly versatile. Serve it as a main course with a side of rice and beans, or use it as a topping for burritos, enchiladas, tacos, or even eggs. It’s also delicious on top of a burger or as a dip for tortilla chips.
Leftover chile can be stored in an airtight container in the refrigerator for up to 3-4 days. For longer storage, freeze in freezer-safe containers for up to 3 months. To reheat, thaw in the refrigerator overnight and then warm on the stovetop or in the microwave. Add a splash of water if needed to restore the original consistency.
Nutritional Information
Note: Nutritional information is an estimate and may vary based on specific ingredients and portion sizes.
| Nutrient | Amount per Serving | % Daily Value |
|---|---|---|
| Calories | 225 kcal | N/A |
| Total Fat | 16g | 23% |
| Saturated Fat | 4g | 21% |
| Cholesterol | 39mg | 12% |
| Sodium | 114mg | 4% |
| Total Carbohydrate | 10g | 3% |
| Dietary Fiber | 2g | 6% |
| Sugars | 5g | N/A |
| Protein | 13g | 24% |
Variations & Substitutions
- Gluten-Free: Use a gluten-free all-purpose flour blend or cornstarch to make the roux.
- Vegetarian/Vegan: Substitute the ground beef with cooked beans, lentils, or crumbled tofu. Ensure you’re using a plant-based oil.
- Spicier: Add a pinch of cayenne pepper or a finely chopped jalapeno pepper to the chile for extra heat.
- Smokier: Add a teaspoon of smoked paprika to enhance the smoky flavor.
- Different Meat: Try using ground pork, chicken, or turkey instead of beef.
- Bean Addition: Mix in a can of drained and rinsed pinto beans or kidney beans for a heartier chile.
FAQs (Frequently Asked Questions)
Q: What kind of green chiles should I use?
A: Pueblo or Hatch chiles are traditional, but any variety of green chile that you can roast and peel will work. Anaheim peppers are a milder option if you prefer less heat.
Q: How do I roast the green chiles?
A: You can roast them under a broiler, on a grill, or directly on a gas stovetop flame until the skins are blackened and blistered. Then, place them in a bowl covered with plastic wrap for about 10 minutes to steam, which makes peeling easier.
Q: Can I make this ahead of time?
A: Absolutely! Pueblo green chile actually tastes better the next day, as the flavors have more time to meld together. Store it in the refrigerator and reheat when ready to serve.
Q: How do I control the spiciness?
A: Remove the seeds and membranes from the chiles for a milder flavor. Leaving them in will result in a spicier chile.
Q: What’s the best way to serve this?
A: Pueblo green chile is incredibly versatile. It’s delicious on its own, as a topping for burritos or enchiladas, or served with eggs and potatoes for breakfast.
Final Thoughts
This Pueblo green chile recipe is more than just a set of instructions; it’s a connection to a rich culinary heritage and a labor of love meant to be shared. I encourage you to try it, experiment with the variations, and make it your own. Gather your family and friends around the table, savor each bite, and experience the warm, comforting flavors of home. And if you have any questions or feedback, please share! I’d love to hear about your experience. Enjoy!