
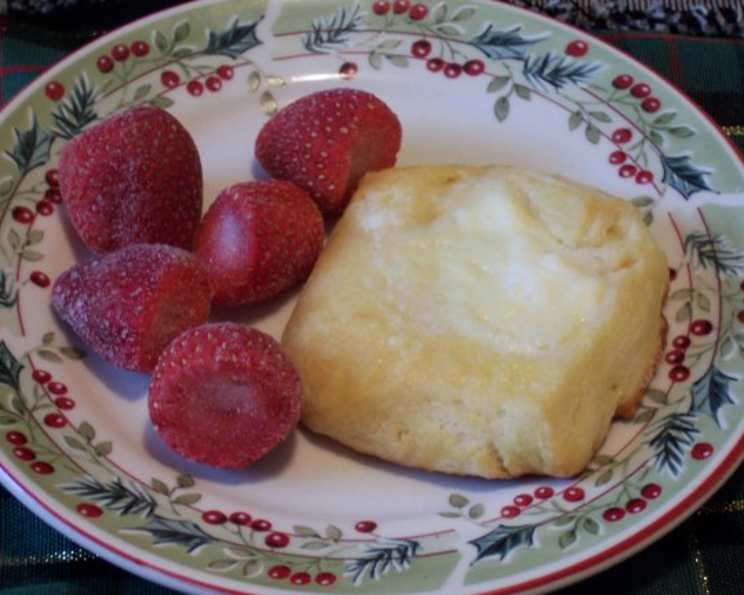
Mastering the Art of Puff Pastry: A Baker’s Journey
The scent of warm butter and yeast is a powerful memory trigger for me. It instantly transports me back to my grandmother’s kitchen, a place of flour-dusted counters and endless possibilities. She had a magical touch with dough, and her Danish pastries were legendary. I remember watching, mesmerized, as she transformed simple ingredients into flaky, golden masterpieces, each bite a perfect blend of sweet and buttery goodness. Though I’ve baked countless other pastries since, nothing quite compares to the satisfaction of creating my own version of her beloved puff pastry.
Recipe Overview
- Prep Time: 45 minutes (plus overnight refrigeration)
- Cook Time: Varies depending on the final pastry
- Total Time: At least 12 hours
- Yields: Approximately 2 pounds of dough
- Dietary Type: Not specified (contains dairy and gluten)
Ingredients
- 1 (1/4 ounce) package dry yeast
- 3/4 cup milk, warm (about 110 degrees F)
- 1 egg, lightly beaten
- 1/4 cup sugar
- 1 teaspoon vanilla extract
- 2 1/2 cups all-purpose flour
- 1 cup butter, cold and cut into small cubes
Equipment Needed
- Large mixing bowl
- Medium mixing bowl
- Rubber spatula
- Plastic wrap
- Heavily floured surface
- Rolling pin
- Flexible metal palate knife
- Refrigerator
Instructions
-
Activate the Yeast: In a large bowl, sprinkle the dry yeast over the warm milk. Allow it to sit for about 5 minutes, or until it becomes foamy. This indicates that the yeast is active and ready to work its magic.
-
Combine Wet Ingredients: Add the lightly beaten egg, sugar, and vanilla extract to the yeast mixture. Whisk gently to combine all the ingredients. Set aside.
-
Prepare the Butter and Flour Mixture: In a medium bowl, toss the diced, cold butter and flour together. Use your fingertips to break down any larger pieces of butter, creating a shaggy mixture. This helps ensure the butter remains cold, which is crucial for creating flaky layers.
-
Combine Wet and Dry: Add the flour and butter mixture to the wet ingredients. Fold gently with a rubber spatula until the flour is just moistened. Do not overmix; a few streaks of flour are perfectly fine. The dough will be quite rough at this stage.
-
First Refrigeration: Transfer the dough to a smaller bowl, cover tightly with plastic wrap, and refrigerate overnight. This long, cold rest allows the gluten to relax and the butter to firm up, which are both essential for creating a tender and flaky pastry.
-
First Book Fold: Remove the dough from the refrigerator. On a heavily floured surface, gently pat the dough into a rectangle approximately 8 x 6 inches. Then, using a rolling pin, roll it out into a larger rectangle, about 14 x 24 inches. Be sure to flour the surface generously to prevent sticking. Brush off any excess flour with a pastry brush. Fold both of the short edges of the rectangle inward, so that they meet in the center, like closing a book. This is called a “book fold.”
-
First Turn and Roll: Rotate the rectangle of dough 1/4 turn on the floured surface. This is called a “turn”. Roll the dough into a rectangle measuring approximately 24 x 12 inches. Again, use a flexible metal spatula to loosen the dough from the surface underneath, reflouring as necessary to prevent sticking.
-
Second Book Fold and Refrigeration: Brush off any excess flour and give the dough another book fold (folding the short ends to the center). Wrap the dough tightly in plastic wrap and refrigerate for 20 to 30 minutes. This brief rest allows the gluten to relax again and the butter to firm up, preventing it from melting during subsequent steps.
-
Repeat Folding and Turning (Twice): Remove the dough from the fridge and repeat the rolling, turning, and folding process two more times. Each time, roll the dough out to a 12 x 24-inch rectangle, followed by a book fold. Remember to keep the surface well-floured and to loosen the dough underneath with a metal spatula.
-
Final Shaping and Refrigeration: After the final turn, shape the dough package into a rectangle measuring approximately 9 x 6 inches. Brush off any excess flour, wrap it tightly in plastic wrap, and refrigerate for up to 2 days. Alternatively, you can freeze it for up to one month.
Expert Tips & Tricks
- Keep it Cold: The key to perfect puff pastry is keeping the butter cold. Work quickly and efficiently to prevent the butter from melting into the dough, which will result in a tough, dense pastry instead of flaky layers. If the butter starts to soften, return the dough to the refrigerator for a longer rest.
- Flour Generously: Don’t be afraid to flour your work surface and rolling pin generously. This will prevent the dough from sticking and tearing, which can disrupt the layering process.
- Use a Flexible Spatula: A long, flexible metal spatula is your best friend when working with puff pastry. Use it to gently loosen the dough from the surface without tearing it.
- Rest is Essential: The refrigeration periods are crucial for allowing the gluten to relax and the butter to firm up. Don’t skip these steps, or you’ll end up with a tough, overworked dough.
- Egg Wash for Shine: Before baking your pastries, brush them with an egg wash (a beaten egg mixed with a little water or milk) for a beautiful golden-brown color and a glossy finish.
Serving & Storage Suggestions
Puff pastry is incredibly versatile and can be used to create a wide variety of sweet and savory treats. Serve your pastries warm from the oven for the best flavor and texture. Store any leftover baked pastries in an airtight container at room temperature for up to 2 days. For longer storage, freeze them in a single layer on a baking sheet, then transfer them to a freezer-safe bag or container. Reheat frozen pastries in a preheated oven at 350°F (175°C) until warmed through. You can also freeze the unbaked puff pastry dough, tightly wrapped, for up to a month. Thaw overnight in the refrigerator before using.
Nutritional Information
Note: Nutritional information is an estimate and may vary based on specific ingredients and portion sizes.
| Nutrient | Amount per Serving | % Daily Value |
|---|---|---|
| Calories | ~300 kcal | ~15% |
| Total Fat | ~20g | ~30% |
| Saturated Fat | ~12g | ~60% |
| Cholesterol | ~50mg | ~17% |
| Sodium | ~100mg | ~4% |
| Total Carbohydrate | ~25g | ~8% |
| Dietary Fiber | ~1g | ~4% |
| Sugars | ~5g | N/A |
| Protein | ~4g | ~8% |
Variations & Substitutions
- Vegan Puff Pastry: While this recipe contains both dairy and eggs, it can be adapted to be vegan with some substitutions. Use a high-quality vegan butter substitute and a flax egg (1 tablespoon ground flaxseed mixed with 3 tablespoons water, allowed to sit for 5 minutes) in place of the regular egg.
- Gluten-Free Puff Pastry: This is more challenging, but not impossible! Use a gluten-free all-purpose flour blend that is specifically designed for baking, and add a binder like xanthan gum to help with structure. Be aware that the texture may be slightly different.
- Flavor Infusions: Experiment with adding flavor extracts to the dough, such as almond, lemon, or orange extract. You can also incorporate spices like cinnamon, nutmeg, or cardamom for a warm, comforting flavor.
FAQs (Frequently Asked Questions)
Q: Why is my puff pastry not puffing up?
A: This is usually caused by the butter melting into the dough. Make sure your ingredients are cold and that you’re not overworking the dough. Adequate rest in the fridge is also essential.
Q: Can I use salted butter instead of unsalted butter?
A: While you can, it’s generally recommended to use unsalted butter so you have more control over the saltiness of the final product. If you use salted butter, reduce the amount of salt in any fillings accordingly.
Q: How do I know when the puff pastry is done?
A: The pastry should be golden brown and puffed up significantly. The layers should be distinct and flaky.
Q: Can I use a stand mixer instead of mixing by hand?
A: While you can use a stand mixer, be very careful not to overmix the dough. Overmixing will develop the gluten too much and result in a tough pastry. A few gentle pulses are all you need.
Q: What fillings work best with puff pastry?
A: The possibilities are endless! Sweet fillings like fruit preserves, custard, chocolate, and nuts all work beautifully. For savory options, try cheese, spinach, mushrooms, or ham.
Final Thoughts
Creating your own puff pastry dough might seem daunting, but with a little patience and attention to detail, you can achieve truly impressive results. This recipe is a testament to the transformative power of simple ingredients and time-honored techniques. Don’t be afraid to experiment with different fillings and flavors, and most importantly, enjoy the process. There’s nothing quite like the satisfaction of pulling a tray of golden, flaky pastries from the oven, knowing you created them from scratch. So, grab your rolling pin, and let the buttery adventure begin! And be sure to share your creations and experiences – I’m always eager to see how this recipe inspires your own baking journey.