
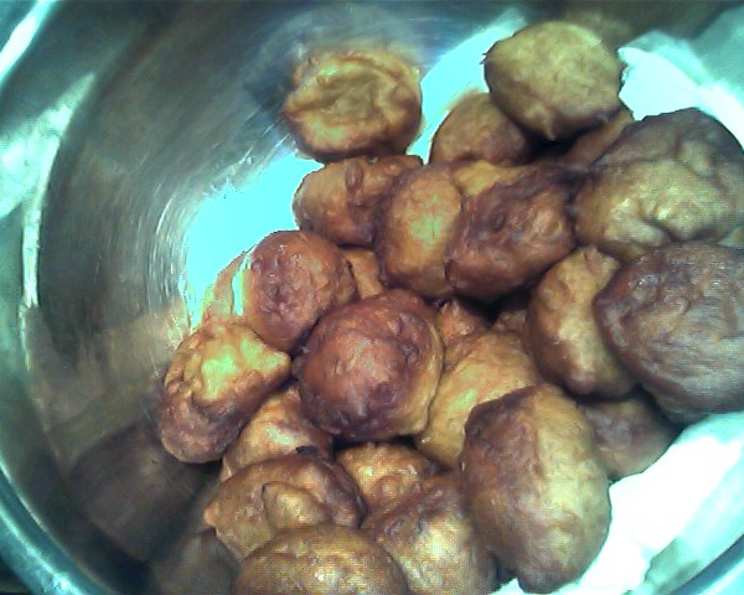
The Irresistible Allure of Puff Puff: A Taste of Home
My earliest memories are filled with the sweet, yeasty aroma of puff puff bubbling in hot oil. My grandmother, a master of simple pleasures, would spend afternoons transforming basic ingredients into golden-brown spheres of joy. We’d gather around her, faces smeared with powdered sugar, vying for the freshest, warmest pieces straight from the pot. It wasn’t just a snack; it was a symbol of love, togetherness, and the magic of transforming simple ingredients into something truly extraordinary. This recipe is my homage to those cherished moments, a tribute to the enduring power of food to evoke memories and create new ones.
Recipe Overview
- Prep Time: 2 hours
- Cook Time: 30 minutes
- Total Time: 2 hours 30 minutes
- Yields: 50-70 puff puff
- Serves: 3-4
- Dietary Type: Vegetarian
Ingredients
- 4 cups warm water
- 2 1/4 ounces active dry yeast
- 6 cups bread flour
- 2 tablespoons sugar
- 1 1/4 cups sugar
- 1 tablespoon salt
- 1 tablespoon vanilla extract
- 1/2 gallon canola oil
Equipment Needed
- Large mixing bowl
- Whisk
- Wooden spoon or spatula
- Saran wrap (plastic wrap)
- Large pot for frying
- Slotted spoon or spider strainer
- Paper towels
Instructions
- In a large bowl, combine the warm water, 2 tablespoons of sugar, and the active dry yeast. Use a whisk to dissolve the mixture completely. This step is crucial for activating the yeast, which gives puff puff its signature airy texture. Whisk for about 2 minutes.
- Let the yeast mixture sit undisturbed for approximately 7 minutes, or until it becomes foamy and bubbly. This indicates that the yeast is active and ready to be used.
- Transfer the bubbly yeast mixture to a large mixing bowl. Add the remaining 1 1/4 cups of sugar, salt, and vanilla extract. Mix well with a whisk until all the ingredients are thoroughly dissolved.
- Gradually sift the bread flour into the wet ingredients. Initially, use a whisk or a wooden spoon to combine the mixture. As the dough thickens, transition to mixing with your hand. This ensures all the ingredients are incorporated and no dry pockets remain.
- Continue mixing the dough with your hand for about 4 minutes until it becomes smooth and elastic, eliminating any lumps. The texture should be slightly sticky but manageable.
- Once the dough is smooth, cover the bowl tightly with saran wrap (plastic wrap) to prevent it from drying out. Place the bowl in a warm area to rise for approximately 1 to 1.5 hours, or until the dough has doubled in size. The warmer the environment, the faster the dough will rise.
- While the dough is rising, prepare the canola oil for frying. Pour about 1/2 gallon of oil into a large pot, ensuring the oil is at least 2 inches deep. This depth is essential for the puff puff to float and cook evenly. Heat the oil over medium heat for about 15 minutes.
- After 15 minutes, test the oil temperature by dropping a small piece of dough into the hot oil. If the dough sizzles and quickly rises to the surface, the oil is ready. If it doesn’t, continue heating the oil for a few more minutes, checking periodically. Once the oil is ready, lower the heat to medium-low to prevent the puff puff from burning on the outside while remaining uncooked inside.
- Once the dough has doubled, gently deflate it. Then, grab a small amount of the dough and gently squeeze it through your thumb and index finger to form small balls. Alternatively, use a small ice cream scoop for a more consistent size.
- Carefully drop the dough balls into the hot oil, ensuring not to overcrowd the pot. Overcrowding will lower the oil temperature and result in greasy puff puff.
- As the puff puff cooks, adjust the heat to maintain a consistent temperature. You want the balls to brown evenly without burning. Cook each batch for about 3-4 minutes, turning them frequently with a slotted spoon or spider strainer to ensure they are golden brown on all sides and cooked through.
- Once the puff puff are golden brown and cooked through, remove them from the oil with a slotted spoon or spider strainer and place them on a plate lined with paper towels to drain excess oil.
- Allow the puff puff to cool for about 30 minutes before serving. This will allow the inside to set and prevent burning your mouth.
Expert Tips & Tricks
- Yeast Activation: Ensure the water isn’t too hot; it should be warm to the touch, but not scalding. Excessive heat will kill the yeast.
- Oil Temperature Control: Maintaining the correct oil temperature is crucial. Too low, and the puff puff will be greasy; too high, and they’ll burn on the outside before cooking through. A candy thermometer can be helpful for monitoring the oil temperature.
- Dough Consistency: The dough should be slightly sticky, but not runny. If it’s too wet, add a tablespoon of flour at a time until you reach the desired consistency.
- Size Matters: Smaller puff puff cook more evenly and are less likely to be raw in the center.
- Batch Cooking: Fry the puff puff in batches to avoid overcrowding the pot and lowering the oil temperature.
- Crispy Coating: For extra crispy puff puff, dust them lightly with flour before frying.
Serving & Storage Suggestions
Puff puff are best served warm and fresh, ideally within a few hours of frying. They can be served plain or dusted with powdered sugar, cinnamon sugar, or even dipped in chocolate sauce. They are a delightful treat on their own or served alongside a cold drink like coke or sprite.
Leftover puff puff can be stored at room temperature in an airtight container for up to 2 days. For longer storage, refrigerate them for up to 5 days. To reheat, warm them in a preheated oven at 350°F (175°C) for a few minutes, or microwave them briefly. Reheating can alter the texture slightly, so it’s best to enjoy them fresh. They can also be frozen for up to a month.
Nutritional Information
| Nutrient | Amount per Serving | % Daily Value |
|---|---|---|
| Calories | 6485.6 kcal | N/A |
| Calories from Fat | 5268 g | 81% |
| Total Fat | 585.4 g | 900% |
| Saturated Fat | 43.4 g | 217% |
| Cholesterol | 0 mg | 0% |
| Sodium | 2352.1 mg | 98% |
| Total Carbohydrate | 291.8 g | 97% |
| Dietary Fiber | 12.5 g | 49% |
| Sugars | 92.8 g | 371% |
| Protein | 34.4 g | 68% |
Variations & Substitutions
- Spice It Up: Add a pinch of nutmeg, cinnamon, or ginger to the dough for a warm, spiced flavor.
- Coconut Puff Puff: Substitute some of the warm water with coconut milk for a richer, more aromatic flavor.
- Gluten-Free: Use a gluten-free flour blend specifically designed for baking, but be aware that the texture may be slightly different.
- Savory Puff Puff: Omit the sugar and vanilla extract and add finely chopped onions, peppers, or herbs for a savory version. These can be served as appetizers or snacks.
- Chocolate Puff Puff: Add cocoa powder to the dough for a chocolatey twist.
FAQs (Frequently Asked Questions)
Q: Why are my puff puff flat and not round?
A: This usually happens if the oil isn’t hot enough or if the dough is too wet. Ensure the oil is at the correct temperature and adjust the dough consistency by adding a little more flour if needed.
Q: How do I prevent my puff puff from being greasy?
A: Maintaining the correct oil temperature is key. The oil should be hot enough to cook the dough quickly, but not so hot that it burns the outside before the inside is cooked. Also, avoid overcrowding the pot, which can lower the oil temperature.
Q: Can I make the dough ahead of time?
A: Yes, you can prepare the dough ahead of time and store it in the refrigerator for up to 24 hours. Bring it back to room temperature before frying.
Q: How do I know when the puff puff are cooked through?
A: The puff puff should be golden brown on all sides and feel firm to the touch. If you’re unsure, you can cut one open to check that the inside is cooked through.
Q: Can I use a different type of oil for frying?
A: Yes, you can use other oils with a high smoke point, such as vegetable oil, groundnut oil, or sunflower oil.
Final Thoughts
Now it’s your turn to experience the joy of making puff puff! Don’t be intimidated; this recipe is forgiving and adaptable. Embrace the process, experiment with different variations, and most importantly, share your creations with loved ones. These golden spheres are more than just a snack; they’re a taste of home, a symbol of love, and a reminder that simple ingredients, when combined with care, can create something truly extraordinary. I’d love to hear about your experiences – share your photos and feedback in the comments below! Enjoy!