
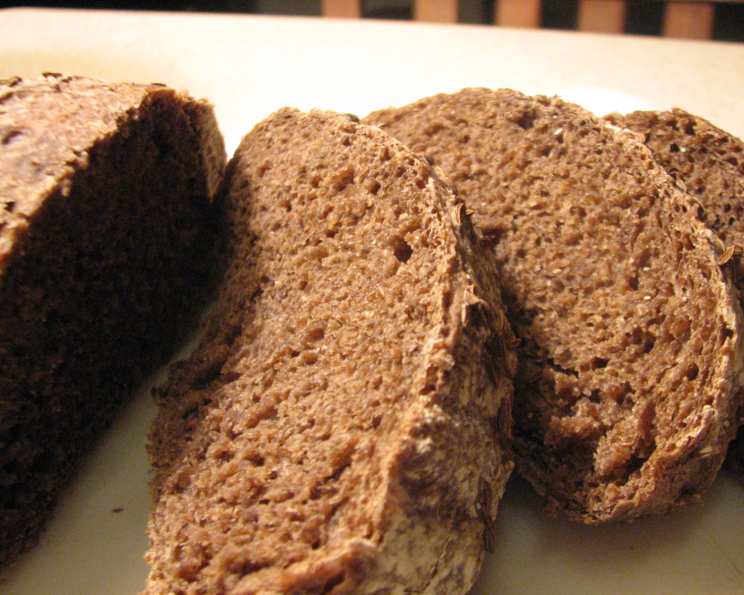
No-Knead Pumpernickel Bread: An Effortless Delight
The scent of pumpernickel always transports me back to my grandmother’s kitchen. She wasn’t much of a baker, but every year, without fail, she’d order a loaf of dark, dense pumpernickel from a local German bakery for the holidays. The deep, earthy aroma, paired with the slightly sweet molasses notes, was a comforting constant amidst the holiday chaos. Sliced thin and slathered with cream cheese and smoked salmon, it was a simple pleasure that defined the season. Now, I can easily recreate those cherished memories with this incredibly easy, no-knead recipe.
Recipe Overview
- Prep Time: 15 minutes
- Cook Time: 35-40 minutes
- Total Time: 2 hours 5 minutes (plus chilling time)
- Servings: 12
- Yield: 2 one-pound loaves
- Dietary Type: Vegetarian
Ingredients
- 3/4 tablespoon yeast
- 2 1/2 teaspoons coarse salt (or 2 teaspoons table salt)
- 2 tablespoons molasses
- 1 cup lukewarm coffee
- 1/2 cup lukewarm water
- 1 1/2 tablespoons cocoa powder
- 1/2 cup rye flour
- 2 3/4 cups unbleached all-purpose flour
- Cornmeal, for pizza peel
Equipment Needed
- Large plastic storage container with lid
- Wooden spoon
- Serrated knife
- Pizza peel (or parchment paper)
- Cast-iron skillet or broiler tray
- Baking stone
- Pastry brush
- Cooling rack
Instructions
- Mixing and Storing the Dough: Note: If measuring flour rather than weighing, avoid packing it down into the measuring cup. Gently scoop the flour and level it off with a knife or spatula for a more accurate measurement.
- In a large plastic storage container (with a lid), combine the all-purpose flour, rye flour, yeast, cocoa powder, and salt.
- In a separate bowl or measuring cup, whisk together the lukewarm coffee, lukewarm water, and molasses.
- Pour the liquid mixture into the dry ingredients all at once and mix thoroughly with a wooden spoon.
- If the dough becomes too difficult to mix with the spoon, dampen your hands with water and use them to press the mixture together. Note: Kneading is not necessary for this no-knead recipe.
- Continue mixing (either with the spoon or your wet hands) until all the ingredients are uniformly moist and there are no dry patches of flour. The dough will be quite wet and loose.
- Cover the container with a lid (not airtight) that fits well. Let the mixture rise at room temperature until it begins to collapse slightly or at least flattens on top. This will take approximately 2 hours, but the exact time will vary depending on the room temperature and the initial water temperature. Longer rising times, up to about 5 hours, will not harm the result.
- You can use a portion of the dough any time after this initial rise. However, fully refrigerated dough is less sticky and easier to work with than dough at room temperature. For best results, refrigerate the dough overnight, or at least for 3 hours, before shaping a loaf.
- The bread’s flavor improves with longer refrigeration, so it’s recommended to wait at least 24 hours before baking the first loaf! The dough can be stored in the refrigerator for up to 8 days.
- Baking (One 1-pound loaf): Using wet hands, reach into the refrigerated dough and pull up one end. With a serrated knife, cut off a 1-pound piece of dough (about the size of a grapefruit).
- Without using any flour, shape the dough into a ball by stretching the surface of the dough around to the bottom on all sides, rotating the ball a quarter-turn as you go. Then, form the ball into an oval-shaped loaf.
- Place the shaped loaf on a pizza peel generously dusted with cornmeal (or on a sheet of parchment paper). Allow the loaf to rest for 40 minutes to 1 1/2 hours. The exact proofing time will vary depending on the temperature of your kitchen. A shorter resting time will result in a denser crumb.
- Twenty minutes before baking, place an empty cast-iron skillet or broiler tray on the bottom shelf of the oven and a baking stone on the center shelf. Preheat the oven to 400 degrees F (200 degrees C).
- Using a pastry brush, paint the top of the loaf with a cornstarch wash (made by whisking 1 tbsp cornstarch with 1/4 cup cold water, then simmering until thickened). Sprinkle the top with caraway seeds, if desired.
- With a serrated bread knife, slash the top of the loaf with deep diagonal cuts.
- Carefully slide the loaf directly onto the hot baking stone. Immediately pour 1 cup of hot tap water into the hot cast-iron skillet or broiler tray and quickly close the oven door. The steam created by the water will help create a crisp crust.
- Bake for approximately 35-40 minutes, or until the loaf is firm and the internal temperature reaches 198-200 degrees F (92-93 degrees C). Larger or smaller loaves will require adjustments to the baking time. Use a thermometer to accurately measure the internal temperature.
- Allow the baked pumpernickel loaf to cool completely on a cooling rack before slicing and serving.
Expert Tips & Tricks
- For a more intense rye flavor: Increase the amount of rye flour to 1 cup and reduce the all-purpose flour accordingly. Be mindful that this might result in a slightly denser loaf.
- The importance of steam: Don’t skip the step of adding water to the hot skillet. The steam is crucial for creating that beautiful, shiny, and crackly crust that is characteristic of pumpernickel.
- Don’t be afraid of a sticky dough: This dough is meant to be wet and loose. Resist the urge to add more flour during the mixing and shaping stages. Using wet hands will help prevent the dough from sticking to you.
- Shaping the loaf: If you find the dough too sticky to shape freeform, you can bake it in a greased loaf pan.
- Adjusting the bake: If the crust is browning too quickly, tent the loaf loosely with aluminum foil for the last 10-15 minutes of baking.
Serving & Storage Suggestions
This pumpernickel bread is delicious served in a variety of ways. It pairs perfectly with smoked salmon, cream cheese, and dill, echoing my grandmother’s holiday tradition. It’s also fantastic for sandwiches, especially with hearty fillings like pastrami, corned beef, or roasted vegetables. For a simple appetizer, try toasted slices topped with goat cheese and a drizzle of honey.
Store cooled pumpernickel bread at room temperature in a bread box or wrapped tightly in plastic wrap for up to 3 days. To extend its shelf life, store it in the refrigerator for up to a week. For longer storage, freeze the bread (either whole or sliced) in a freezer-safe bag for up to 2 months. Thaw frozen bread at room temperature before serving. To refresh slightly stale bread, lightly toast it or wrap it in foil and warm it in a low oven (300°F/150°C) for 10-15 minutes.
Nutritional Information
| Nutrient | Amount per Serving | % Daily Value |
|---|---|---|
| Calories | 132.9 kcal | N/A |
| Calories from Fat | 4 g | 3% |
| Total Fat | 0.5 g | 0% |
| Saturated Fat | 0.1 g | 0% |
| Cholesterol | 0 mg | 0% |
| Sodium | 487.6 mg | 20% |
| Total Carbohydrate | 28.3 g | 9% |
| Dietary Fiber | 1.7 g | 6% |
| Sugars | 2 g | 7% |
| Protein | 3.9 g | 7% |
Note: Nutritional information is an estimate and may vary based on specific ingredients and portion sizes.
Variations & Substitutions
- Gluten-Free Pumpernickel: Substitute the all-purpose flour with a high-quality gluten-free all-purpose flour blend. You may need to adjust the amount of liquid slightly, as gluten-free flours can absorb moisture differently.
- Spiced Pumpernickel: Add 1 teaspoon of caraway seeds, 1/2 teaspoon of fennel seeds, and 1/4 teaspoon of ground coriander to the dough for a more complex flavor profile.
- Sweet Pumpernickel: Increase the amount of molasses to 1/4 cup for a sweeter loaf.
- Coffee Substitute: If you don’t have coffee on hand, you can use hot water with a teaspoon of instant coffee granules dissolved in it.
FAQs (Frequently Asked Questions)
Q: Why is the dough so wet?
A: This no-knead pumpernickel dough is intentionally quite wet. The high hydration level is what allows the bread to develop its open crumb structure without kneading.
Q: Can I use active dry yeast instead of instant yeast?
A: Yes, you can. Use the same amount of active dry yeast, but proof it in the lukewarm water for 5-10 minutes before adding it to the dry ingredients.
Q: How do I know when the bread is done?
A: The bread is done when it is firm to the touch and the internal temperature reaches 198-200 degrees F (92-93 degrees C). A hollow sound when you tap the bottom of the loaf is also a good indicator.
Q: Can I skip the refrigeration step?
A: While you can bake the bread without refrigeration, refrigerating the dough for at least 3 hours (or preferably overnight) allows the flavors to develop more fully and makes the dough easier to handle.
Q: What can I use instead of a baking stone?
A: If you don’t have a baking stone, you can use a baking sheet. Preheat the baking sheet in the oven before placing the loaf on it. The crust may not be quite as crisp as it would be with a baking stone, but it will still be delicious.
Final Thoughts
This no-knead pumpernickel bread recipe truly demystifies the art of bread baking. Its ease of preparation and the depth of flavor it delivers will impress even the most experienced bakers. I encourage you to give it a try. Experiment with variations, adjust the ingredients to your liking, and most importantly, share your creation with friends and family. There’s nothing quite like the satisfaction of slicing into a loaf of homemade bread and enjoying the fruits of your labor. Pair a slice with a hearty soup or a creamy cheese for the ultimate comforting experience.