
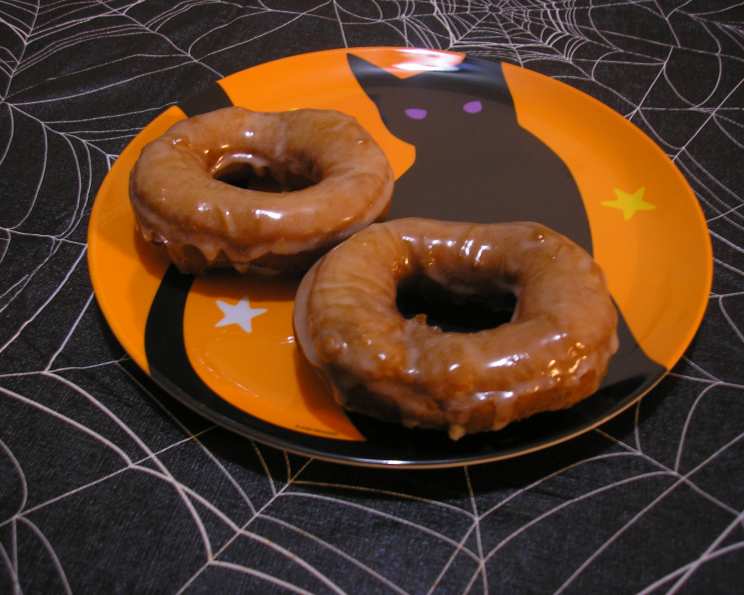
Pumpkin Buttermilk Doughnuts: A Taste of Autumn in Every Bite
The first crisp day of fall always brings a specific craving: doughnuts. Not just any doughnuts, though. It has to be those doughnuts – the ones my grandmother made every October. I can still picture her, flour dusting her apron, a mischievous glint in her eye as she’d let me sneak a taste of the sugary coating before they were even cool. These Pumpkin Buttermilk Doughnuts are my attempt to recreate that pure, unadulterated joy, that perfect marriage of pumpkin spice and a tender, tangy crumb that just screams autumn.
Recipe Overview
- Prep Time: 25 minutes (plus 3 hours minimum chill time)
- Cook Time: 5 minutes per batch
- Total Time: 3 hours 30 minutes (minimum)
- Yields: 18 doughnuts
- Dietary Type: Vegetarian
Ingredients
- 3 ½ cups sifted all-purpose flour
- 1 tablespoon baking powder
- 1 teaspoon baking soda
- 1 teaspoon salt
- ½ teaspoon cinnamon
- ½ teaspoon ground ginger
- ¼ cup butter, room temperature
- ¾ cup sugar
- 2 large eggs
- ⅔ cup pumpkin puree
- ⅔ cup buttermilk
- ½ cup firmly packed brown sugar
- ½ cup sugar
- Vegetable oil, for deep frying
Equipment Needed
- Medium bowl
- Large bowl
- Electric mixer
- Plastic wrap
- Paper bag
- Lightly-floured surface
- 3 ½ inch round doughnut cutter
- Floured board
- Deep fryer
- Slotted spoon
- Paper towels
- Wire racks
Instructions
-
Begin by preparing the dry ingredients. In a medium bowl, resift the flour along with the baking powder, baking soda, salt, cinnamon, and ginger. This ensures a light and airy texture. Set aside.
-
In a large bowl, cream the butter until it’s light and fluffy. An electric mixer works best for this step.
-
Gradually add the ¾ cup of sugar to the creamed butter and beat until the mixture is light and fluffy, approximately 6 minutes. This step is crucial for incorporating air into the dough, resulting in a tender crumb.
-
Add the eggs, one at a time, beating well after each addition. Make sure each egg is fully incorporated before adding the next.
-
Beat in about ¼ cup of the dry ingredients from your medium bowl. This helps to prevent the wet ingredients from curdling.
-
Add the pumpkin puree and buttermilk and mix until thoroughly combined. Don’t overmix at this stage; just ensure everything is evenly distributed.
-
Gradually add the remaining dry ingredients and stir until just blended. Be careful not to overmix, as this can lead to tough doughnuts. The dough will be slightly sticky, which is perfectly fine.
-
Cover the bowl tightly with plastic wrap and refrigerate for at least 3 hours, or preferably overnight. This resting period allows the gluten to relax and the flavors to meld together, resulting in a more tender and flavorful doughnut.
-
Prepare the sugar coating while the dough chills. Combine the brown sugar and ½ cup of sugar in a paper bag. Set this aside.
-
After the dough has chilled, roll it out on a lightly floured surface to a thickness of ¼ to ⅓ inch. Don’t roll it too thin, or the doughnuts will be flat.
-
Using a lightly floured 3 ½ inch round doughnut cutter, cut out the doughnuts and the doughnut holes.
-
Transfer the cut doughnuts and holes to a floured board as they are cut. This prevents them from sticking.
-
Gather up the scraps of dough, gently reroll, and repeat the cutting process until all the dough is used.
-
Let the cut doughnuts stand for 10 minutes. This allows them to relax and puff up slightly before frying.
-
Heat about 4 inches of vegetable oil in a deep fryer or large pot to 360°F (180°C). Use a thermometer to ensure the oil is at the correct temperature. If the oil is too hot, the doughnuts will burn on the outside before they are cooked through. If the oil is too cool, they will absorb too much oil and become greasy.
-
Carefully add about ¼ of the doughnuts and holes to the hot oil and cook until golden brown, turning once, about 5 minutes total. Avoid overcrowding the fryer, as this will lower the oil temperature.
-
Transfer the fried doughnuts and holes to paper towels using a slotted spoon to drain excess oil for about 3 minutes.
-
Immediately transfer the drained doughnuts and holes to the paper bag containing the sugar mixture and shake to coat completely. The warmth of the doughnuts will help the sugar adhere.
-
Arrange the sugar-coated doughnuts and holes on wire racks to cool completely.
-
Repeat the frying and coating process until all the doughnuts and holes have been fried and coated.
-
The doughnuts can be prepared a day ahead. Store them in an airtight container at room temperature.
Expert Tips & Tricks
- Temperature is key: Maintaining the correct oil temperature is crucial for perfectly cooked doughnuts. Use a thermometer and adjust the heat as needed.
- Don’t overmix: Overmixing the dough will develop the gluten, resulting in tough doughnuts. Mix until just combined.
- Chill time is essential: The chilling period allows the gluten to relax and the flavors to meld. Don’t skip this step!
- Use fresh oil: Fresh vegetable oil will ensure the best flavor and prevent the doughnuts from tasting greasy.
- For a glaze instead of sugar: If you prefer a glaze, whisk together powdered sugar with milk or cream until you reach your desired consistency, then dip the cooled doughnuts.
Serving & Storage Suggestions
Serve these Pumpkin Buttermilk Doughnuts warm or at room temperature with a cup of coffee, tea, or a glass of cold milk. They are best enjoyed fresh, but can be stored in an airtight container at room temperature for up to 2 days. They can also be frozen for longer storage. To freeze, place cooled doughnuts in a single layer on a baking sheet and freeze until solid. Then transfer them to an airtight container or freezer bag. Reheat in a warm oven for a few minutes before serving.
Nutritional Information
| Nutrient | Amount per Serving | % Daily Value |
|---|---|---|
| Calories | 201.5 kcal | N/A |
| Calories from Fat | N/A | 15% |
| Total Fat | 3.4 g | 5% |
| Saturated Fat | 1.9 g | 9% |
| Cholesterol | 30.6 mg | 10% |
| Sodium | 298 mg | 12% |
| Total Carbohydrate | 39.4 g | 13% |
| Dietary Fiber | 0.7 g | 2% |
| Sugars | 20.4 g | N/A |
| Protein | 3.6 g | 7% |
Note: Nutritional information is an estimate and may vary based on specific ingredients and cooking methods.
Variations & Substitutions
- Gluten-Free: Substitute the all-purpose flour with a gluten-free flour blend, ensuring it contains xanthan gum for binding.
- Spice it up: Add a pinch of nutmeg or cloves to the dry ingredients for a more complex spice flavor.
- Maple Glaze: Instead of the sugar coating, try a maple glaze made with maple syrup, powdered sugar, and a touch of vanilla extract.
- Chocolate Chips: Stir chocolate chips into the dough before chilling for a chocolate pumpkin delight.
FAQs (Frequently Asked Questions)
Q: Why do I need to sift the flour?
A: Sifting the flour ensures that it is light and airy, which helps to create a more tender doughnut. It also helps to remove any lumps.
Q: Can I use canned pumpkin pie filling instead of pumpkin puree?
A: No, canned pumpkin pie filling contains added spices and sugar, which will alter the flavor and texture of the doughnuts. Use plain pumpkin puree.
Q: My dough is too sticky to roll out. What should I do?
A: Add a little more flour to your work surface and lightly dust the dough. Be careful not to add too much flour, as this can make the doughnuts tough. You can also chill the dough for a longer period of time.
Q: How do I know when the oil is hot enough?
A: Use a thermometer to ensure the oil reaches 360°F (180°C). If you don’t have a thermometer, you can test the oil by dropping a small piece of dough into it. If the dough sizzles and turns golden brown within a few minutes, the oil is ready.
Q: Can I bake these instead of frying them?
A: While frying provides the most authentic doughnut texture, you can try baking them at 350°F (175°C) for about 10-12 minutes, or until golden brown. However, the texture will be more cake-like than a traditional fried doughnut.
Final Thoughts
There’s just something magical about the aroma of these Pumpkin Buttermilk Doughnuts wafting through the kitchen. Whether you’re a seasoned baker or just starting out, I encourage you to give this recipe a try. Don’t be intimidated by the frying – with a little patience and attention to detail, you’ll be rewarded with the most delicious, homemade doughnuts imaginable. Share them with your loved ones and create some sweet memories of your own! And if you try any variations, let me know how they turned out! I’d love to hear your feedback.