
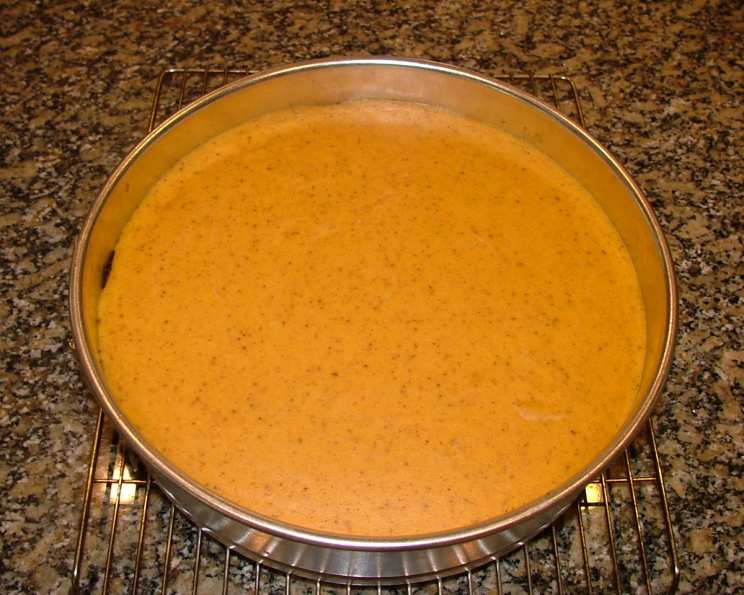
Decadent Dairy-Free and Gluten-Free Pumpkin Cheesecake
I’ll never forget the first time I tasted a truly exceptional cheesecake. It was at a small bakery in Vienna, Austria. The baker, a kindly old woman with flour dusting her apron, presented me with a slice that was both rich and delicate. Every year as the leaves turn and pumpkins dot the fields, I’m reminded of that slice and I yearn to recreate that same sense of comforting indulgence, but with a festive fall twist and mindful of dietary needs. This dairy-free and gluten-free pumpkin cheesecake is my attempt to bring that memory to life, ensuring everyone can enjoy a slice of autumn bliss.
Recipe Overview
- Prep Time: 20 minutes
- Cook Time: 1 hour
- Total Time: 8 hours 50 minutes (includes cooling and chilling)
- Servings: 12
- Yield: 1 cheesecake
- Dietary Type: Dairy-Free, Gluten-Free
Ingredients
For the Crust:
- 8 ounces gluten-free gingersnap cookies (Midel brand recommended)
- 3 tablespoons Earth Balance butter (or other dairy-free butter alternative)
For the Filling:
- 16 ounces dairy-free cream cheese (room temperature)
- 1/4 cup dairy-free sour cream
- 1 (15 ounce) can pumpkin puree
- 3/4 cup unrefined sugar
- 1 teaspoon vanilla extract
- 1 teaspoon ground cinnamon
- 1/2 teaspoon ground ginger
- 1/2 teaspoon ground cloves
- 1/2 teaspoon ground nutmeg
- 1 teaspoon cinnamon (additional, for flavor layering)
- 1/4 teaspoon salt
- 2 1/2 tablespoons cornstarch
- 3 eggs (room temperature, beaten)
Equipment Needed
- 9-inch springform pan
- Food processor
- Mixing bowl
- Electric mixer (handheld or stand mixer)
- Large roasting pan
- Aluminum foil
- Kettle or pot for boiling water
- Cooling rack
- Knife
Instructions
-
Preheat your oven to 325 degrees Fahrenheit (160 degrees Celsius).
-
Prepare your springform pan: Rub a stick of dairy-free butter along the bottom and sides of the pan to prevent sticking. Then, melt the remaining dairy-free butter.
-
Make the crust: Grind the gluten-free gingersnap cookies in a food processor until they are finely ground into crumbs. Add the melted dairy-free butter to the cookie crumbs and pulse until the mixture is evenly moistened.
-
Press the crust into the pan: Press the cookie crumb mixture firmly and evenly into the bottom of the prepared springform pan. You can use the bottom of a measuring cup or your fingers to create a compact and even crust.
-
Bake the crust: Bake the crust in the preheated oven for 15-20 minutes, or until it is slightly golden brown. Remove the crust from the oven and let it cool completely.
-
Prepare the water bath: While the crust is baking and cooling, boil water in a kettle or pot. A water bath is essential for a creamy cheesecake texture.
-
Make the filling: In a large mixing bowl, beat the dairy-free cream cheese with an electric mixer until it is smooth and creamy. Make sure your cream cheese is at room temperature to avoid lumps.
-
Add sugar: Gradually add the unrefined sugar to the cream cheese and mix until well combined and smooth.
-
Incorporate sour cream: Add the dairy-free sour cream to the mixture and mix until just combined. Be careful not to overmix.
-
Add pumpkin: Add the pumpkin puree to the mixture and mix until well combined. Ensure the pumpkin puree is smooth with no stringy bits.
-
Add the eggs, vanilla and spices: In a separate bowl, lightly beat the eggs until just combined. Add the eggs to the pumpkin mixture along with the vanilla extract, ground cinnamon, ground ginger, ground cloves, ground nutmeg, additional cinnamon and salt. Mix until everything is well incorporated.
-
Add the cornstarch: Add the cornstarch to the filling mixture and mix until just combined. Cornstarch helps to stabilize the cheesecake and prevent cracking.
-
Pour filling into crust: Pour the pumpkin cheesecake filling into the cooled crust, spreading it evenly.
-
Prepare the water bath: Wrap the bottom of the springform pan tightly with heavy-duty aluminum foil to prevent water from seeping in. Place the foil-wrapped springform pan inside a larger roasting pan.
-
Add boiling water: Carefully pour the boiling water into the roasting pan, filling it to about halfway up the sides of the springform pan. This creates a water bath that helps to bake the cheesecake evenly and prevent cracking.
-
Bake the cheesecake: Carefully place the roasting pan with the cheesecake and water bath into the preheated oven. Bake for approximately 1 hour, or until the outer edges of the cheesecake are set but the center is still slightly jiggly.
-
Cool in the oven: After 1 hour, turn off the oven and prop the oven door slightly open with a wooden spoon or oven mitt. Leave the cheesecake in the oven for another 30 minutes to allow it to cool gradually. This helps to prevent cracking.
-
Cool on a rack: After 30 minutes, remove the cheesecake from the oven and carefully remove it from the water bath. Place the cheesecake on a wire rack to cool completely.
-
Chill: Once the cheesecake has cooled to room temperature, run a thin knife or offset spatula around the edges of the springform pan to loosen the cheesecake. Cover the cheesecake with plastic wrap and refrigerate for at least 6-8 hours, or preferably overnight, until it is firm and fully chilled.
-
Serve: Once the cheesecake is thoroughly chilled and firm, remove the sides of the springform pan. Slice and serve.
Expert Tips & Tricks
- Room Temperature Ingredients are Key: Make sure the dairy-free cream cheese and eggs are at room temperature. This helps to create a smooth and creamy filling. If you forget to take the cream cheese out ahead of time, you can microwave it in 15-second intervals, being careful not to melt it.
- Don’t Overmix the Filling: Overmixing can incorporate too much air into the filling, which can cause the cheesecake to puff up during baking and then crack as it cools. Mix until just combined.
- Preventing Cracks: The water bath is crucial for preventing cracks, but also make sure not to open the oven door frequently during baking.
- Gingerbread Crust Alternative: For a deeper flavor, consider adding a teaspoon of molasses to the crust mixture.
- Spice it Up: Adjust the spices to your liking. A pinch of cardamom or allspice would also work well in this recipe.
Serving & Storage Suggestions
Serve the dairy-free and gluten-free pumpkin cheesecake chilled. It’s delicious on its own, but you can also garnish it with a dollop of dairy-free whipped cream, a sprinkle of cinnamon, or a drizzle of maple syrup.
- Storage: Store leftover cheesecake in the refrigerator, covered tightly with plastic wrap or in an airtight container, for up to 3-4 days.
- Freezing: You can freeze the cheesecake for longer storage. Wrap it tightly in plastic wrap and then in foil. Frozen cheesecake will last for up to 2 months. Thaw it in the refrigerator overnight before serving.
- Reheating: Cheesecake is best served cold, so reheating is not necessary.
Nutritional Information
(Estimates based on ingredients used; actual values may vary.)
| Nutrient | Amount per Serving | % Daily Value |
|---|---|---|
| Calories | 350 kcal | 18% |
| Total Fat | 20g | 31% |
| Saturated Fat | 11g | 55% |
| Cholesterol | 100mg | 33% |
| Sodium | 330mg | 14% |
| Total Carbohydrate | 35g | 12% |
| Dietary Fiber | 1g | 4% |
| Sugars | 20g | N/A |
| Protein | 6g | 12% |
Variations & Substitutions
- Crust Variations: For a nuttier crust, try using almond flour and a touch of maple syrup to bind it together.
- Sweetener Options: You can substitute coconut sugar for the unrefined sugar.
- Spice It Up: Consider adding a pinch of cardamom, allspice, or even a dash of cayenne pepper for a hint of warmth.
- Vegan Option: Use a flax egg replacer instead of eggs, combined with vegan cream cheese and sour cream.
- Coconut Cream: For an even richer flavor, use full-fat coconut cream instead of dairy-free sour cream.
FAQs (Frequently Asked Questions)
Q: Can I use a different gluten-free cookie for the crust?
A: Yes, you can use any gluten-free cookie you like, but gingersnaps add a warm, spicy flavor that complements the pumpkin.
Q: Can I make this cheesecake without a water bath?
A: While you can, the water bath is highly recommended to prevent cracking and ensure a creamy texture. If you skip it, reduce the baking time slightly and watch carefully.
Q: My cheesecake cracked, what did I do wrong?
A: Cracking can be caused by overbaking, rapid temperature changes, or overmixing the filling. A water bath and gradual cooling can help prevent this.
Q: How can I tell when the cheesecake is done?
A: The outer edges should be set, but the center should still have a slight jiggle. It will continue to set as it cools.
Q: Can I make this ahead of time?
A: Absolutely! In fact, this cheesecake is best made a day ahead to allow the flavors to meld and the texture to firm up.
Final Thoughts
I hope this recipe helps you create a delicious and inclusive dessert that everyone can enjoy. Don’t be afraid to experiment with the spices and flavors to make it your own. Whether you’re catering to dietary restrictions or simply seeking a healthier alternative, this dairy-free and gluten-free pumpkin cheesecake is a guaranteed crowd-pleaser. Happy baking, and please share your creations and feedback! Perhaps pair it with a warm mug of spiced apple cider for the ultimate autumn experience.