
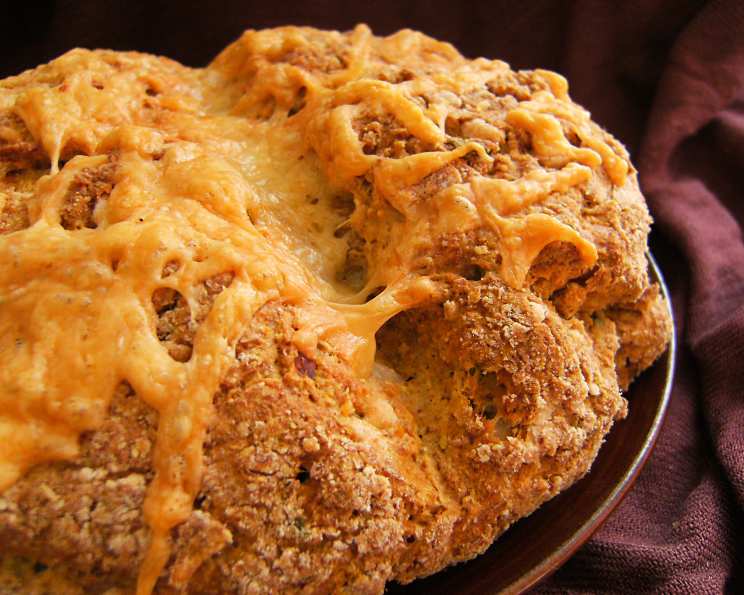
Pumpkin & Chive Damper: A Taste of the Australian Outback
The scent of baking damper always takes me back to my childhood camping trips in the Blue Mountains. We’d build a crackling fire, and while the stars began to pepper the inky sky, my grandfather would whip up a batch of damper right there in the embers. The simple, rustic bread, slightly charred and smoky, was the perfect accompaniment to stories told under the vast Australian sky. This pumpkin and chive version adds a touch of sweetness and herbaceousness that elevates the classic, making it a truly unforgettable treat.
Recipe Overview
- Prep Time: 20 minutes
- Cook Time: 25 minutes
- Total Time: 45 minutes
- Yields: 1 loaf
- Dietary Type: Vegetarian
Ingredients
- 2 cups self-raising flour
- 30g butter
- ½ cup mashed pumpkin
- ¼ cup grated tasty cheese
- 2 tablespoons snipped chives
- Salt & pepper, to taste
- ¼ cup milk
- 1 egg
- Extra grated cheese, for topping
Equipment Needed
- Large mixing bowl
- Baking tray
- Measuring cups and spoons
- Sifter
- Pastry blender or fingertips
- Pastry brush
Instructions
-
Preheat your oven to 220°C (430°F). This initial high heat will give the damper a lovely crust.
-
Sift the self-raising flour into a large mixing bowl. Sifting ensures a light and airy texture.
-
Add the butter to the flour. Using your fingertips, or a pastry blender, rub the butter into the flour until the mixture resembles breadcrumbs. This creates pockets of fat that will steam during baking, resulting in a tender crumb.
-
Add the mashed pumpkin, grated tasty cheese, snipped chives, salt, and pepper to the bowl.
-
In a separate small bowl, combine the egg and milk. Whisk lightly to break up the egg.
-
Pour the egg and milk mixture into the dry ingredients. Mix quickly with a wooden spoon or your hands until a soft dough forms. Be careful not to overmix; a slightly shaggy dough is perfect. Overmixing will develop the gluten, leading to a tough damper.
-
Turn the dough out onto a lightly floured surface. Knead it very gently – just a few times – to bring it together into a round shape. Avoid vigorous kneading.
-
Place the round of dough onto a lightly greased baking tray.
-
Brush the top of the damper with a little milk. This will help it achieve a beautiful golden-brown color.
-
Sprinkle the top generously with extra grated cheese.
-
Bake in the preheated oven for 10 minutes.
-
Reduce the oven temperature to 180°C (350°F) and continue baking for a further 15-20 minutes, or until the damper sounds hollow when tapped on the base. The hollow sound indicates that it is cooked through. If the top is browning too quickly, you can loosely tent it with foil.
-
Remove from the oven and let cool slightly on the baking tray before serving.
-
Serve warm, preferably with butter.
Expert Tips & Tricks
- Pumpkin Perfection: The type of pumpkin you use will influence the flavor. Butternut pumpkin tends to be sweeter, while Queensland Blue offers a more earthy taste. Feel free to experiment! Ensure your mashed pumpkin is not too watery; drain off any excess liquid.
- Cheese Choices: While tasty cheese is a classic, you can substitute it with other cheeses like cheddar, Gruyere, or even feta for a tangier flavor.
- Chive Substitute: If you don’t have fresh chives, you can use dried chives (about 1 tablespoon) or finely chopped green onions.
- Make-Ahead Tip: You can prepare the dough ahead of time and keep it in the refrigerator for up to 24 hours. Bring it to room temperature before baking.
- Doneness Check: If you’re unsure if the damper is cooked through, insert a wooden skewer into the center. If it comes out clean, it’s ready.
- Crispy Crust Boost: For an extra crispy crust, try placing a baking sheet filled with water on the bottom rack of the oven. This creates steam, which helps the crust develop a beautiful texture.
Serving & Storage Suggestions
Pumpkin and chive damper is best served warm, straight from the oven, with a generous slather of butter. It’s a delicious accompaniment to soups, stews, or even grilled meats. Leftover damper can be stored in an airtight container at room temperature for up to 2 days or in the refrigerator for up to 4 days. To reheat, wrap the damper in foil and warm it in a low oven (150°C/300°F) for about 10-15 minutes, or until heated through. You can also toast slices of damper for a quick and easy snack. For longer storage, freeze the damper whole or in slices. Wrap tightly in plastic wrap and then foil. Frozen damper can be stored for up to 2 months. Thaw overnight in the refrigerator before reheating.
Nutritional Information
| Nutrient | Amount per Serving | % Daily Value |
|---|---|---|
| Calories | 320 kcal | 16% |
| Total Fat | 18g | 28% |
| Saturated Fat | 11g | 55% |
| Cholesterol | 75mg | 25% |
| Sodium | 580mg | 24% |
| Total Carbohydrate | 35g | 12% |
| Dietary Fiber | 2g | 8% |
| Sugars | 3g | 6% |
| Protein | 8g | 16% |
Note: Nutritional information is an estimate and may vary based on specific ingredients and portion sizes.
Variations & Substitutions
- Gluten-Free Damper: Substitute the self-raising flour with a gluten-free self-raising flour blend. You may need to add a binding agent like xanthan gum to help with the texture.
- Vegan Damper: Replace the butter with vegan butter or coconut oil. Use plant-based milk (like almond or soy milk) instead of dairy milk, and replace the egg with a flax egg (1 tablespoon of flaxseed meal mixed with 3 tablespoons of water). Omit the cheese or use a vegan cheese alternative.
- Herb Variations: Experiment with different herbs like rosemary, thyme, or sage instead of chives.
- Sweet Damper: Add a tablespoon of sugar to the dough for a slightly sweeter damper. You could also include dried fruit like raisins or sultanas.
- Savory Additions: Add chopped bacon, sun-dried tomatoes, or olives for a more savory flavor profile.
- Spiced Damper: Add a pinch of cinnamon, nutmeg, or ginger to the dough for a warm and comforting flavor.
FAQs (Frequently Asked Questions)
Q: Can I use canned pumpkin puree for this recipe?
A: Yes, you can use canned pumpkin puree as long as it’s 100% pumpkin and not pumpkin pie filling (which contains added spices and sugar).
Q: My damper is browning too quickly. What should I do?
A: If the top of the damper is browning too quickly, loosely tent it with aluminum foil during the last 10-15 minutes of baking.
Q: How do I know when the damper is cooked through?
A: The damper is cooked through when it sounds hollow when tapped on the base. You can also insert a wooden skewer into the center; if it comes out clean, it’s ready.
Q: Can I make this recipe without cheese?
A: Yes, you can omit the cheese if you prefer. The damper will still be delicious.
Q: Can I freeze the damper?
A: Yes, you can freeze the damper whole or in slices. Wrap it tightly in plastic wrap and then foil. Thaw overnight in the refrigerator before reheating.
Final Thoughts
Now, go forth and create your own memories around this simple, yet satisfying Pumpkin & Chive Damper. Whether you’re baking it in your kitchen oven or over an open fire, I hope this recipe brings you a taste of the Australian Outback and a sense of warmth and connection. Don’t be afraid to experiment with different flavors and ingredients to make it your own. And most importantly, enjoy the process of baking and sharing this delicious bread with loved ones. I’d love to hear about your experience, so please share your thoughts and variations in the comments below! Perhaps pair it with a hearty beef stew for a truly unforgettable meal. Happy baking!