
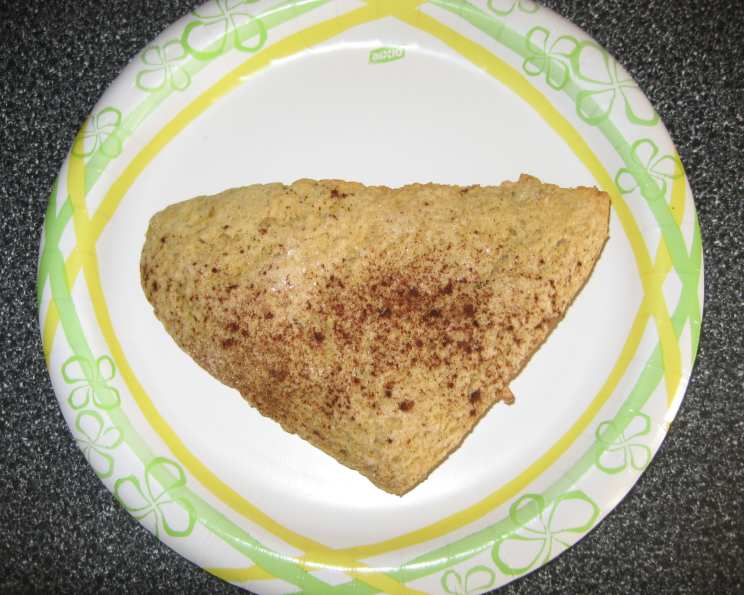
Pumpkin Ginger Scones: A Slice of Autumn Comfort
I’ll never forget the scent of ginger and cinnamon wafting through my grandmother’s kitchen every fall. As a child, those aromas signaled cozy afternoons spent huddled near the fireplace, watching the leaves change color outside. One of her signature treats was a batch of spiced scones, warm from the oven and slathered with butter. While her original recipe was a closely guarded secret, this Pumpkin Ginger Scone recipe captures the essence of those cherished memories, bringing the warmth and spice of autumn to every bite.
Recipe Overview
- Prep Time: 15 minutes
- Cook Time: 10-12 minutes
- Total Time: 25-27 minutes
- Servings: 12
- Yield: 12 scones
- Dietary Type: Vegetarian
Ingredients
- ½ cup sugar, plus 1 tablespoon set aside
- 2 cups flour
- 2 teaspoons baking powder
- 1 teaspoon ground cinnamon
- ½ teaspoon baking soda
- ½ teaspoon salt
- 5 tablespoons butter, divided (4 tablespoons cold, 1 tablespoon melted)
- 1 egg
- ½ cup pumpkin puree
- ¼ cup sour cream
- ½ teaspoon grated fresh ginger
Equipment Needed
- Large Mixing Bowl
- Small Mixing Bowl
- Measuring Cups and Spoons
- Pastry Cutter or Fork
- Baking Sheet
- Rolling Pin
- Pastry Brush
- Grater
Instructions
-
Preheat your oven to 425°F (220°C). Set aside 1 tablespoon of sugar in a small bowl – this will be used for topping the scones later.
-
In a large mixing bowl, combine the remaining ½ cup sugar, flour, baking powder, cinnamon, baking soda, and salt. Whisk together until well combined.
-
Cut in 4 tablespoons of cold butter using a pastry cutter or a fork. Work the butter into the dry ingredients until the mixture resembles coarse crumbs. The smaller the butter pieces, the flakier the scones will be!
-
In a small bowl, beat the egg lightly with a fork.
-
Add the pumpkin puree, sour cream, and freshly grated ginger to the beaten egg. Whisk until the mixture is smooth and well combined. The ginger adds a subtle warmth that complements the pumpkin beautifully.
-
Pour the wet ingredients (pumpkin mixture) into the large bowl with the dry ingredients. Stir gently until a soft dough forms and the dough just starts to pull away from the sides of the bowl. Be careful not to overmix the dough, as this can result in tough scones.
-
Turn the dough out onto a well-floured surface. Knead the dough gently about 10 times. The dough should be just combined and slightly sticky.
-
Using a rolling pin, roll the dough into a 9×6 inch rectangle. Try to keep the thickness even throughout.
-
Cut the rectangle into 6 equal squares. Then, cut each square in half diagonally to form 12 triangles. These will be your scones.
-
Place the scones onto an ungreased baking sheet, leaving a little space between each one.
-
Melt the remaining 1 tablespoon of butter. Brush the tops of each scone triangle with the melted butter. This will give them a beautiful golden-brown color and a slightly crisp top.
-
Sprinkle the tops of the buttered scones generously with the reserved 1 tablespoon of sugar. The sugar adds a touch of sweetness and a delightful crunch.
-
Bake in the preheated oven for 10-12 minutes, or until the scones are golden brown. Keep a close eye on them during the last few minutes to prevent burning. A toothpick inserted into the center should come out clean.
-
Remove the scones from the oven and let them cool on the baking sheet for a few minutes before transferring them to a wire rack to cool completely (or serve warm, if you can’t resist!).
Expert Tips & Tricks
- Cold Butter is Key: Using cold butter is crucial for creating flaky scones. If the butter is too soft, it will melt into the flour and result in dense, rather than flaky scones. You can even freeze the butter for 15 minutes before using it for an extra boost of flakiness.
- Don’t Overmix: Overmixing the dough develops the gluten in the flour, which can lead to tough scones. Mix just until the ingredients are combined. A few streaks of flour are okay.
- Ginger Intensity: Adjust the amount of grated ginger to your preference. For a more pronounced ginger flavor, use up to 1 teaspoon. Ground ginger can be substituted if fresh is not available.
- Make-Ahead Tip: The dry ingredients can be mixed together in advance and stored in an airtight container. When ready to bake, add the wet ingredients and proceed with the recipe.
- Preventing Dryness: If your oven tends to dry out baked goods, place a pan of hot water on the bottom rack while the scones are baking. The steam will help keep them moist.
Serving & Storage Suggestions
Serve these Pumpkin Ginger Scones warm, preferably with a dollop of clotted cream, a drizzle of honey, or a pat of butter. They are also delicious with a cup of hot tea or coffee.
Leftover scones can be stored in an airtight container at room temperature for up to 2 days. For longer storage, freeze them individually wrapped in plastic wrap for up to 2 months. To reheat, thaw completely and warm in a preheated oven at 350°F (175°C) for 5-7 minutes, or until heated through. You can also microwave them briefly, but they may lose some of their crispness.
Nutritional Information
| Nutrient | Amount per Serving | % Daily Value |
|---|---|---|
| Calories | 169.1 kcal | N/A |
| Calories from Fat | 57 g | 34% |
| Total Fat | 6.4 g | 9% |
| Saturated Fat | 3.8 g | 19% |
| Cholesterol | 32.5 mg | 10% |
| Sodium | 252.8 mg | 10% |
| Total Carbohydrate | 25.1 g | 8% |
| Dietary Fiber | 0.7 g | 2% |
| Sugars | 8.5 g | N/A |
| Protein | 2.9 g | 5% |
Variations & Substitutions
- Spice it Up: Add a pinch of ground cloves, nutmeg, or allspice to the dry ingredients for a richer, more complex flavor profile.
- Gluten-Free: Substitute the all-purpose flour with a gluten-free blend designed for baking. You may need to add a bit more liquid to achieve the right consistency.
- Dairy-Free: Use a dairy-free sour cream alternative, such as cashew or coconut cream. Replace the butter with a vegan butter substitute.
- Nuts and Seeds: Add ¼ cup of chopped pecans, walnuts, or pumpkin seeds to the dough for added texture and flavor.
- Maple Glaze: Instead of brushing with melted butter and sprinkling with sugar, drizzle the baked scones with a maple glaze made from powdered sugar and maple syrup.
FAQs (Frequently Asked Questions)
Q: Can I use canned pumpkin pie filling instead of pumpkin puree?
A: No, pumpkin pie filling contains added sugar and spices, which will alter the flavor and texture of the scones. Use plain pumpkin puree for the best results.
Q: My scones are dry. What did I do wrong?
A: Overbaking is the most common cause of dry scones. Make sure to check them frequently during the last few minutes of baking. Overmixing the dough can also contribute to dryness.
Q: Can I freeze the scone dough before baking?
A: Yes, you can freeze the unbaked scone triangles. Place them on a baking sheet and freeze until solid. Then, transfer them to a freezer bag or container. Bake from frozen, adding a few extra minutes to the baking time.
Q: What can I use if I don’t have sour cream?
A: You can substitute Greek yogurt or plain yogurt for the sour cream. The texture will be slightly different, but the flavor will be similar.
Q: How do I keep the sugar from burning on top of the scones?
A: If you notice the sugar is browning too quickly, tent the scones with a piece of aluminum foil during the last few minutes of baking.
Final Thoughts
I hope this recipe brings you as much joy as it brings me, conjuring images of crisp autumn days and cozy evenings. Don’t be afraid to experiment with different spices and flavor combinations to create your own signature Pumpkin Ginger Scones. Share your creations with friends and family, and let me know what you think in the comments below! These scones pair perfectly with a warm spiced latte or a crisp apple cider – the perfect autumnal treat. Happy baking!