
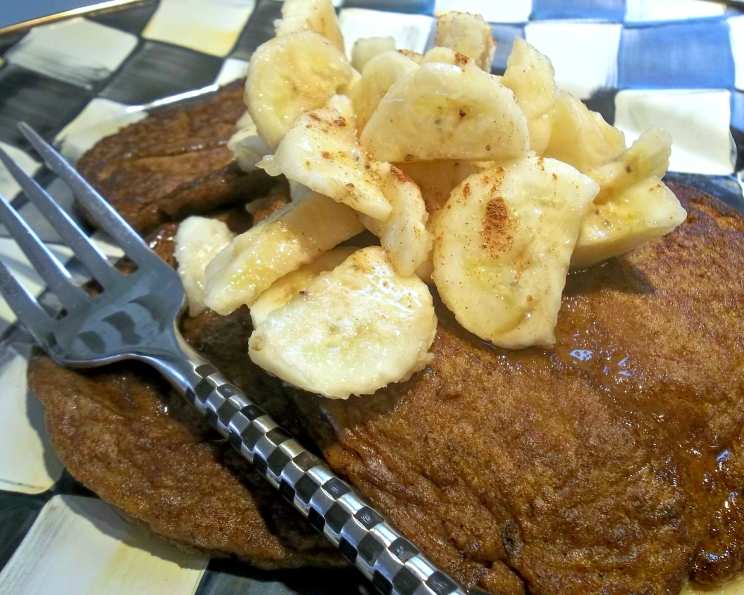
Pumpkin Pancakes – No Flour!
The aroma of pumpkin pie spice always transports me back to crisp autumn mornings in Vermont, where I spent countless hours helping my grandmother prepare for the local harvest festival. While her famous pumpkin pies were the undisputed stars, I remember sneaking bites of the leftover pumpkin puree, dreaming of other ways to capture that warm, comforting flavor. These flourless pumpkin pancakes, surprisingly light and fluffy, evoke those same cherished memories with every bite, but without the fuss of a traditional batter. They’re a wonderfully simple and satisfying way to start any day, especially when the leaves start to turn.
Recipe Overview
- Prep Time: 5 minutes
- Cook Time: 15 minutes
- Total Time: 20 minutes
- Servings: 2
- Dietary Type: Gluten-Free, Grain-Free (potentially Dairy-Free, see ingredients)
Ingredients
- 4 eggs
- ½ cup canned pumpkin (not pumpkin pie filling)
- 1 teaspoon pure vanilla extract
- 1 mashed banana (ripe)
- 1 teaspoon pumpkin pie spice
- 1 teaspoon cinnamon
- ¼ teaspoon baking soda
- 2 teaspoons butter (plus extra for pan frying) or 2 teaspoons coconut oil (plus extra for pan frying) – Choose butter for a richer flavor or coconut oil to keep it dairy-free.
Equipment Needed
- Large bowl
- Whisk or fork
- Large skillet or griddle
- Spatula
Instructions
-
In a large bowl, whisk together the eggs, canned pumpkin, mashed banana, and pure vanilla extract until well combined. Make sure the banana is fully mashed to avoid lumps in the batter.
-
In a separate small bowl, sift together the pumpkin pie spice, cinnamon, and baking soda. Sifting ensures that the spices are evenly distributed throughout the batter and that the baking soda can properly react. This helps create a lighter, fluffier pancake.
-
Add the dry ingredients (the spiced flour mixture) to the wet ingredients (the pumpkin and egg mix) and gently fold them together until just combined. Avoid overmixing, as this can lead to tough pancakes.
-
Melt 2 teaspoons of butter (or coconut oil) in a microwave or in a small saucepan. Once melted, stir the melted butter (or oil) into the pancake batter. This adds richness and helps with the cooking process.
-
Heat a large skillet or griddle over medium heat. Once heated, grease the skillet lightly with additional butter or coconut oil. This prevents the pancakes from sticking and ensures even browning.
-
Spoon the pancake batter onto the prepared skillet to form pancakes of your desired size. Keep in mind these pancakes can be more delicate than traditional flour-based pancakes.
-
Cook the pancakes for approximately 2-3 minutes per side, or until golden brown and cooked through. Watch for small bubbles to begin forming on the surface of the pancake, as this is a good indication that it is ready to be flipped.
-
Carefully flip the pancakes using a thin, flexible spatula. This can be a bit challenging due to the absence of flour. Work gently and try to get the spatula under the entire pancake before flipping.
-
Continue cooking for another 1-2 minutes, or until the pancakes are cooked through and golden brown on the second side. A toothpick inserted into the center should come out clean.
-
Serve immediately with your favorite toppings.
Expert Tips & Tricks
- Don’t Overmix: Overmixing develops the gluten in flour-based pancakes. Since these are flourless, overmixing isn’t as detrimental, but it can still affect the texture. Gentle folding is best.
- Temperature Control: Medium heat is crucial. Too high, and the pancakes will burn on the outside before cooking through. Too low, and they’ll be pale and soggy.
- Patience is Key: These pancakes require a little more patience than traditional pancakes, especially when flipping. Let them cook undisturbed until they are firm enough to flip easily.
- Batter Consistency: If your banana is particularly large or ripe, the batter might be a little too thin. In that case, you can add a tablespoon or two of almond flour or coconut flour for added structure, although that would no longer make it 100% flourless.
- Spice It Up: Experiment with other spices like nutmeg, ginger, or cardamom to customize the flavor profile.
- Make-Ahead Tip: While best served fresh, you can make the batter ahead of time and store it in the refrigerator for up to 24 hours.
Serving & Storage Suggestions
These pumpkin pancakes are best served warm, straight from the skillet. Garnish with a pat of butter and a sprinkle of cinnamon, or opt for sliced bananas and a drizzle of maple syrup. For a more decadent treat, add a dollop of whipped cream or a scoop of vanilla ice cream.
Leftover pancakes can be stored in an airtight container in the refrigerator for up to 3 days. To reheat, warm them gently in a skillet over low heat, in a microwave, or in a toaster oven. For longer storage, you can freeze the pancakes in a single layer on a baking sheet, then transfer them to a freezer bag. Frozen pancakes can be reheated in the oven or toaster.
Nutritional Information
| Nutrient | Amount per Serving | % Daily Value |
|---|---|---|
| Calories | 262 kcal | N/A |
| Fat | 13.8g | N/A |
| Saturated Fat | 5.8g | N/A |
| Cholesterol | 382.1mg | N/A |
| Sodium | 481.7mg | N/A |
| Carbohydrate | 21.1g | N/A |
| Fiber | 4.1g | N/A |
| Sugars | 10g | N/A |
| Protein | 14g | N/A |
Note: Nutritional information is an estimate and may vary based on specific ingredients and serving sizes.
Variations & Substitutions
- Dairy-Free: Use coconut oil instead of butter for cooking and serving. Choose a dairy-free whipped cream or yogurt for topping.
- Sweetener: Adjust the sweetness by adding a touch of maple syrup, honey, or your favorite sugar substitute to the batter.
- Spice it Up: Add a pinch of ground ginger, nutmeg, or cloves to the batter for a more intense pumpkin pie flavor.
- Chocolate Chips: Fold in a handful of chocolate chips for a delicious chocolate-pumpkin combination.
- Nutty Texture: Add chopped pecans or walnuts to the batter for added crunch and flavor.
- Savory Pancakes: Omit the vanilla and cinnamon, and add a pinch of salt and pepper for a savory twist. Serve with a fried egg and some crumbled bacon.
FAQs (Frequently Asked Questions)
Q: Are these pancakes really flourless?
A: Yes! This recipe uses mashed banana and eggs as the binding agents, eliminating the need for flour.
Q: Why are my pancakes sticking to the skillet?
A: Make sure your skillet is properly preheated and well-greased. Use a non-stick skillet if you have one.
Q: Can I use pumpkin pie filling instead of pumpkin puree?
A: No, pumpkin pie filling contains added sugar and spices that will alter the flavor and texture of the pancakes. Use plain canned pumpkin puree.
Q: My batter seems too thin. What should I do?
A: Let the batter rest for a few minutes to allow the baking soda to activate. If it’s still too thin, add a tablespoon of almond flour or coconut flour to thicken it slightly.
Q: Can I double the recipe?
A: Yes, you can easily double or triple this recipe to feed a larger crowd. Just be sure to adjust the cooking time accordingly.
Final Thoughts
I hope you enjoy these surprisingly delightful, flourless pumpkin pancakes as much as I do! They’re a testament to the fact that sometimes the simplest recipes are the most satisfying. Don’t be afraid to experiment with different spices and toppings to create your own unique version. And if you have any tips or tricks of your own, I’d love to hear them in the comments below. Happy cooking! These pancakes pair perfectly with a warm cup of spiced apple cider for the ultimate fall breakfast experience.