
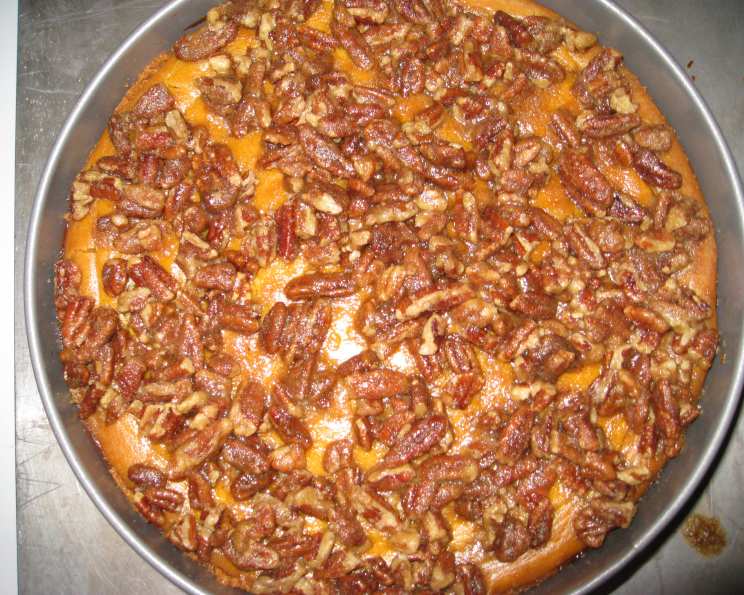
Pumpkin-Pecan Cheesecake: A Slice of Autumnal Bliss
The memory of my grandmother’s Thanksgiving dessert table is forever etched in my mind. While everyone else clamored for the pecan pie, I always made a beeline for her pumpkin cheesecake. It wasn’t just the taste—a creamy, spiced dream atop a buttery crust—but the way it made the entire house smell like a warm hug. The combination of pumpkin, cinnamon, and toasted pecans was pure magic, and it instantly transported me to a world of cozy gatherings and family traditions.
Recipe Overview
- Prep Time: 30 minutes
- Cook Time: 1 hour 45 minutes
- Total Time: Overnight chilling + 2 hours
- Servings: 10
- Yield: 1 cheesecake
- Dietary Type: Not specified
Ingredients
For the Topping:
- 1/2 cup firmly packed light brown sugar
- 5 tablespoons butter, chilled
- 1 1/2 cups chopped pecans
For the Cheesecake:
- 1 1/2 cups graham cracker crumbs
- 3/4 cup firmly packed light brown sugar
- 3/4 cup sugar
- 5 large eggs
- 6 tablespoons butter, melted
- 3 (8 ounce) packages cream cheese, room temperature
- 1/2 cup whipping cream
- 1 (15 ounce) can pumpkin puree
- 1/2 teaspoon nutmeg
- 1/2 teaspoon cinnamon
- 1/4 teaspoon clove
Equipment Needed
- 9-inch diameter springform pan
- Mixing bowls
- Electric mixer (stand or hand-held)
- Measuring cups and spoons
- Rubber spatula
- Oven
Instructions
- Prepare the topping: In a small bowl, place the light brown sugar. Add the chilled butter and cut it in using a pastry blender or your fingers until the mixture resembles coarse meal.
- Stir in the chopped pecans and set aside. This topping will add a delightful crunch and nutty flavor to the finished cheesecake.
- Make the crust: In a separate bowl, blend together the graham cracker crumbs, 1/4 cup sugar, and melted butter. Ensure all the crumbs are evenly coated with butter for a stable crust.
- Press the crumb mixture firmly into the bottom and up the sides of a 9-inch diameter springform pan. A flat-bottomed measuring cup can help create an even, compact crust.
- Chill the crust: Place the prepared crust in the refrigerator to chill while you prepare the filling. This will help it set and prevent it from becoming soggy during baking.
- Preheat the oven: Preheat your oven to 350 degrees F (165 degrees C). Make sure the oven is fully preheated before baking the cheesecake to ensure even cooking.
- Prepare the cheesecake filling: In a large mixing bowl, beat the cream cheese until smooth and creamy. It’s crucial that the cream cheese is at room temperature to avoid lumps in the filling.
- Gradually mix in the remaining white sugar and brown sugar, beating until well combined.
- Add the eggs one at a time, beating well after each addition, until the mixture is light and fluffy. Be careful not to overbeat at this stage, as it can incorporate too much air into the batter, leading to cracks on the surface of the cheesecake.
- Blend in the pumpkin puree, whipping cream, nutmeg, cinnamon, and clove. Mix until just combined, being careful not to overmix.
- Pour the filling into the crust: Pour the pumpkin cheesecake filling into the chilled graham cracker crust, spreading it evenly.
- Bake the cheesecake: Bake in the preheated oven for approximately 1 ½ hours, or until the center no longer moves when the pan is gently shaken. The edges should be set, but the center should still have a slight jiggle.
- Add the topping: Remove the cheesecake from the oven and sprinkle the pecan topping evenly over the top.
- Continue baking: Return the cheesecake to the oven and bake for an additional 15 minutes, or until the topping is golden brown and the cheesecake is completely set.
- Cool the cheesecake: Turn off the oven and let the cheesecake cool in the oven with the door slightly ajar for about an hour. This gradual cooling helps prevent cracking.
- Chill overnight: Remove the cheesecake from the oven and let it cool completely on a wire rack. Once cooled, cover it with plastic wrap and refrigerate overnight (or for at least 8 hours). This chilling time is essential for the cheesecake to fully set and develop its flavor.
- Serve: Before serving, carefully remove the sides of the springform pan.
Expert Tips & Tricks
- Water Bath: For an extra creamy and crack-free cheesecake, consider baking it in a water bath. Wrap the bottom of the springform pan tightly with aluminum foil and place it in a larger roasting pan. Pour hot water into the roasting pan until it reaches about halfway up the sides of the springform pan.
- Room Temperature Ingredients: Ensure all ingredients, especially the cream cheese and eggs, are at room temperature. This helps them blend together smoothly and prevents lumps in the filling.
- Prevent Cracking: Avoid opening the oven door frequently during baking, as temperature fluctuations can cause the cheesecake to crack.
- Toasting Pecans: Toasting the pecans before chopping them enhances their flavor and adds a deeper nutty note to the topping. Spread the pecans on a baking sheet and toast in a 350°F (175°C) oven for 5-7 minutes, or until fragrant.
- Spice Adjustment: Adjust the amount of spices to your preference. If you prefer a more pronounced pumpkin flavor, add a little extra cinnamon and nutmeg.
Serving & Storage Suggestions
Serve the Pumpkin-Pecan Cheesecake chilled, straight from the refrigerator. A dollop of whipped cream or a drizzle of caramel sauce would complement the flavors beautifully. To store leftovers, cover tightly with plastic wrap and refrigerate for up to 5 days. You can also freeze the cheesecake for longer storage. Wrap it tightly in plastic wrap and then in foil, and it will keep for up to 2 months. Thaw it in the refrigerator overnight before serving.
Nutritional Information
| Nutrient | Amount per Serving | % Daily Value |
|---|---|---|
| Calories | 774.5 kcal | N/A |
| Calories from Fat | 503 g | 65% |
| Total Fat | 56 g | 86% |
| Saturated Fat | 26 g | 129% |
| Cholesterol | 217.9 mg | 72% |
| Sodium | 439.3 mg | 18% |
| Total Carbohydrate | 63.1 g | 21% |
| Dietary Fiber | 2.5 g | 9% |
| Sugars | 49.7 g | 198% |
| Protein | 10.8 g | 21% |
Variations & Substitutions
- Gluten-Free Crust: Substitute the graham cracker crumbs with gluten-free graham crackers or a blend of almond flour and oats for a gluten-free option.
- Spice It Up: Add a pinch of ground ginger or cardamom to the filling for a more complex spice profile.
- Maple Syrup: Replace some of the sugar with maple syrup for a richer, more autumnal flavor.
- Dairy-Free: While the recipe is not inherently dairy-free, one could attempt using dairy-free cream cheese, however this substitution may significantly impact the overall taste and texture. Proceed at your own discretion.
FAQs (Frequently Asked Questions)
Q: Can I make the cheesecake ahead of time?
A: Absolutely! In fact, it’s best to make it a day or two in advance to allow the flavors to meld and the cheesecake to fully set.
Q: How do I prevent the cheesecake from cracking?
A: Baking in a water bath and avoiding sudden temperature changes can help prevent cracking. Letting the cheesecake cool gradually in the oven is also beneficial.
Q: Can I use store-bought graham cracker crust?
A: Yes, you can use a store-bought graham cracker crust to save time. Just make sure it’s a 9-inch crust.
Q: Can I freeze the cheesecake?
A: Yes, you can freeze the cheesecake for up to 2 months. Wrap it tightly in plastic wrap and then in foil. Thaw it in the refrigerator overnight before serving.
Q: What can I do if my cheesecake browns too quickly?
A: If the top of the cheesecake is browning too quickly, you can tent it with aluminum foil during the last part of baking.
Final Thoughts
This Pumpkin-Pecan Cheesecake is more than just a dessert; it’s a celebration of autumn’s flavors and a testament to the joy of sharing delicious food with loved ones. The creamy, spiced filling, the crunchy pecan topping, and the buttery graham cracker crust create a symphony of textures and tastes that will leave you wanting more. I encourage you to try this recipe and create your own cherished memories. Feel free to experiment with the spices and toppings to make it your own. And please, share your feedback and photos! I’d love to know how it turns out. Perhaps you’ll even find yourself making it a tradition for years to come, just as my grandmother did.