
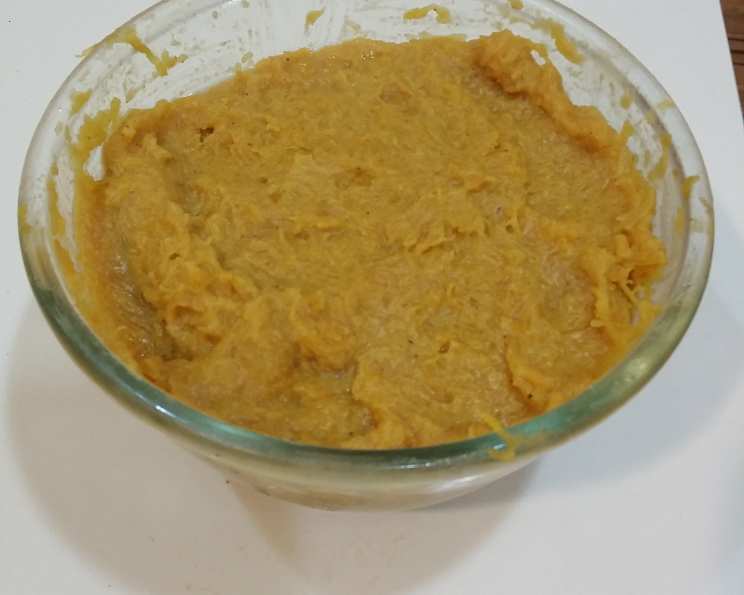
From Patch to Pie: Crafting the Perfect Homemade Pumpkin Pie Filling
The scent of pumpkin, cinnamon, and nutmeg, mingling in the air as the oven warms, is a direct portal back to my grandmother’s kitchen. Every Thanksgiving, she’d orchestrate a pie-making frenzy, and my job, as a child, was to “supervise” the pumpkin carving. Mostly, I just enjoyed the messy business of scooping out seeds and the satisfying thunk as she quartered the gourd, all the while knowing the incredible flavor that awaited us in a perfectly spiced pumpkin pie. To me, there’s just no comparison to the taste of a truly homemade pumpkin pie; the journey from fresh pumpkin to warm slice is part of the joy.
Recipe Overview: Pumpkin Pie Filling
- Prep Time: 20 minutes
- Cook Time: 30 minutes
- Total Time: 50 minutes
- Yields: Approximately 32 ounces, depending on pumpkin size
- Dietary Type: Vegetarian, Gluten-Free
Ingredients
- 2 fresh pie pumpkins (about 1.5-2 pounds each)
- ½ cup butter, unsalted
- 1 cup brown sugar, packed
- Freshly ground nutmeg, to taste
- Freshly ground cinnamon, to taste
- Kosher salt, to taste
Equipment Needed
- Large knife
- Spoon for scooping seeds
- Large cookie sheet or baking dish with sides
- Fork
- Vegetable peeler (optional)
- Blender, food processor, or potato masher
Instructions
- Begin by preparing your pumpkins. Using a large, sharp knife, carefully cut the tops off each pumpkin in a circular fashion, just as you would when carving a jack-o’-lantern. These “lids” are discarded, so don’t worry about keeping them pretty.
- Next, quarter the pumpkins from the top down. This makes it much easier to remove the seeds and stringy pulp.
- Using a spoon, scoop out the seeds and tendrils from each quarter. Don’t discard the seeds! You can roast them for delicious pepitas. Simply rinse them, toss with olive oil and salt, and bake at 350°F (175°C) for 10-15 minutes, or until golden brown and crispy.
- Place the pumpkin shells, cut-side up, on a large cookie sheet or baking dish with sides. This prevents any sugary juices from spilling into your oven.
- Generously smear the inner surfaces of the pumpkins with the softened butter. Make sure to evenly coat each quarter for optimal flavor and moisture.
- Sprinkle the brown sugar evenly over the buttered pumpkin flesh. Don’t be shy – the brown sugar will caramelize beautifully during baking, adding depth and richness to the filling.
- Season generously with freshly ground nutmeg and cinnamon. The aroma alone will transport you to an autumnal wonderland. Add a small pinch of kosher salt to balance the sweetness and enhance the flavors.
- Bake in a preheated oven at 375°F (190°C) for 30 minutes, or until you can easily pierce the flesh with a fork. The pumpkin should be tender and slightly caramelized. Baking time may vary depending on the size and type of pumpkin.
- Let the pumpkins stand to cool slightly before handling. This will make it easier to remove the skin.
- Once cooled enough to handle, gently cut away the outer skin using a sharp knife or vegetable peeler. Don’t worry about getting every last bit of skin off – a little bit of the darker green part won’t hurt, but try to remove as much as possible. The skin is excellent for composting!
- Finally, puree, mash, or process the pumpkin meat to your desired consistency. For a very smooth filling, perfect for a mousse or a refined pie, use a blender or food processor. For a more rustic pie, you can simply mash the pumpkin with a potato masher or fork, leaving some small chunks for added texture.
Expert Tips & Tricks
- Roasting the pumpkin instead of steaming or boiling concentrates the flavors, resulting in a richer, more intensely flavored filling.
- Freshly ground spices make a world of difference. If possible, grind your own nutmeg and cinnamon for the most aromatic and flavorful results.
- Don’t overbake the pumpkin. Overbaking can dry it out, resulting in a less-than-creamy filling.
- If your pumpkin seems watery, you can drain it slightly after pureeing by placing it in a cheesecloth-lined sieve for about 30 minutes.
- For an extra layer of flavor, try adding a tablespoon of maple syrup or a splash of bourbon to the filling.
- If you don’t want to deal with cutting up a whole pumpkin, you can roast the halves. Simply cut each pumpkin in half from top to bottom and scoop out the seeds before proceeding with the rest of the recipe.
Serving & Storage Suggestions
Serve your homemade pumpkin pie filling in your favorite pie crust, or use it as a base for other delicious desserts, such as pumpkin mousse, pumpkin bread, or pumpkin parfaits.
- Storage: Store leftover pumpkin pie filling in an airtight container in the refrigerator for up to 3-4 days. It can also be frozen for up to 2-3 months. Thaw in the refrigerator overnight before using.
- Reheating: If using frozen filling, it may release some excess water after thawing. Drain off any excess liquid before using. No reheating should be necessary if baking the filling within a pie.
Nutritional Information (Approximate)
| Nutrient | Amount per Serving (1/8 of total) | % Daily Value |
|---|---|---|
| Calories | 145 kcal | 7% |
| Total Fat | 8g | 10% |
| Saturated Fat | 5g | 25% |
| Cholesterol | 20mg | 7% |
| Sodium | 50mg | 2% |
| Total Carbohydrate | 20g | 7% |
| Dietary Fiber | 2g | 7% |
| Sugars | 12g | – |
| Protein | 1g | 2% |
Variations & Substitutions
- Vegan Pumpkin Pie Filling: Substitute the butter with coconut oil or a vegan butter alternative.
- Spice it Up: Add a pinch of ginger, cloves, or allspice to the spice blend for a more complex flavor profile.
- Sweeten Naturally: Replace the brown sugar with maple syrup or honey for a more natural sweetener. Adjust the amount to taste.
- Add Citrus: A teaspoon of orange or lemon zest can brighten the flavor of the filling.
- Nutty Notes: Toasting 1/2 cup of pecans or walnuts and adding them to the pureed pumpkin flesh gives a welcome textural counterpoint.
FAQs (Frequently Asked Questions)
Q: Can I use canned pumpkin puree instead of fresh?
A: While fresh pumpkin provides the best flavor, you can substitute with canned pumpkin puree in a pinch. Use the same amount (about 32 ounces) as you would get from the fresh pumpkins.
Q: How do I know when the pumpkin is cooked through?
A: The pumpkin is ready when you can easily pierce the flesh with a fork. It should be tender and slightly caramelized.
Q: Can I use a different type of squash?
A: Yes, you can substitute with other types of squash, such as butternut squash or kabocha squash. The flavor will be slightly different, but still delicious.
Q: What if my pumpkin puree is too watery?
A: Drain the puree in a cheesecloth-lined sieve for about 30 minutes to remove excess moisture.
Q: Can I make the pumpkin pie filling ahead of time?
A: Absolutely! The filling can be made up to 3-4 days in advance and stored in the refrigerator.
Final Thoughts
Making your own pumpkin pie filling from scratch might seem like a daunting task, but it’s incredibly rewarding. The depth of flavor and the satisfaction of knowing you created something truly special are well worth the effort. So, this fall, embrace the spirit of the season, grab a couple of pie pumpkins, and get ready to create a pumpkin pie that will become a cherished family tradition. Don’t be afraid to experiment with different spices and flavor combinations to create your own signature blend. And most importantly, have fun! Share your creations with loved ones and savor the warmth and comfort of homemade pumpkin pie.