
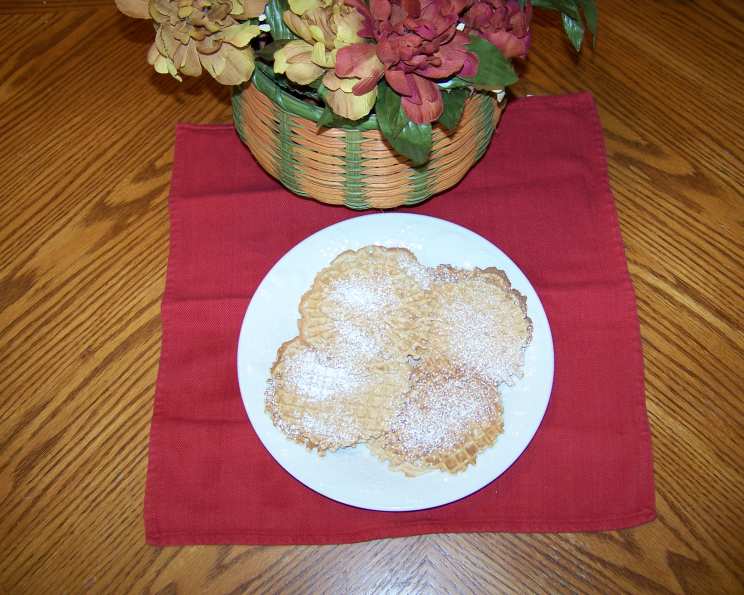
Pumpkin Pizzelles: A Taste of Autumn in Every Bite
The first time I encountered pizzelles, they were being pressed on a well-loved iron by my Italian grandmother, Nonna Elena. The scent of anise filled her small kitchen, a comforting cloud that promised warmth and sweetness. While she always made the classic anise-flavored cookies, I often wondered about other flavor possibilities. Years later, with a bumper crop of pumpkins from my own garden, I decided to experiment, and thus, these pumpkin pizzelles were born. The warm spices mingle beautifully with the subtle sweetness of the pumpkin, creating a delightful autumnal twist on a beloved classic.
Recipe Overview
- Prep Time: 20 minutes
- Cook Time: 30-40 minutes
- Total Time: 50-60 minutes
- Yields: Approximately 60 pizzelles
- Dietary Type: Vegetarian
Ingredients
- 1 cup granulated sugar
- 1/2 cup (1 stick) butter, softened
- 2 eggs
- 1 cup canned pumpkin puree
- 1 teaspoon vanilla extract
- 2 1/2 cups all-purpose flour
- 1/2 teaspoon salt
- 2 teaspoons baking powder
- 1 teaspoon ground cinnamon
- 3/4 teaspoon ground nutmeg
- 1/4 teaspoon ground ginger
Equipment Needed
- Pizzelle iron
- Mixing bowls
- Electric mixer (handheld or stand mixer)
- Measuring cups and spoons
- Sifter or fine-mesh sieve
- Cooling rack
- Small brush (for buttering the iron)
- Optional: Rolling mat for shaping pizzelles
Instructions
-
Begin by preheating your pizzelle iron. It’s essential that the iron is fully heated before you start baking for even cooking and consistent results.
-
In a large mixing bowl, cream together the softened butter and granulated sugar using an electric mixer until the mixture is light and fluffy. This typically takes 3-5 minutes. Be patient and scrape down the sides of the bowl occasionally to ensure everything is well combined.
-
Add the eggs one at a time, beating well after each addition. Then, incorporate the canned pumpkin puree and vanilla extract. Mix until everything is thoroughly combined and the batter has a uniform color and consistency.
-
In a separate medium-sized bowl, sift together the flour, salt, baking powder, ground cinnamon, ground nutmeg, and ground ginger. Sifting ensures that there are no lumps and the dry ingredients are evenly distributed, leading to a more tender pizzelle.
-
Gradually add the dry ingredients to the wet ingredients, folding them in gently until just combined. Be careful not to overmix, as this can result in tough pizzelles.
-
Lightly brush the pizzelle iron with a thin layer of melted butter or cooking spray. This prevents the pizzelles from sticking and ensures they release easily. Reapply butter as needed between batches, but be careful not to overdo it or your pizzelles will become greasy.
-
Drop a teaspoonful of dough onto the center of each pizzelle pattern on the heated iron. The amount of dough needed will vary depending on the size of your iron, so you may need to experiment a little to find the perfect amount.
-
Close the lid of the pizzelle iron and bake for 34-60 seconds, or until the pizzelles are golden brown. The exact baking time will depend on your pizzelle iron, so keep a close eye on them. If your iron has a timer, that can be helpful.
-
Carefully remove the pizzelles from the iron using a thin spatula or fork. Be gentle, as they will be delicate when they are hot.
-
While the pizzelles are still warm and pliable (within the first few seconds), you can shape them into cones, rolls, or shallow bowls, if desired. To make cones, quickly roll the pizzelle around a cone-shaped mold. To make rolls, roll them around a dowel or the handle of a wooden spoon. For bowls, press them gently into a small bowl or ramekin. Let them cool completely in their new shapes. If you prefer to keep them flat, simply let them cool on a wire rack.
-
Repeat steps 6-10, buttering the iron as needed and baking the remaining dough.
-
Once the pizzelles have cooled completely, you can garnish them by dusting them with powdered sugar.
Expert Tips & Tricks
- Softened Butter is Key: Make sure your butter is properly softened, but not melted. It should be soft enough to easily cream with the sugar.
- Don’t Overmix: Overmixing develops gluten, which will result in tough pizzelles. Mix the dry ingredients into the wet ingredients until just combined.
- Even Heat: Ensure your pizzelle iron is evenly heated before you begin baking for uniform results.
- Shaping Speed: If you’re planning on shaping the pizzelles, work quickly, as they become brittle as they cool.
- Burnt Pizzelles: If your pizzelles are burning, reduce the heat slightly or decrease the baking time. Every pizzelle iron is different, so it takes a few tries to find the sweet spot.
Serving & Storage Suggestions
Serve these pumpkin pizzelles as a delightful dessert alongside a cup of warm spiced cider or a scoop of vanilla ice cream. They are also perfect for gifting during the holiday season.
Store the cooled pizzelles in an airtight container at room temperature. They will stay fresh for up to 5 days. For longer storage, you can freeze them for up to 2 months. Thaw them at room temperature before serving. These cookies are best served at room temperature and will become more crisp after cooling.
Nutritional Information
Please note that the following values are estimates and can vary depending on specific ingredients and portion sizes.
| Nutrient | Amount per Serving (1 pizzelle) | % Daily Value |
|---|---|---|
| Calories | 50 kcal | 2% |
| Total Fat | 2g | 3% |
| Saturated Fat | 1g | 5% |
| Cholesterol | 10mg | 3% |
| Sodium | 57mg | 2% |
| Total Carbohydrate | 8g | 3% |
| Dietary Fiber | 0.3g | 1% |
| Sugars | 4g | 4% |
| Protein | 1g | 2% |
Variations & Substitutions
- Gluten-Free: Substitute the all-purpose flour with a gluten-free blend. You may need to add a binding agent like xanthan gum.
- Vegan: Replace the butter with a plant-based butter alternative and the eggs with flax eggs (1 tablespoon ground flaxseed mixed with 3 tablespoons water per egg).
- Spice it Up: Add a pinch of ground cloves or cardamom for a more complex flavor profile.
- Citrus Zest: A teaspoon of orange or lemon zest adds a bright, zesty note to the pizzelles.
- Chocolate Drizzle: Drizzle melted chocolate over the cooled pizzelles for an extra touch of indulgence.
FAQs (Frequently Asked Questions)
Q: My pizzelles are sticking to the iron. What am I doing wrong?
A: Make sure you are lightly buttering the iron before each batch. If you are using too much butter, it could also cause sticking. Additionally, ensure the iron is fully heated before you start baking.
Q: Can I use fresh pumpkin puree instead of canned?
A: Yes, fresh pumpkin puree works well. Just be sure to drain any excess liquid from the puree before adding it to the batter.
Q: My pizzelles are not crispy. How can I make them crispier?
A: Make sure you are baking them long enough. The exact baking time will depend on your pizzelle iron. Also, allowing them to cool completely on a wire rack helps them crisp up.
Q: Can I make the batter ahead of time?
A: Yes, you can make the batter ahead of time and store it in the refrigerator for up to 24 hours. However, keep in mind that the baking powder will lose its effectiveness over time, so the pizzelles may not be as light and airy if you wait too long.
Q: Can I add nuts to the batter?
A: Absolutely! Finely chopped pecans or walnuts would be a delicious addition. Just be sure to add them in moderation so they don’t interfere with the pizzelle’s delicate texture.
Final Thoughts
These pumpkin pizzelles are a delightful way to celebrate the flavors of fall. The warm spices and subtle sweetness of the pumpkin create a truly irresistible treat that’s perfect for sharing with loved ones. Don’t be afraid to experiment with different variations and substitutions to make them your own. I encourage you to give this recipe a try and experience the joy of creating something delicious and beautiful in your own kitchen. And please, share your creations and feedback – I’d love to hear about your pumpkin pizzelle adventures! Pair these treats with a hot cup of apple cider or a pumpkin spice latte for the ultimate fall experience.