
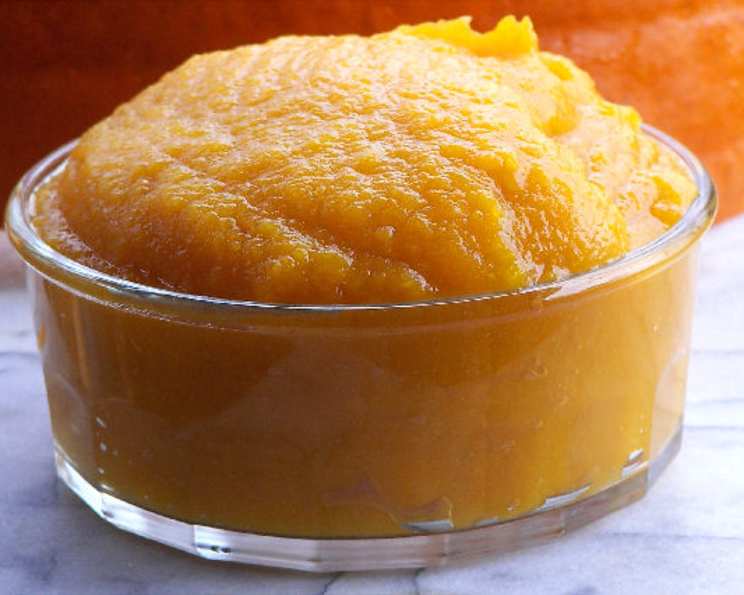
The Ultimate Guide to Homemade Pumpkin Puree
The scent of pumpkin spice always evokes a particular memory for me – Halloween night as a child, carving jack-o’-lanterns with my family. The messy process, the laughter, and, of course, the seeds we roasted afterward. While those jack-o’-lanterns eventually went to compost, the pumpkins we used for cooking were always transformed into something truly special: homemade pumpkin puree, the heart and soul of countless fall recipes. This puree, unlike its canned counterpart, bursts with fresh, vibrant flavor, a testament to the simple magic of transforming a humble gourd into culinary gold.
Recipe Overview
- Prep Time: 15 minutes
- Cook Time: 1 hour
- Total Time: 1 hour 15 minutes (plus optional overnight draining)
- Yields: Approximately 4-6 cups
- Dietary Type: Vegan, Gluten-Free, Dairy-Free, Vegetarian
Ingredients
- 1 medium pumpkin (pie pumpkin or sugar pumpkin recommended)
- Cheesecloth (optional, for removing excess liquid)
Equipment Needed
- Large knife
- Cutting board
- Baking dish or casserole dish
- Oven
- Fork
- Hand blender or food processor
- Strainer (optional)
Instructions
- Begin by preparing your pumpkin. Using a large, sharp knife and a sturdy cutting board, carefully cut the skin off the pumpkin. This can be the most challenging part, so take your time and ensure your fingers are safely out of the way. For easier cutting, you can microwave the pumpkin whole for 2-3 minutes to soften the skin slightly.
- Once the skin is removed, cut the pumpkin into 1 or 2 inch cubes. Uniformly sized pieces will ensure even cooking.
- Place the cubed pumpkin in a casserole dish or baking dish. There’s no need to add any liquid; the pumpkin will release its own moisture as it cooks.
- Cook in a 350°F (175°C) oven for one hour. The cooking time may vary slightly depending on the size and density of your pumpkin, so check for doneness.
- To check if the pumpkin is done, pierce a cube with a fork. It’s ready when it is soft and easily “mushy” when pressed with a fork. If it resists, return it to the oven for another 15-20 minutes.
- Remove the cooked pumpkin from the oven and allow it to cool slightly.
- Using a hand blender or food processor, blend the cooked pumpkin until smooth. Work in batches if necessary to avoid overfilling your blender or processor. Blend until the puree is completely uniform and free of any lumps.
- At this stage, your pumpkin puree might seem a little watery. To remove excess liquid, place the pureed pumpkin in a strainer lined with cheesecloth (optional). Allow it to drain overnight in the refrigerator. This step is crucial for achieving a thicker, more concentrated puree, especially if you plan to use it in baked goods. If you prefer a thinner puree for soups or beverages, you can skip this step.
- Use the pumpkin puree right away, or freeze it in small amounts to be used in cooking and baking. I recommend portioning it into 1-cup or 2-cup containers or freezer bags, depending on your typical recipe needs. Be sure to label and date each container.
Alternate Method (Roasting with Skin On):
If you prefer, you can roast the pumpkin with the skin on. To do this, cut the pumpkin in half, remove the seeds, and cover the cut sides with tin foil. Place the pumpkin halves on a cookie sheet and bake until the flesh is tender (about the same time as the first method). After baking, scrape the cooked pumpkin fruit from the skin and proceed with step 6 to puree. This method can be slightly easier and less messy than peeling the pumpkin beforehand.
Expert Tips & Tricks
- Choose the right pumpkin: Pie pumpkins or sugar pumpkins are specifically bred for cooking and have a sweeter, more flavorful flesh than carving pumpkins.
- Don’t overcrowd the pan: Ensure the pumpkin cubes are spread in a single layer in the baking dish for even cooking.
- Roast for deeper flavor: For an even richer, slightly caramelized flavor, try roasting the pumpkin at a slightly higher temperature (375°F or 190°C) for the last 15-20 minutes of cooking. Keep a close eye to prevent burning.
- Seasoning Boost: Add a pinch of salt and a dash of cinnamon or nutmeg to the pumpkin before roasting to enhance the flavor.
- Thickening without draining: If you don’t have time to drain the puree overnight, you can simmer it gently in a saucepan over low heat for 30-45 minutes, stirring occasionally, to evaporate excess moisture.
- Reviving Frozen Puree: When thawing frozen pumpkin puree, it may separate slightly. Simply stir it well to re-combine before using.
Serving & Storage Suggestions
Homemade pumpkin puree is incredibly versatile! Use it in:
- Pies: Of course! The classic pumpkin pie is a must-try.
- Soups: Add a creamy, autumnal touch to soups and stews.
- Muffins and Breads: Incorporate it into your favorite baked goods for a moist and flavorful treat.
- Cookies: Pumpkin puree adds a soft, chewy texture to cookies.
- Pancakes and Waffles: A spoonful or two in your batter elevates your breakfast game.
- Baby Food: As mentioned, this is a great healthy and natural option for little ones.
Storage:
- Room Temperature: Do not leave pumpkin puree at room temperature for more than 2 hours.
- Refrigerate: Store in an airtight container in the refrigerator for up to 3-4 days.
- Freeze: For longer storage, freeze in airtight containers or freezer bags for up to 3 months.
Nutritional Information
Note: Nutritional information is an estimate and may vary based on the specific pumpkin.
| Nutrient | Amount per Serving (1 cup) | % Daily Value* |
|---|---|---|
| Calories | 49 kcal | 2% |
| Total Fat | 0.2g | 0% |
| Saturated Fat | 0.0g | 0% |
| Cholesterol | 0mg | 0% |
| Sodium | 12mg | 1% |
| Total Carbohydrate | 12g | 4% |
| Dietary Fiber | 3g | 12% |
| Sugars | 5g | – |
| Protein | 2g | 4% |
| Vitamin A | 245% | – |
| Vitamin C | 19% | – |
| Calcium | 2% | – |
| Iron | 4% | – |
*Percent Daily Values are based on a 2,000 calorie diet.
Variations & Substitutions
- Spice it up: Add a pinch of ginger, cloves, or allspice to the pumpkin while cooking for a warmer flavor profile.
- Sweeten naturally: If you prefer a sweeter puree, add a tablespoon of maple syrup or honey before blending.
- Butternut Squash: If you can’t find a pie pumpkin, butternut squash makes a good substitute. The flavor is slightly different, but it works well in most recipes.
- Acorn Squash: For a nuttier flavor, try acorn squash.
- Vegan Pumpkin Spice Latte: Blend with non-dairy milk, spices and sweetener for a cosy treat.
FAQs (Frequently Asked Questions)
Q: How do I know when the pumpkin puree is thick enough?
A: The puree should be smooth and slightly thick, similar to the consistency of applesauce. If it’s too watery, drain it using cheesecloth or simmer it gently on the stovetop to remove excess moisture.
Q: Can I use canned pumpkin puree instead of making my own?
A: Yes, you can. However, homemade pumpkin puree has a fresher, more vibrant flavor. If using canned, make sure it’s 100% pumpkin puree and not pumpkin pie filling, which contains added sugars and spices.
Q: Why is my pumpkin puree bitter?
A: Sometimes, pumpkins can have a slightly bitter taste. This can be due to the variety of pumpkin or growing conditions. Adding a pinch of salt and a touch of sweetness (like maple syrup) can help to balance the bitterness.
Q: Can I freeze pumpkin puree?
A: Absolutely! Freezing is a great way to preserve pumpkin puree for later use. Store it in airtight containers or freezer bags for up to 3 months.
Q: Do I need to peel the pumpkin before roasting?
A: No, you can roast the pumpkin with the skin on, then scoop out the flesh after it’s cooked. This can be easier than peeling the pumpkin beforehand.
Final Thoughts
Now that you have mastered the art of homemade pumpkin puree, the possibilities are endless. Embrace the warmth and comfort of fall flavors by creating your favorite pumpkin-infused recipes. Don’t be afraid to experiment and put your own spin on this versatile ingredient. Share your creations with friends and family and let the season of pumpkin spice begin! And of course, I’d love to hear about your own pumpkin puree adventures and any variations you try – happy cooking!