
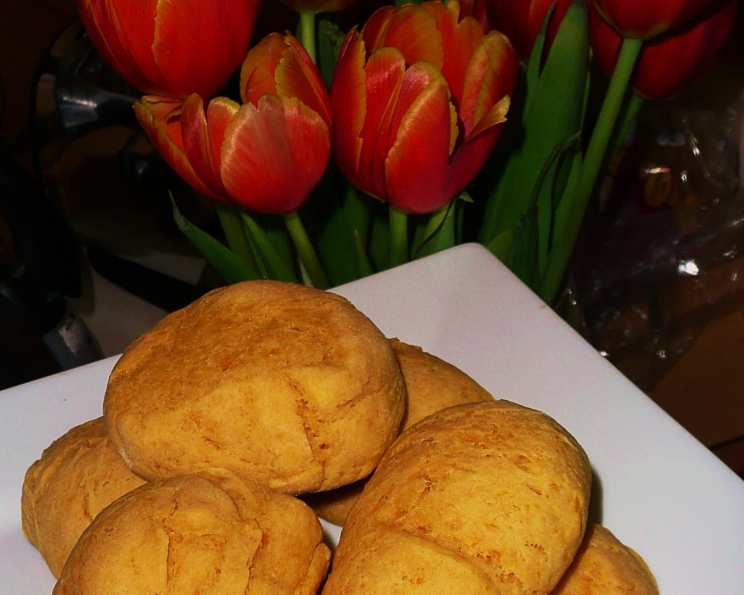
Vegan Pumpkin Scones: Autumn’s Embrace in Every Bite
I still remember the first time I truly fell in love with baking. It was a crisp October afternoon, the air thick with the scent of fallen leaves and woodsmoke. My grandmother, a woman whose hands seemed to hold the secrets to every comfort food imaginable, was teaching me how to make pumpkin scones. The warmth from the oven, the sweet, spicy aroma filling her cozy kitchen, and the sheer magic of transforming simple ingredients into something so delicious cemented a lifelong passion. Now, I’ve adapted her recipe to be completely vegan, so everyone can experience that same comforting feeling.
Recipe Overview
- Prep Time: 15 minutes
- Cook Time: 10-15 minutes
- Total Time: 25-30 minutes
- Servings: Variable, depending on cutter size
- Yields: Approximately 10-12 scones
- Dietary Type: Vegan, Egg-Free, Lactose-Free
Ingredients
- 100g vegan margarine (cold, straight from the fridge is best)
- 2 tablespoons sugar
- Egg substitute (equal to one egg, prepared according to package directions)
- 2 cups self-raising flour
- 1 pinch salt
- 1 teaspoon ground cinnamon
- 1 cup pumpkin (cooked, drained, and mashed – canned pumpkin puree works well too, just ensure it’s 100% pumpkin)
- ¼ cup soymilk (or other plant-based milk)
Equipment Needed
- Large mixing bowl
- Measuring cups and spoons
- Sifter
- Baking tray
- Scone cutter (or a sharp knife)
- Wire rack
Instructions
-
Preheat your oven to 220°C (425°F). This high heat is crucial for achieving that desirable rise and golden crust. Remember, oven temperatures can vary, so it’s always a good idea to use an oven thermometer to ensure accuracy.
-
In a large mixing bowl, beat the vegan margarine until it softens slightly. It’s important that the margarine isn’t completely melted, as this will affect the texture of the scones.
-
Add the sugar and prepared egg substitute to the softened margarine.
-
Cream the mixture together until it is light and fluffy. This process incorporates air, which contributes to a tender scone. A hand mixer can speed this up, but it’s perfectly achievable by hand with a bit of elbow grease.
-
In a separate bowl, sift the flour, salt, and cinnamon together. Sifting ensures that there are no lumps and evenly distributes the cinnamon throughout the flour mixture. This step is important for a consistent flavor in every bite.
-
Add the pumpkin and soymilk alternately with the sifted dry ingredients into the creamed margarine mixture. Start with a portion of the dry ingredients, then add some of the pumpkin and soymilk, and continue alternating until everything is just combined.
-
Gently mix until just combined. Be careful not to overmix the dough! Overmixing develops the gluten in the flour, which can result in tough, dense scones. The dough should be slightly sticky.
-
Turn the scone dough onto a lightly floured surface.
-
Knead the dough lightly. This step helps to bring the dough together, but again, avoid overworking it. A few gentle folds are all that’s needed.
-
Roll or pat the scone dough out to a thickness of about 2-3cm (approximately 1 inch). The thickness will determine the height of your scones.
-
Cut the dough into desired shapes with a scone cutter or a sharp knife. If using a knife, cut straight down – avoid twisting, which can seal the edges and prevent them from rising properly. For classic scones, a round cutter is traditional, but you can use any shape you like!
-
Place the scone shapes close together on a lightly greased and flour-dusted baking tray. Placing them close together helps them rise upwards rather than spreading outwards.
-
Brush the tops of the scones with a little soymilk. This helps to promote browning and gives them a lovely golden sheen. You can also sprinkle a little extra sugar or cinnamon on top at this point for added sweetness and flavor.
-
Bake in the preheated oven for 10-15 minutes, or until cooked through and golden brown. Keep a close eye on them during the last few minutes of baking to prevent burning, especially on the bottoms. As I mentioned in the beginning – watch those bottoms! A slightly lower rack position can help if your oven tends to burn the bottoms of baked goods.
-
Remove the scones from the tray and cool them slightly on a wire rack. This prevents the bottoms from becoming soggy.
-
Serve warm and enjoy!
Expert Tips & Tricks
-
Cold Ingredients are Key: Using cold vegan margarine is crucial for creating a light and flaky scone. The cold fat creates steam as it bakes, resulting in pockets of air that give the scone its signature texture.
-
Don’t Overmix: This is probably the most important tip! Overmixing develops the gluten in the flour, leading to tough, dense scones. Mix only until the ingredients are just combined.
-
Handle with Care: The dough is delicate, so handle it gently. Avoid pressing down too hard when rolling or cutting the scones.
-
Freeze for Later: Unbaked scone dough can be frozen for up to a month. Simply cut out the shapes, place them on a baking sheet, and freeze until solid. Then, transfer them to a freezer bag. When ready to bake, simply bake from frozen, adding a few extra minutes to the baking time.
-
Spice it Up: Feel free to experiment with different spices! A pinch of nutmeg, ginger, or cardamom would all be delicious additions.
Serving & Storage Suggestions
These vegan pumpkin scones are best served warm, straight from the oven. They are delicious on their own or with a dollop of vegan butter, jam, or even a vegan cream cheese frosting.
Leftover scones can be stored in an airtight container at room temperature for up to 2 days. For longer storage, they can be frozen for up to a month. To reheat, simply warm them in a low oven (around 150°C/300°F) for a few minutes until heated through. You can also microwave them for a few seconds, but be careful not to overdo it, as they can become tough.
Nutritional Information
(Estimated per scone; values may vary based on specific ingredients used)
| Nutrient | Amount per Serving | % Daily Value* |
|---|---|---|
| Calories | 180 kcal | 9% |
| Total Fat | 8g | 10% |
| Saturated Fat | 2g | 10% |
| Cholesterol | 0mg | 0% |
| Sodium | 250mg | 11% |
| Total Carbohydrate | 25g | 9% |
| Dietary Fiber | 1g | 4% |
| Sugars | 5g | – |
| Protein | 2g | 4% |
*Percent Daily Values are based on a 2,000 calorie diet.
Variations & Substitutions
-
Gluten-Free: Substitute the self-raising flour with a gluten-free self-raising flour blend. You may need to add a bit more plant-based milk to achieve the right consistency.
-
Different Plant-Based Milk: Feel free to use almond milk, oat milk, or any other plant-based milk you prefer in place of the soymilk.
-
Add-Ins: Get creative with add-ins! Chocolate chips, chopped nuts, dried cranberries, or even a swirl of pumpkin spice jam would all be delicious additions.
-
Icing: For an extra special treat, top the cooled scones with a simple vegan icing made from powdered sugar and plant-based milk. Add a dash of vanilla extract or pumpkin spice for added flavor.
FAQs (Frequently Asked Questions)
Q: Can I use regular margarine instead of vegan margarine?
A: While you could use regular margarine, this recipe is designed to be vegan. Vegan margarine is readily available in most supermarkets and works perfectly in this recipe.
Q: Can I make these scones ahead of time?
A: Yes, you can prepare the dough ahead of time and store it in the refrigerator for up to 24 hours. Alternatively, you can freeze the unbaked scones for longer storage.
Q: My scones are not rising properly. What could be the reason?
A: Several factors can affect the rise of scones. Make sure your baking powder is fresh, and avoid overmixing the dough. The oven temperature should also be high enough.
Q: What can I use if I don’t have an egg replacer?
A: You can try using applesauce (about 1/4 cup) as an egg substitute. It might slightly alter the texture, but it should still work.
Q: Can I add a glaze to these scones?
A: Absolutely! A simple glaze made from powdered sugar and plant-based milk, flavored with vanilla or pumpkin spice, would be a delicious addition.
Final Thoughts
These vegan pumpkin scones are a delightful way to welcome the flavors of fall into your kitchen. Whether you’re enjoying them as a cozy breakfast treat, a comforting afternoon snack, or a festive addition to your holiday table, I hope this recipe brings you as much joy as it has brought me over the years. Don’t be afraid to experiment with different variations and make them your own. Happy baking! I’d love to hear about your experience making these scones – feel free to share your feedback and any creative twists you add in the comments below! Perhaps pair them with a warm cup of spiced apple cider for the ultimate autumn experience.