
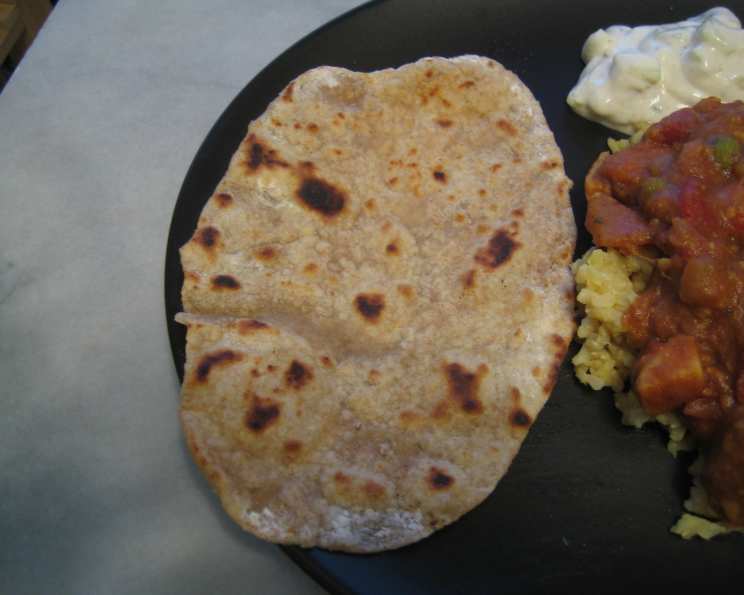
Mastering the Art of Punjabi Chapati: A Taste of Home
The first time I truly understood the magic of a chapati was not in a restaurant, but in a small, bustling kitchen in Amritsar. The air was thick with the aroma of spices, and an auntie, her hands dusted with flour, effortlessly coaxed perfectly round chapatis from simple dough. Warm, pliable, and slightly smoky from the tawa, they were more than just bread; they were a symbol of family, comfort, and the heart of Punjabi hospitality. That day, I vowed to learn the art of chapati-making, to bring that same warmth and deliciousness to my own table.
Recipe Overview
- Prep Time: 20 minutes
- Cook Time: 30 minutes
- Total Time: 50 minutes
- Yields: 12 chapatis
- Dietary Type: Vegetarian
Ingredients
- 2 cups chapati flour
- 2 tablespoons butter, softened (or margarine)
- 1 cup boiling water
- Extra flour for dusting
Equipment Needed
- Large mixing bowl
- Rolling pin
- Clean kitchen towel
- Heavy-based frying pan (cast iron preferred)
Instructions
-
In a large mixing bowl, combine the chapati flour and softened butter (or margarine). Rub the butter into the flour using your fingertips until the mixture resembles coarse breadcrumbs. This step is crucial for creating tender chapatis.
-
Gradually add half of the boiling water to the flour mixture, stirring continuously with a spoon or your hand to combine.
-
Slowly add the remaining boiling water, stirring until all the flour is hydrated and a dough begins to form. Be patient and add the water gradually to avoid making the dough too sticky.
-
Turn the dough out onto a lightly floured surface and knead for approximately 3 minutes. Be cautious, as the dough may be hot from the boiling water. The dough is ready when it springs back slightly when pressed and feels slightly sticky.
-
Place the dough back in the bowl, cover it tightly with a lid, plastic wrap, or a zip-top bag, and let it rest for 30 minutes. This resting period allows the gluten to relax, resulting in softer, more pliable chapatis. Don’t skip this step!
-
After resting, divide the dough into 12 equal portions. Shape each portion into a small ball, about half the size of a tennis ball.
-
Dip each ball into extra flour, ensuring it’s well-coated. This prevents the dough from sticking to the rolling pin and surface.
-
Gently press each ball in your hand until slightly flattened into a disc.
-
Using a rolling pin, roll the disc into a thin, round pancake, about 6-8 inches in diameter. Aim for an even thickness to ensure even cooking.
-
Heat a heavy-based frying pan (preferably cast iron) over medium-high heat. The pan should be hot enough that a drop of water sizzles and evaporates quickly.
-
Place the rolled chapati onto the hot pan and cook for about 30-60 seconds, or until small blisters begin to appear on the surface.
-
Flip the chapati and cook on the other side for another 30-60 seconds. The chapati may puff up; this is a good sign, indicating that it’s cooking properly.
-
Remove the chapati from the pan and immediately wrap it in a clean tea towel to keep it warm and soft. This also prevents them from drying out.
-
Repeat steps 7-13 with the remaining dough balls.
Expert Tips & Tricks
- Hot Water is Key: Using boiling water helps to develop the gluten in the flour quickly, resulting in softer chapatis.
- Resting is Essential: The resting period is crucial for gluten relaxation, yielding a more tender and pliable final product. Do not skip this step.
- Even Rolling: Aim for an even thickness when rolling the chapatis. Uneven thickness can lead to some parts burning while others remain undercooked.
- Puffing Up: If your chapati doesn’t puff up, it might be due to insufficient kneading or uneven rolling. Try pressing down gently on the edges with a clean cloth while it’s cooking to encourage puffing.
- Freezing for Later: You can roll out the chapatis and freeze them uncooked between sheets of parchment paper. When ready to cook, thaw them slightly before cooking as directed.
- Ghee for Extra Flavor: For an even richer flavor, brush the cooked chapati with a little melted ghee (clarified butter) before serving.
Serving & Storage Suggestions
Chapatis are best served warm, straight off the pan. They are a perfect accompaniment to a wide variety of Indian dishes, such as curries, dals, and vegetable preparations. Serve them alongside your favorite dishes or with a simple dollop of butter or yogurt.
Store leftover chapatis wrapped tightly in a clean tea towel at room temperature for up to 2 days. To store them for longer, place them in an airtight container in the refrigerator for up to 5 days. You can also freeze them for up to 2 months.
To reheat, you can warm them in a dry pan, microwave them briefly (covered with a damp paper towel to prevent drying), or steam them for a few minutes.
Nutritional Information
| Nutrient | Amount per Serving | % Daily Value* |
|---|---|---|
| Calories | 93 kcal | – |
| Fat | 2g | 3% |
| Saturated Fat | 1g | 6% |
| Cholesterol | 5mg | 1% |
| Sodium | 14mg | 0% |
| Carbohydrates | 16g | 5% |
| Fiber | 1g | 2% |
| Sugar | 0g | 0% |
| Protein | 2g | 4% |
*Percent Daily Values are based on a 2,000 calorie diet.
Variations & Substitutions
- Whole Wheat Chapatis: For a healthier option, substitute half or all of the chapati flour with whole wheat flour. You may need to add a little more water to achieve the desired dough consistency.
- Gluten-Free Chapatis: While traditionally made with wheat flour, you can experiment with gluten-free flour blends. A blend of rice flour, tapioca starch, and sorghum flour can work well, but you may need to adjust the water content.
- Flavored Chapatis: Add spices like ajwain (carom seeds), cumin, or dried fenugreek leaves (kasuri methi) to the dough for added flavor.
- Herb Chapatis: Incorporate finely chopped fresh herbs like cilantro or mint into the dough for a vibrant and aromatic twist.
FAQs (Frequently Asked Questions)
Q: What is chapati flour?
A: Chapati flour, also known as atta, is a finely ground whole wheat flour commonly used in Indian cooking for making flatbreads like chapatis and rotis. It has a higher gluten content than all-purpose flour, which helps to create soft and pliable dough.
Q: Why are my chapatis hard and dry?
A: Hard and dry chapatis are often caused by not using enough water in the dough, not kneading it enough, or overcooking them on the pan. Ensure you add enough water gradually, knead the dough for the recommended time, and cook them until just lightly browned.
Q: Can I use all-purpose flour instead of chapati flour?
A: While you can use all-purpose flour in a pinch, the texture will be different. Chapati flour has a higher gluten content, which results in softer and more pliable chapatis. If using all-purpose flour, consider adding a tablespoon of oil to the dough for added tenderness.
Q: How do I prevent the chapatis from sticking to the pan?
A: Make sure your pan is hot enough before placing the chapati on it. Also, ensure that the dough is well-floured before rolling it out to prevent sticking.
Q: Can I make the dough ahead of time?
A: Yes, you can make the dough ahead of time and store it in the refrigerator for up to 24 hours. Bring it to room temperature before rolling and cooking.
Final Thoughts
Making chapatis might seem daunting at first, but with a little practice and patience, you’ll be able to create these delicious and comforting flatbreads in your own kitchen. Don’t be afraid to experiment with different variations and flavors to find your perfect chapati. Embrace the process, enjoy the aroma of freshly cooked bread, and share your creations with loved ones. They’re more than just food; they’re an experience. I encourage you to try this recipe and share your feedback. Pair these warm chapatis with a flavorful dal makhani or a spicy vegetable curry for a complete and satisfying meal. Happy cooking!