
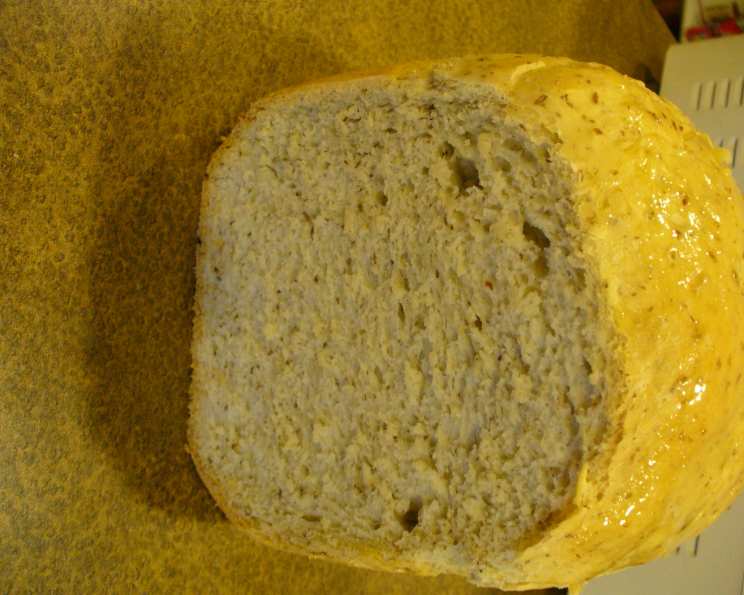
Quick 1.5 Lb White Bread for Bread Machine
I remember the first time I baked bread completely on my own. It was a white loaf, and it took nearly an entire afternoon. While the results were delicious, the time commitment was daunting! These days, life moves at warp speed, and sometimes I just crave that fresh-baked bread aroma without the hours of kneading and proofing. This quick bread machine recipe is my solution – all the comfort, none of the fuss.
Recipe Overview
- Prep Time: 5 minutes
- Cook Time: 58 minutes
- Total Time: 1 hour 3 minutes
- Servings: 4-6
- Yield: 1.5 lb loaf
- Dietary Type: Vegetarian
Ingredients
- 1 cup warm water
- 2 tablespoons olive oil
- 3 cups unbleached flour
- 2 tablespoons ground flax seeds
- 5 teaspoons fast rising yeast
Equipment Needed
- Bread Machine
Instructions
This recipe is designed to be incredibly straightforward, utilizing the convenience of your bread machine. Be sure to consult your bread machine’s instruction manual for any specific recommendations for your particular model. Most bread machines prefer liquids first, followed by dry ingredients.
- First, add 1 cup of warm water to the bread machine pan.
- Next, pour in 2 tablespoons of olive oil.
- Then, carefully add 3 cups of unbleached flour. Make sure the flour covers the water and oil. This helps prevent the yeast from activating prematurely.
- Sprinkle 2 tablespoons of ground flax seeds evenly over the flour.
- Finally, add 5 teaspoons of fast rising yeast. Make sure the yeast is kept separate from the liquids until the bread machine starts. A small well in the flour is useful for this purpose.
- Place the bread pan into your bread machine. Secure it properly, according to your machine’s instructions.
- Select the “58 minute express bake” setting on your bread machine. This rapid cycle is what makes this recipe so incredibly quick.
- Press the “start” button. The bread machine will now handle the kneading, proofing, and baking processes automatically.
- Once the baking cycle is complete, carefully remove the bread pan from the machine using oven mitts. It will be hot!
- Invert the pan to release the bread onto a cooling rack. If the bread doesn’t release easily, gently shake the pan or use a spatula to loosen the sides.
- Allow the bread to cool for at least 15 minutes before slicing. This helps prevent it from becoming gummy and allows the internal structure to set properly.
Expert Tips & Tricks
- Flour Power: The type of flour you use can slightly affect the texture of the bread. Unbleached flour provides a slightly chewier crumb. You can experiment with bread flour for an even chewier texture, but be aware that it may require slightly more liquid.
- Yeast is Key: Ensure your yeast is fresh. Expired yeast will result in a flat, dense loaf. If you’re unsure about your yeast’s freshness, you can test it by adding a teaspoon to a small amount of warm water with a pinch of sugar. If it foams within 5-10 minutes, it’s good to go.
- Temperature Matters: The temperature of the water is important for activating the yeast. It should be warm to the touch (around 105-115°F or 40-46°C). Too hot, and you’ll kill the yeast; too cold, and it won’t activate properly.
- Dough Consistency: While the bread machine does most of the work, it’s worth peeking at the dough during the initial kneading phase. If it seems too dry, add a tablespoon of water at a time until it forms a smooth, slightly sticky ball. If it’s too wet, add a tablespoon of flour at a time.
- Enhance the Flavor: For a richer flavor, try using melted butter instead of olive oil. You can also add a pinch of garlic powder or dried herbs to the flour for a more savory loaf.
- Even Baking: If you notice that your bread is browning too quickly on top, you can tent it with foil during the last 15 minutes of baking.
Serving & Storage Suggestions
This quick white bread is incredibly versatile. Serve it warm with butter, jam, or your favorite spread. It’s also excellent for making sandwiches, toast, or croutons.
- Room Temperature: Store the bread in an airtight container at room temperature for up to 2 days.
- Refrigerator: For longer storage, keep it in the refrigerator for up to a week. However, be aware that refrigeration can dry out the bread, so it’s best to toast or reheat it before serving.
- Freezer: The bread can also be frozen for up to 2 months. Wrap it tightly in plastic wrap and then place it in a freezer bag. Thaw it at room temperature before serving. To reheat, you can wrap it in foil and warm it in a 350°F (175°C) oven for about 10-15 minutes, or until heated through.
Nutritional Information
Note: Nutritional information is an estimate and can vary based on specific ingredients and portion sizes.
| Nutrient | Amount per Serving | % Daily Value |
|---|---|---|
| Calories | 250 kcal | 13% |
| Total Fat | 5g | 8% |
| Saturated Fat | 1g | 5% |
| Cholesterol | 0mg | 0% |
| Sodium | 5mg | 0% |
| Total Carbohydrate | 45g | 15% |
| Dietary Fiber | 3g | 12% |
| Sugars | 1g | 2% |
| Protein | 7g | 14% |
Variations & Substitutions
- Whole Wheat: Substitute up to half of the unbleached flour with whole wheat flour for a nuttier flavor and added fiber.
- Gluten-Free: While this recipe isn’t designed for gluten-free baking, you can experiment with gluten-free flour blends designed for bread machines. Be sure to follow the instructions on the flour blend packaging carefully.
- Sweet Bread: Add 1-2 tablespoons of sugar or honey to the dough for a sweeter loaf. You can also add a handful of raisins, dried cranberries, or chocolate chips.
- Savory Bread: Add chopped herbs, garlic, or cheese to the dough for a savory twist.
- Dairy-Free: This recipe is already dairy-free, but you can ensure it by using a dairy-free olive oil.
FAQs (Frequently Asked Questions)
Q: Can I use active dry yeast instead of fast rising yeast?
A: While fast rising yeast is recommended for the express bake cycle, you can use active dry yeast. However, you may need to adjust the baking time and use a longer bread machine cycle.
Q: My bread is too dense. What could be the reason?
A: Common causes of dense bread include using expired yeast, not measuring ingredients accurately, or not having enough liquid in the dough.
Q: Can I add seeds or nuts to this recipe?
A: Yes, you can add seeds or nuts! Add them during the last few minutes of the kneading cycle so they are evenly distributed without being crushed.
Q: What if I don’t have a 58 minute express bake setting on my bread machine?
A: Use the closest equivalent setting, such as a rapid bake or quick bread cycle. Monitor the bread closely and adjust the baking time as needed.
Q: How do I prevent the bread from sticking to the pan?
A: Ensure your bread pan is clean and lightly greased before adding the ingredients. You can also use a bread machine-specific non-stick spray.
Final Thoughts
There’s something magical about the smell of freshly baked bread wafting through your home. This quick bread machine recipe makes it possible to enjoy that experience even on the busiest of days. So go ahead, give it a try! I’m confident you’ll love the convenience and deliciousness of this simple white bread. And don’t be afraid to experiment with different variations and flavors to make it your own. Share your creations and feedback – I’d love to hear how it turns out! This bread pairs perfectly with a hearty soup or a simple salad for a comforting and satisfying meal.