
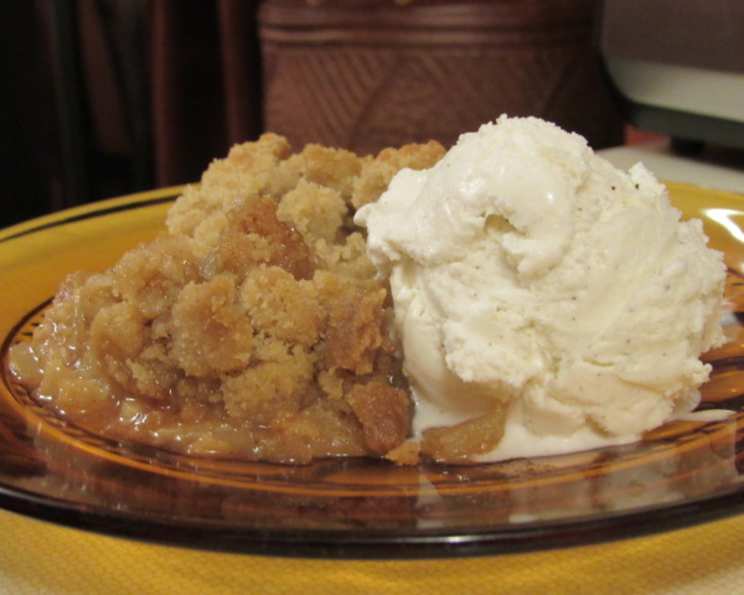
Quick & Easy Apple Crisp: A Taste of Autumn Comfort
Some of my fondest childhood memories revolve around the scent of cinnamon and baked apples wafting from my grandmother’s kitchen. She had this uncanny ability to transform simple ingredients into the most comforting and soul-satisfying desserts. Apple crisp was her signature, a dish she whipped up effortlessly, filling our home with warmth and the promise of cozy evenings spent together. Every bite was a hug from grandma.
Recipe Overview
- Prep Time: 10 minutes
- Cook Time: 30-40 minutes
- Total Time: 40-50 minutes
- Servings: 6
- Yield: 1 8×8 inch pan
- Dietary Type: Vegetarian (can be made Diabetic-Friendly)
Ingredients
- 6-8 tart apples, peeled, cored, and sliced (such as Granny Smith)
- 2-3 teaspoons lemon juice
- 1/4 cup granulated sugar
- 1 teaspoon cinnamon
- 1 tablespoon butter
- 1 cup flour
- 1 cup brown sugar
- 1/2 cup butter
- Vanilla ice cream or fresh whipped cream for serving (optional)
- No-stick cooking spray
Equipment Needed
- 8×8 inch baking pan
- Mixing bowl
- Pastry blender or fork
- Measuring cups and spoons
- Apple peeler, corer, and knife
- Oven
Instructions
- Preheat your oven to 350°F (175°C). This is the ideal temperature for baking the apple crisp, allowing the apples to soften perfectly while the topping becomes golden brown.
- Prepare the apples: Peel, core, and slice 6-8 tart apples. Granny Smith apples are my preferred choice for their firm texture and tartness, which complements the sweetness of the topping beautifully. However, you can use other varieties like Honeycrisp or Fuji as well.
- In a mixing bowl, toss the sliced apples with 2-3 teaspoons of lemon juice, 1/4 cup of granulated sugar, and 1 teaspoon of cinnamon. The lemon juice prevents the apples from browning and adds a subtle tang, while the sugar and cinnamon infuse them with warm, comforting flavors.
- Lightly coat an 8×8 inch baking pan with no-stick cooking spray. This will prevent the apple crisp from sticking to the pan, making it easier to serve.
- Transfer the apple mixture to the prepared baking pan.
- Dot the top of the apples with 1 tablespoon of butter. This adds richness and helps to create a slightly caramelized layer on the apples.
- Prepare the crisp topping: In a separate mixing bowl, combine 1 cup of flour, 1 cup of brown sugar, and 1/2 cup of butter.
- Use a pastry blender or a fork to cut the butter into the flour and brown sugar until the mixture resembles coarse crumbs. The key is to work quickly so the butter stays cold, creating a light and crumbly topping.
- Sprinkle the crumbly topping evenly over the apple mixture.
- Bake in the preheated oven for 30-40 minutes, or until the apples are tender and the topping is golden brown. To check for doneness, insert a fork into the apples. They should be easily pierced. If the topping starts to brown too quickly, you can loosely cover the baking pan with foil for the last 10-15 minutes of baking.
- Remove the apple crisp from the oven and let it cool slightly before serving.
- Serve warm with a scoop of vanilla ice cream or a dollop of fresh whipped cream, if desired. The contrast of the warm, sweet apple crisp with the cold, creamy ice cream is simply divine.
Expert Tips & Tricks
- Use cold butter: When making the crisp topping, make sure your butter is cold. This will create a flakier, more tender topping. You can even grate the cold butter using a cheese grater to make it easier to incorporate into the dry ingredients.
- Adjust sweetness to your liking: Taste the apple mixture before adding the topping and adjust the amount of sugar to your preference. If your apples are very tart, you may want to add a bit more sugar.
- Add nuts: For extra crunch and flavor, add 1/2 cup of chopped nuts (such as pecans or walnuts) to the crisp topping.
- Spice it up: Experiment with different spices in the apple filling, such as nutmeg, ginger, or cloves.
- Make it ahead: You can assemble the apple crisp ahead of time and store it in the refrigerator for up to 24 hours before baking. Just add a few extra minutes to the baking time.
Serving & Storage Suggestions
Serve the apple crisp warm, preferably with a scoop of vanilla ice cream or a dollop of freshly whipped cream. Leftovers can be stored in an airtight container at room temperature for up to 2 days or in the refrigerator for up to 4 days. To reheat, simply warm it in the oven at 350°F (175°C) for 10-15 minutes, or until heated through. You can also reheat it in the microwave, but the topping may not be as crisp. For longer storage, you can freeze the apple crisp for up to 2 months. Thaw it overnight in the refrigerator before reheating.
Nutritional Information
| Nutrient | Amount per Serving | % Daily Value |
|---|---|---|
| Calories | 496.1 kcal | N/A |
| Calories from Fat | 160 g | 32% |
| Total Fat | 17.8 g | 27% |
| Saturated Fat | 11 g | 55% |
| Cholesterol | 45.8 mg | 15% |
| Sodium | 164.6 mg | 6% |
| Total Carbohydrate | 85.8 g | 28% |
| Dietary Fiber | 5.2 g | 20% |
| Sugars | 62.9 g | 251% |
| Protein | 2.9 g | 5% |
Variations & Substitutions
- Gluten-Free: Use a gluten-free flour blend in the crisp topping. You may need to add a little extra liquid (such as water or melted butter) to help the topping come together.
- Vegan: Substitute vegan butter for the butter in both the apple filling and the crisp topping. You can also use a flax egg (1 tablespoon ground flaxseed mixed with 3 tablespoons water) as a binder in the topping.
- Different Fruits: Feel free to substitute other fruits for the apples, such as pears, peaches, or berries. Adjust the amount of sugar as needed, depending on the sweetness of the fruit.
- Spice Variations: Try adding a pinch of nutmeg, cardamom, or ginger to the apple filling for a warm, autumnal flavor.
- Diabetic-Friendly: Substitute Splenda for the granulated sugar and substitute 1/2 cup Splenda for 1/2 cup of the brown sugar – the remaining 1/2 cup of brown sugar is still used.
FAQs (Frequently Asked Questions)
Q: Can I use any type of apples for this recipe?
A: While you can use any type of apples, tart varieties like Granny Smith or Honeycrisp work best because their acidity balances the sweetness of the topping.
Q: How do I prevent the topping from burning before the apples are cooked?
A: If the topping starts to brown too quickly, loosely cover the baking pan with foil for the last 10-15 minutes of baking.
Q: Can I make this apple crisp ahead of time?
A: Yes, you can assemble the apple crisp ahead of time and store it in the refrigerator for up to 24 hours before baking. Just add a few extra minutes to the baking time.
Q: How do I store leftover apple crisp?
A: Leftover apple crisp can be stored in an airtight container at room temperature for up to 2 days or in the refrigerator for up to 4 days.
Q: Can I freeze apple crisp?
A: Yes, you can freeze the apple crisp for up to 2 months. Thaw it overnight in the refrigerator before reheating.
Final Thoughts
This Quick & Easy Apple Crisp is more than just a dessert; it’s a comforting hug in a bowl, a reminder of simpler times, and a celebration of autumn’s bounty. I encourage you to try this recipe and experience the joy of creating a warm, delicious treat that your family and friends will love. Feel free to experiment with different variations and make it your own. And don’t forget to share your feedback – I’d love to hear how it turns out! Serve it alongside a warm cup of spiced cider for the perfect fall experience.