
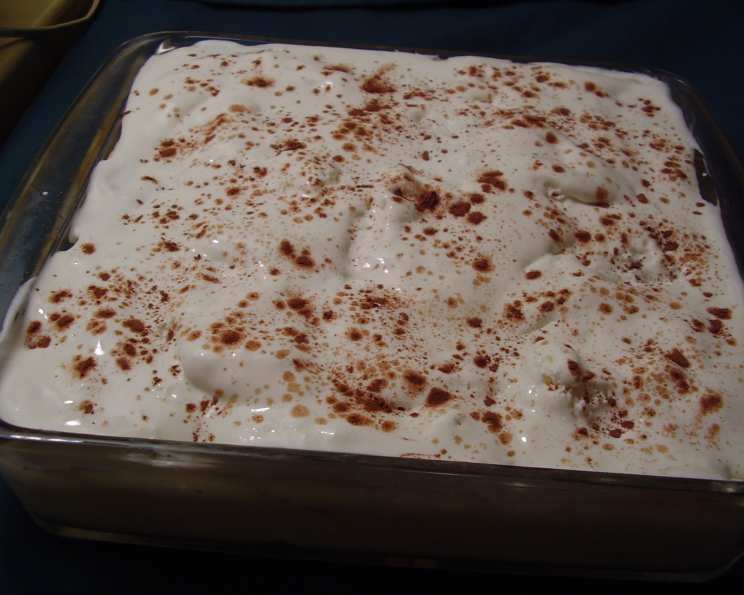
Quick & Easy Diabetic Tiramisu
Oh, Tiramisu. Just the name conjures up memories of my Nonna’s kitchen, the aroma of coffee permeating the air, and that first blissful bite of creamy, coffee-soaked goodness. Of course, Nonna’s version wasn’t exactly waistline-friendly, let alone suitable for those watching their sugar intake. So, I embarked on a quest to recreate that cherished flavor in a lighter, guilt-free way. This recipe brings back all the wonderful flavors and textures of classic tiramisu, but lightened up for a healthy lifestyle!
Recipe Overview
- Prep Time: 25 minutes
- Cook Time: 0 minutes
- Total Time: 2 hours 25 minutes
- Servings: 12
- Yield: 1 baking dish
- Dietary Type: Diabetic-Friendly
Ingredients
- 1/2 cup warm filtered water
- 1 tablespoon instant coffee granules
- 2 (3 1/2 ounce) packages sugar-free instant vanilla pudding mix (Note: Be sure to use 3.4-3.5 ounce packages for correct pudding thickness)
- 2 cups nonfat milk (skim)
- 1 (8 ounce) package light cream cheese, softened
- 1 (3 ounce) package ladyfingers
- 2 cups frozen light whipped dessert topping, thawed
- 1/2 teaspoon unsweetened cocoa
Equipment Needed
- Small bowl
- Large bowl
- Mixer (hand or stand)
- 8-inch square glass baking dish
Instructions
- First, prepare the coffee mixture. In the small bowl, combine the 1/2 cup of warm filtered water and 1 tablespoon of instant coffee granules. Stir until the coffee granules are completely dissolved. Set aside 1 tablespoon of this mixture. This reserved coffee will be used to moisten the ladyfingers later.
- In the large bowl, combine the 2 packages of sugar-free instant vanilla pudding mix and 2 cups of nonfat milk. Beat with a mixer until the mixture thickens. This usually takes about 2-3 minutes, depending on your mixer speed.
- Now, add the remaining coffee mixture (the part not reserved in Step 1) to the pudding mixture. Stir to combine evenly. Ensure the coffee is well incorporated to create a uniform flavor throughout the pudding.
- Add the 8 ounces of softened light cream cheese to the pudding and coffee mixture. Beat with the mixer until the mixture is completely smooth and creamy. Ensure there are no lumps of cream cheese remaining. This step is crucial for achieving the signature tiramisu texture.
- Split the ladyfingers lengthwise. This will allow them to soak up the coffee flavor more effectively.
- Line the bottom of the 8-inch square glass baking dish with half of the split ladyfingers. Arrange them in a single layer, covering the entire bottom of the dish. You may need to break some of the ladyfingers to fill in any gaps.
- Drizzle the ladyfingers in the baking dish with the 1 tablespoon of reserved coffee mixture. Distribute the coffee evenly over the ladyfingers to ensure they are thoroughly moistened.
- Spoon the pudding mixture evenly over the layer of coffee-soaked ladyfingers. Spread it gently to ensure it reaches all the edges of the dish.
- Place the remaining split ladyfingers on top of the pudding mixture. Again, arrange them in a single layer, covering the entire surface.
- Spread the 2 cups of thawed frozen light whipped dessert topping evenly over the top layer of ladyfingers. Ensure the entire surface is covered with a smooth layer of whipped topping.
- Sprinkle the 1/2 teaspoon of unsweetened cocoa evenly over the whipped topping. This adds a touch of visual appeal and a hint of chocolate flavor to complement the coffee and vanilla.
- Cover the baking dish tightly with plastic wrap and chill in the refrigerator for 2-4 hours, or until ready to serve. This chilling time allows the flavors to meld together and the ladyfingers to soften, creating the perfect tiramisu texture.
Expert Tips & Tricks
- Cream Cheese Consistency: Ensure the cream cheese is thoroughly softened before adding it to the pudding mixture. This will prevent lumps and ensure a smooth, creamy texture. Let it sit at room temperature for at least 30 minutes before using.
- Coffee Strength: Adjust the amount of instant coffee granules to your liking. If you prefer a stronger coffee flavor, you can add a little more.
- Ladyfinger Soak: Don’t over-soak the ladyfingers! They should be moistened, not soggy. A light drizzle of coffee is all they need.
- Pudding Alternatives: While this recipe calls for vanilla pudding mix, you could experiment with other flavors like cheesecake or even a coffee-flavored pudding mix for a richer coffee experience.
- Make-Ahead: This tiramisu is perfect for making ahead of time. In fact, the flavors meld together even better if it sits in the refrigerator overnight.
- Even cocoa sprinkling: Use a small sifter or fine-mesh sieve to ensure an even distribution of cocoa powder.
Serving & Storage Suggestions
Serve this lightened-up tiramisu chilled, straight from the refrigerator. Cut into squares and gently lift each serving onto a plate. For an extra touch of elegance, you can garnish each serving with a fresh raspberry or a sprinkle of additional cocoa powder.
Store any leftover tiramisu in the refrigerator, covered tightly with plastic wrap or in an airtight container. It will keep well for up to 3 days. While it can be frozen, the texture of the whipped topping may change upon thawing, so it’s best enjoyed fresh or refrigerated.
Nutritional Information
| Nutrient | Amount per Serving | % Daily Value |
|---|---|---|
| Calories | 135 kcal | N/A |
| Total Fat | 6g | N/A |
| Cholesterol | 22mg | N/A |
| Carbohydrate | 16g | N/A |
| Sugars | 8g | N/A |
| Sodium | 334mg | N/A |
| Protein | 4g | N/A |
Note: Daily values are not provided in the source data.
Variations & Substitutions
- Gluten-Free: Use gluten-free ladyfingers to make this recipe gluten-free.
- Dairy-Free: While the recipe calls for light cream cheese and nonfat milk, you can experiment with dairy-free alternatives like vegan cream cheese and almond milk. However, be mindful that this will affect the overall flavor and texture.
- Espresso Kick: Add a shot of cooled espresso to the coffee mixture for an even bolder coffee flavor.
- Flavor Enhancements: A dash of almond extract in the pudding mixture can add a subtle, delightful twist.
- Fruit Infusion: Consider layering sliced berries (strawberries, raspberries, blueberries) between the ladyfingers and pudding for a fruity variation.
FAQs (Frequently Asked Questions)
Q: Can I use regular pudding mix instead of sugar-free?
A: While you can, this recipe is designed to be diabetic-friendly, so using regular pudding mix will significantly increase the sugar content.
Q: Can I make this ahead of time?
A: Absolutely! In fact, it’s recommended. The flavors meld together beautifully when chilled for a longer period (up to 24 hours).
Q: My ladyfingers are soggy. What did I do wrong?
A: You likely used too much coffee mixture. Remember, a light drizzle is all they need.
Q: Can I freeze this tiramisu?
A: While technically you can, the texture of the whipped topping may change upon thawing. It’s best enjoyed fresh or refrigerated.
Q: I can’t find light cream cheese. Can I use regular cream cheese?
A: Yes, you can use regular cream cheese, but it will increase the fat content of the dessert.
Final Thoughts
So, there you have it: a quick, easy, and diabetic-friendly tiramisu that allows you to indulge in the flavors you love without the guilt. Whether you’re managing your sugar intake or simply looking for a lighter dessert option, this recipe is sure to satisfy your cravings. Give it a try, experiment with your favorite variations, and let me know what you think! And who knows, maybe this will become a new cherished family tradition, just like Nonna’s original recipe was for me. Buon appetito!