
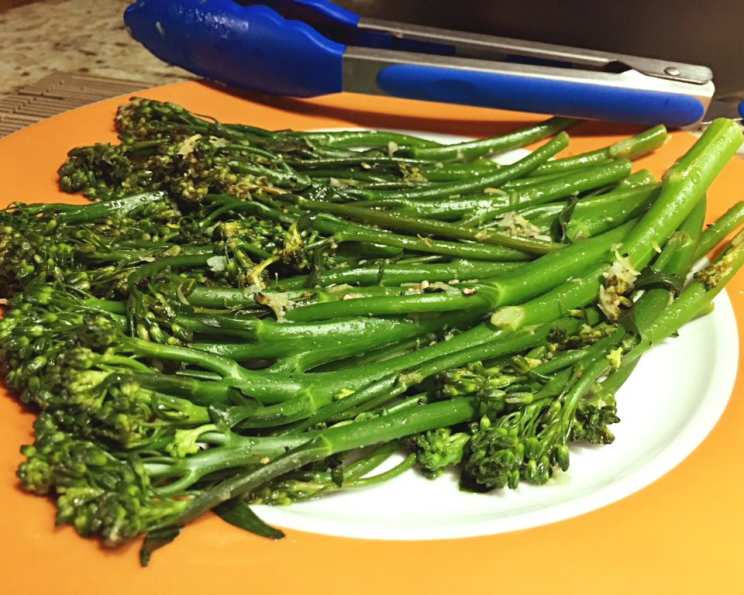
QUICK & EASY SAUTÉED BROCCOLINI
I’ll never forget the first time I truly appreciated broccolini. It was at a small Italian trattoria tucked away in a quiet corner of Rome. The waiter, a cheerful man with twinkling eyes, recommended the broccolini saltati as a side. I was expecting something bland and uninspired, but what arrived was a revelation – vibrant green stalks, perfectly tender-crisp, glistening with garlic and lemon, a symphony of flavors that elevated the entire meal. It was simple, elegant, and utterly delicious. Since then, I’ve been on a mission to recreate that magic, and this recipe comes pretty close.
Recipe Overview
- Prep Time: 5 minutes
- Cook Time: 10 minutes
- Total Time: 15 minutes
- Servings: 4
- Dietary Type: Gluten-Free
Ingredients
- 6 ounces Broccolini, ends slightly cut
- 2 teaspoons sea salt, for water
- 2 tablespoons butter (substitute olive oil)
- ½ tablespoon lemon zest
- 2 large garlic cloves, pressed
- ½ tablespoon lemon juice
- ¼ teaspoon black pepper
Equipment Needed
- Large pot
- Colander
- Large skillet
Instructions
- Bring a large pot of water to a rolling boil. Add the sea salt.
- Carefully add the broccolini to the boiling salted water. Blanch for exactly 2 minutes. Setting a timer is key to achieving the perfect texture.
- Immediately drain the broccolini and immerse it in a bowl of ice water to stop the cooking process. Leave it in the ice bath for 2 minutes. This step is crucial for retaining its vibrant green color and crisp-tender texture.
- Retransfer the broccolini to the colander and allow it to drain thoroughly. Patting it dry with paper towels after draining will also help to get a good sauté in the next steps.
- Place a large skillet over medium heat. Add the butter (or olive oil). Allow the butter to melt completely and shimmer slightly, or the oil to heat up before adding the garlic.
- Add the lemon zest and pressed garlic to the skillet. Stir constantly for 1 minute, being careful not to burn the garlic. Burnt garlic will impart a bitter flavor to the whole dish.
- Pour in the lemon juice and stir to blend it with the butter and garlic mixture.
- Add the broccolini to the skillet and toss to coat it evenly with the flavorful mixture.
- Crack some freshly ground black pepper over the broccolini. Toss continuously until the broccolini is heated through, about 1 ½ minutes. Make sure it is all heated evenly.
- Serve immediately. The broccolini is best enjoyed fresh, when it’s at its peak of flavor and texture.
Expert Tips & Tricks
- Don’t overcook the broccolini: The blanching process is essential, but it’s easy to overdo it. Stick to the specified time (2 minutes) to maintain the crisp-tender texture.
- Garlic watch: Garlic can burn quickly, especially when finely minced or pressed. Keep a close eye on it and stir constantly to prevent bitterness. Adding a splash of water to the pan can also help to regulate the temperature.
- Enhance the flavor: For an extra layer of flavor, try adding a pinch of red pepper flakes along with the black pepper.
- Toasting the Garlic: Before adding the broccolini, you can toast the pressed garlic in the butter or olive oil until it turns a light golden color. This gives it a nutty flavor that complements the other ingredients well. Watch it carefully, as it can burn easily.
Serving & Storage Suggestions
Serve the sautéed broccolini immediately as a vibrant and flavorful side dish alongside grilled chicken, fish, steak, or pasta. It also pairs well with roasted vegetables and can be incorporated into salads or grain bowls.
Leftover broccolini can be stored in an airtight container in the refrigerator for up to 3 days. To reheat, simply sauté in a skillet over medium heat until warmed through, or microwave briefly. Be careful not to overcook it when reheating, as it can become mushy. Freezing is not recommended, as it can affect the texture.
Nutritional Information
| Nutrient | Amount per Serving | % Daily Value |
|---|---|---|
| Calories | 54.7 kcal | N/A |
| Calories from Fat | 52g | 95% |
| Total Fat | 5.8 g | 8% |
| Saturated Fat | 3.6 g | 18% |
| Cholesterol | 15.3 mg | 5% |
| Sodium | 1213.8 mg | 50% |
| Total Carbohydrate | 0.9 g | 0% |
| Dietary Fiber | 0.2 g | 0% |
| Sugars | 0.1 g | 0% |
| Protein | 0.2 g | 0% |
Variations & Substitutions
- Vegan: Easily make this dish vegan by substituting the butter with olive oil.
- Cheese Please: Sprinkle a little grated Parmesan cheese over the broccolini just before serving for a richer flavor.
- Spice it Up: Add a pinch of red pepper flakes for a touch of heat.
- Sesame Seeds: Toast some sesame seeds in the pan at the end and toss with the broccolini for added texture and flavor.
- Other Vegetables: Feel free to add other vegetables like sliced mushrooms or bell peppers to the skillet along with the broccolini.
FAQs (Frequently Asked Questions)
Q: Can I use frozen broccolini?
A: While fresh broccolini is preferred for its texture, frozen broccolini can be used in a pinch. Be sure to thaw it completely and pat it dry before adding it to the skillet. You may need to adjust the cooking time slightly.
Q: How do I prevent the garlic from burning?
A: Keep the heat at medium, stir the garlic constantly, and add a splash of water or broth to the pan if it starts to brown too quickly.
Q: Can I add other seasonings?
A: Absolutely! Feel free to experiment with other herbs and spices, such as oregano, thyme, or garlic powder.
Q: What if I don’t have lemon zest?
A: If you don’t have lemon zest, you can omit it. However, it does add a bright, citrusy flavor to the dish.
Q: Can I make this ahead of time?
A: While it’s best served immediately, you can blanch the broccolini ahead of time and store it in the refrigerator until ready to sauté.
Final Thoughts
I hope this recipe inspires you to embrace the simplicity and deliciousness of sautéed broccolini. With just a few simple ingredients and a few minutes of your time, you can create a side dish that’s both healthy and satisfying. Don’t be afraid to experiment with different flavors and variations to make it your own. I encourage you to try this recipe and share your feedback. Serve it alongside your favorite main course and enjoy!