
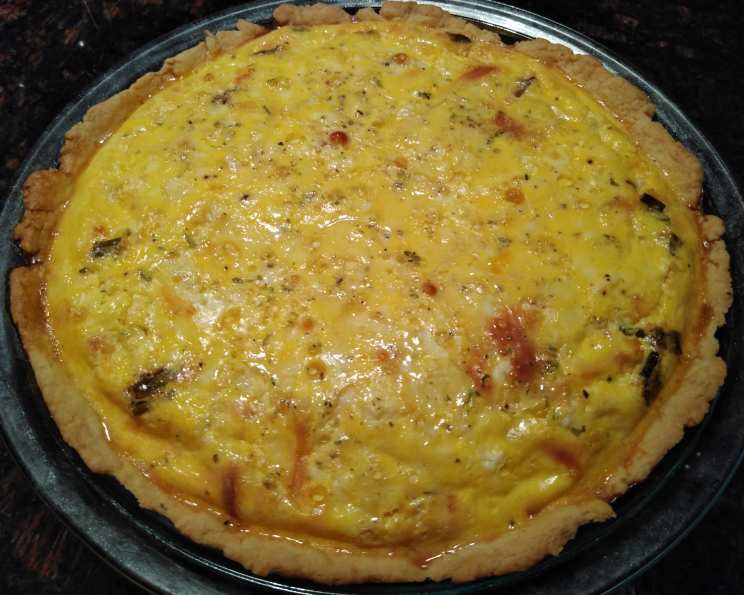
Quick n’ Easy Quiche Crust: Effortless Elegance
There’s something magical about a homemade quiche. I remember the first time I attempted one. It was for a friend’s birthday brunch, and I envisioned a perfectly golden, flaky crust cradling a creamy, savory custard. The filling was no problem, but the crust? That was my Mount Everest. After a disastrous attempt with a traditional pie crust recipe (think rock-hard dough and tears), I stumbled upon this gem. It’s so quick and easy, it’s practically foolproof, and it delivers a wonderfully flaky crust every single time. Now, quiche is my go-to brunch offering, always greeted with appreciative “oohs” and “aahs.”
Recipe Overview
- Prep Time: 10 minutes
- Cook Time: 25-30 minutes (depending on the quiche filling)
- Total Time: 35-40 minutes
- Servings: 6-8
- Yield: 1 (9-inch) pie crust
- Dietary Type: Vegetarian (easily adaptable to vegan)
Ingredients
- 1 cup flour (all-purpose, or gluten-free blend)
- ½ teaspoon salt
- ¼ cup olive oil or ¼ cup canola oil
- ¼ cup ice water (refrigerated water is perfect)
Equipment Needed
- 9-inch pie dish
- Fork
- Whisk or fork (for emulsifying the oil and water)
- Oven
Instructions
-
In a medium bowl, mix the flour and salt together using a fork. This ensures the salt is evenly distributed, which is crucial for flavor and gluten development.
-
In a separate small bowl, beat the oil and ice water together vigorously with a whisk or another fork until the mixture thickens slightly and appears somewhat emulsified. Don’t worry if it doesn’t fully combine; just aim for a cloudy, slightly thicker consistency.
-
Pour the oil and water mixture into the bowl with the flour. Using the fork, mix the wet and dry ingredients together until just combined. Be careful not to overmix; you want a shaggy dough.
-
Press the dough into a 9-inch pie dish. Start by pressing some of the dough onto the bottom of the dish, then work your way up the sides. Use your fingers to create an even layer of dough throughout the dish. Crimp the edges decoratively if desired.
-
Fill the pie crust with your desired quiche mixture. Be sure not to overfill.
-
Bake at 400°F (200°C) until the crust is golden brown and the quiche filling is set. The baking time will depend on your filling, but generally, it takes around 25-30 minutes. A knife inserted into the center of the quiche should come out clean. If the crust is browning too quickly, you can loosely tent it with aluminum foil.
NOTES: I’ve never made this with canola oil, but it should work just as well as olive oil. Olive oil will impart a subtle, savory flavor. You can double the recipe, divide the dough in half, and roll it out into a pair of rounds for two-crust pies. This recipe is not suitable for making baked pie crust shells (blind baking); it’s designed to be baked with a filling. It makes a nice, flaky crust that’s suitable for everyday use.
Expert Tips & Tricks
- Keep the water ice-cold: This helps prevent the gluten in the flour from developing too much, resulting in a more tender crust.
- Don’t overmix: Overmixing develops the gluten, which can make the crust tough. Mix just until the ingredients are combined.
- Chill the dough (optional): While not strictly necessary, chilling the dough for 15-30 minutes before pressing it into the pie dish can make it easier to work with.
- Use a glass pie dish: Glass allows you to see the bottom of the crust and ensure it’s browning evenly.
- For a vegan crust: Ensure your chosen oil is plant-based (olive oil or canola oil work great).
Serving & Storage Suggestions
Serve the quiche warm or at room temperature. It’s delicious on its own, or with a side salad. Leftovers can be stored in the refrigerator for up to 3 days. To reheat, cover the quiche loosely with foil and bake at 350°F (175°C) until heated through. You can also microwave individual slices for a quicker reheat, but the crust may become slightly softer. Freezing is not recommended as it affects the crust texture.
Nutritional Information
| Nutrient | Amount per Serving | % Daily Value |
|---|---|---|
| Calories | 233 kcal | N/A |
| Total Fat | 13.8g | 21% |
| Saturated Fat | 1.9g | 9% |
| Cholesterol | 0mg | 0% |
| Sodium | 292mg | 12% |
| Total Carbohydrate | 23.9g | 7% |
| Dietary Fiber | 0.8g | 3% |
| Sugars | 0.1g | 0% |
| Protein | 3.2g | 6% |
Note: Nutritional information is an estimate and may vary based on specific ingredients and portion sizes.
Variations & Substitutions
- Gluten-Free: Use a gluten-free all-purpose flour blend. Look for one that contains xanthan gum for better binding.
- Herbaceous Crust: Add a teaspoon of dried herbs, such as thyme, rosemary, or oregano, to the flour mixture for an extra layer of flavor.
- Spicy Crust: Add a pinch of cayenne pepper or chili flakes to the flour for a subtle kick.
- Sweet Crust: This crust can even be adapted for sweet pies. Reduce the salt to 1/4 teaspoon and add 1-2 tablespoons of sugar to the flour.
- Different Oils: While olive oil and canola oil are recommended, you could experiment with other neutral-flavored oils like avocado oil or grapeseed oil.
FAQs (Frequently Asked Questions)
Q: Can I make this crust ahead of time?
A: Yes, you can press the dough into the pie dish and store it in the refrigerator for up to 24 hours before filling and baking. Cover it tightly with plastic wrap to prevent it from drying out.
Q: My crust is shrinking during baking. What am I doing wrong?
A: This is often caused by too much gluten development. Be careful not to overmix the dough, and ensure your ingredients are cold. You can also try chilling the dough before pressing it into the pie dish.
Q: Can I blind bake this crust?
A: This recipe is not specifically designed for blind baking, as it is meant to be baked with the filling. If you want to blind bake it, you will need to dock the crust with a fork to prevent it from puffing up, and weigh it down with pie weights or dried beans.
Q: The crust is browning too quickly. What should I do?
A: Loosely tent the crust with aluminum foil to protect it from the heat and prevent it from burning.
Q: Can I use this crust for a sweet pie?
A: Yes, you can adapt this crust for sweet pies by reducing the salt to 1/4 teaspoon and adding 1-2 tablespoons of sugar to the flour.
Final Thoughts
This quick and easy quiche crust has become a staple in my kitchen. Its simplicity and reliable results make it perfect for both weeknight dinners and special occasions. Don’t be intimidated by the idea of making your own crust; this recipe is so forgiving that even a beginner can achieve a beautiful, flaky result. Give it a try, experiment with different fillings, and let your creativity shine! I’d love to hear about your creations and any variations you discover. Pair your finished quiche with a crisp green salad and a glass of chilled white wine for a truly delightful meal. Happy baking!