
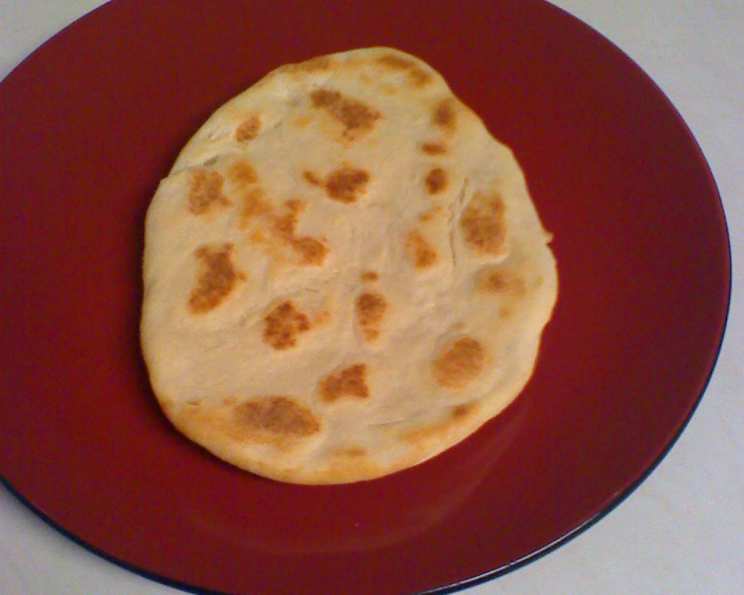
Quick Naan: Fresh Bread in Under an Hour
The aroma of freshly baked bread has always been a source of comfort and warmth for me. My grandmother, a master of simple yet soulful cooking, used to make naan on special occasions, the yeasty fragrance filling her tiny kitchen and drawing everyone in. While her method was time-intensive, requiring hours of kneading and proofing, I’ve found a way to capture that same deliciousness in a fraction of the time, thanks to the humble bread machine. This recipe brings those cherished memories back to life with every bite, a perfect balance of speed and authentic flavor.
Recipe Overview
- Prep Time: 15 minutes
- Cook Time: 4 minutes per naan
- Total Time: 40 minutes
- Servings: 8
- Yield: 8 naans
- Dietary Type: Vegetarian
Ingredients
- 1 cup warm water
- 1 1/4 teaspoons salt
- 1 1/2 teaspoons honey
- 2 1/2 tablespoons oil
- 1/3 cup yogurt (full-fat or Greek works best)
- 4 cups flour (all-purpose or bread flour)
- 1 1/2 teaspoons yeast (active dry or instant)
Equipment Needed
- Bread machine
- Measuring cups and spoons
- Tray or baking sheet
- Oven
- Pizza stone (optional, but highly recommended)
- Heat-resistant metal cooling racks (if not using a pizza stone)
- Clean kitchen towel
Instructions
- If your yogurt is cold, gently warm it in the microwave for about 15 seconds. This helps activate the yeast.
- Add all ingredients to your bread machine in the order recommended by your bread machine’s manufacturer. Typically, liquids go in first, followed by dry ingredients, with the yeast last.
- Start the bread machine on the dough cycle.
- After 5 minutes, check the dough consistency. NOTE: The dough should be somewhat sticky; a small amount might stick to your finger. It shouldn’t stick to the pan at all.
- After another 5 minutes (10 minutes total in the machine), remove the dough from the bread machine.
- Divide the dough into 8 equal pieces.
- Lightly flour each piece and shape it into a ball. Cover the dough balls with a clean cloth or plastic wrap and let them rest on a tray or baking sheet for 20 minutes. This resting period allows the gluten to relax, making the naan easier to shape.
- While the dough is resting, preheat your oven to 500°F (260°C). If you have a pizza stone, place it in the oven to heat up. If not, use heat-resistant metal cooling racks placed directly on the oven racks. Baking sheets don’t work as well because they don’t provide the same intense heat needed for proper naan texture.
- After the dough has rested, use your fingers to flatten each piece into a teardrop shape, about 1/2 inch thick. Don’t worry about making them perfectly uniform; the rustic look is part of their charm.
- Moisten your hands slightly with water. Then, briefly turn each flattened naan in your hands to lightly moisten the surface.
- Place the moistened naan directly onto the preheated pizza stone or metal rack in the oven.
- Bake for approximately 4 minutes, or until the naan is puffed up and lightly golden brown.
- To get a nice, browned top, use the broiler for the last minute or so, watching carefully to prevent burning.
- Remove the naan from the oven and immediately wrap it in a clean kitchen towel to keep it soft and pliable.
- Repeat steps 9-14 with the remaining dough.
- NOTE (from original recipe): If the dough isn’t sticky enough after the initial mixing in the bread machine, add 1 tablespoon of water. If it sticks to the pan, add 1 tablespoon of flour until the correct consistency is achieved.
Expert Tips & Tricks
- Temperature is key: The high oven temperature is crucial for creating the characteristic blistered texture of naan. Don’t skimp on preheating!
- Yogurt Upgrade: For an even richer flavor and softer texture, substitute sour cream for the yogurt, as the original recipe creator suggests.
- Don’t overwork the dough: Over-kneading can result in tough naan. The bread machine handles the kneading perfectly, so avoid additional kneading by hand.
- Brush with garlic butter: For extra flavor, brush the baked naan with melted garlic butter immediately after removing it from the oven.
- Fresh herbs: Sprinkle the naan with chopped cilantro or parsley before serving for a pop of freshness.
- Control the Stickiness: The dough should be sticky enough to leave a small amount on your finger, but not so sticky that it’s difficult to handle. Adjust with flour or water, a tablespoon at a time, until you achieve the desired consistency.
- Pizza Stone Alternative: While a pizza stone is ideal, you can also use an inverted baking sheet preheated in the oven for a similar effect.
Serving & Storage Suggestions
Serve the naan warm, ideally immediately after baking. It’s delicious on its own, but even better when paired with curries, stews, or grilled meats. You can also use it to make wraps or flatbread pizzas.
To store leftover naan, wrap it tightly in plastic wrap or place it in an airtight container. It will keep at room temperature for 1-2 days, in the refrigerator for up to 5 days, or in the freezer for up to 2 months. To reheat, wrap the naan in foil and warm it in a preheated oven at 350°F (175°C) for about 5-10 minutes, or until heated through. You can also reheat it in a microwave, but it may become slightly chewier.
Nutritional Information
| Nutrient | Amount per Serving | % Daily Value |
|---|---|---|
| Calories | 277.7 kcal | N/A |
| Calories from Fat | 47 g | 17% |
| Total Fat | 5.2 g | 8% |
| Saturated Fat | 0.9 g | 4% |
| Cholesterol | 1.3 mg | 0% |
| Sodium | 370.6 mg | 15% |
| Total Carbohydrate | 49.5 g | 16% |
| Dietary Fiber | 1.9 g | 7% |
| Sugars | 1.7 g | 6% |
| Protein | 7.1 g | 14% |
Note: Nutritional information is an estimate and may vary based on specific ingredients and preparation methods.
Variations & Substitutions
- Gluten-Free Naan: Use a gluten-free flour blend specifically formulated for bread making. You may need to adjust the liquid content to achieve the right dough consistency.
- Whole Wheat Naan: Substitute up to half of the all-purpose flour with whole wheat flour for a nuttier flavor and added fiber.
- Garlic Naan: Add 1-2 cloves of minced garlic to the dough during the bread machine cycle.
- Herb Naan: Incorporate 1-2 tablespoons of finely chopped fresh herbs like cilantro, parsley, or dill into the dough.
- Spiced Naan: Add a pinch of ground cumin, coriander, or turmeric to the dough for a warm, aromatic twist.
- Sweet Naan: Reduce the salt to 1 teaspoon and increase the honey to 2 tablespoons for a slightly sweet naan, perfect for serving with fruit or yogurt.
FAQs (Frequently Asked Questions)
Q: Can I make this naan without a bread machine?
A: Yes, you can. Mix the ingredients in a bowl, knead for about 8-10 minutes until smooth, and let the dough rise in a warm place for 1-1.5 hours before proceeding with the recipe.
Q: Why is my naan tough?
A: Over-kneading or using too much flour can result in tough naan. Ensure you’re measuring the flour accurately and not overworking the dough.
Q: My naan is sticking to the pizza stone. What am I doing wrong?
A: Make sure your pizza stone is properly preheated. You can also lightly dust the stone with flour or cornmeal before placing the naan on it.
Q: Can I freeze the naan dough?
A: Yes, you can freeze the dough after dividing it into portions. Thaw it overnight in the refrigerator before shaping and baking.
Q: Can I use different types of yogurt?
A: Yes, full-fat or Greek yogurt will give you the best results, but you can also use low-fat yogurt. Avoid using flavored yogurts, as they may affect the taste of the naan.
Final Thoughts
There’s nothing quite like the simple pleasure of tearing into a warm, freshly baked piece of naan. This quick and easy recipe, adapted for the convenience of a bread machine, allows you to enjoy that experience any day of the week. So, go ahead, give it a try! Experiment with different flavors and toppings, and don’t hesitate to share your creations with family and friends. And please, let me know what you think – I’m always eager to hear your feedback and learn from your experiences in the kitchen!