
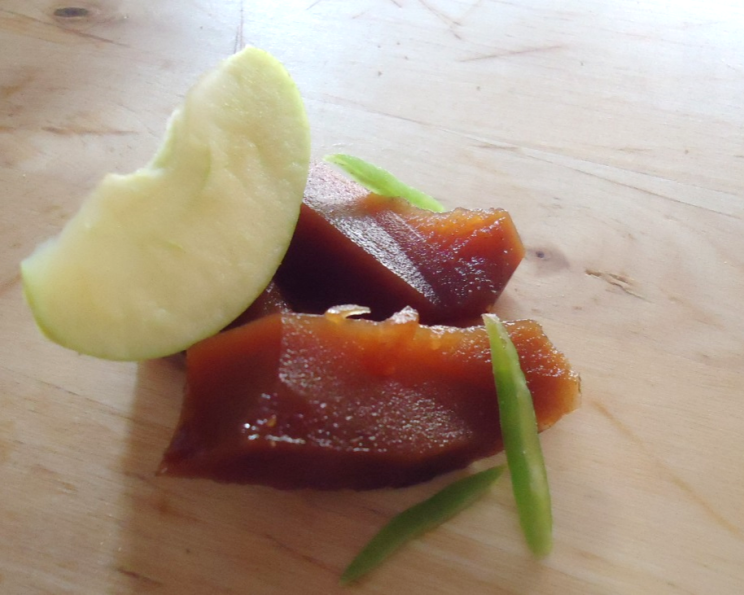
Quince Jelly With Apple and Aloe Vera: A Taste of Autumn Sunshine
I remember the first time I tasted quince jelly. It was at my grandmother’s house, a small cottage nestled amidst rolling hills. Sunlight streamed through the kitchen window as she carefully spread the shimmering, amber-colored jelly on a slice of warm, crusty bread. The sweet, slightly tart flavor, with its delicate floral notes, was unlike anything I’d ever tasted. It felt like a little piece of sunshine captured in a jar, a memory that I cherish and try to recreate with every batch I make. Now, with the addition of apple and aloe vera, this quince jelly boasts even more depth and a touch of refreshing sweetness.
Recipe Overview
- Prep Time: 30 minutes
- Cook Time: 1 hour 10 minutes
- Total Time: 1 hour 40 minutes
- Servings: Approximately 10 servings
- Yield: Varies depending on jar size
- Dietary Type: Vegan
Ingredients
- 1 kg quinces
- 1 kg apples
- 1.5 kg sugar
- 1 dl sweet Aloe Vera drink (approximately 100ml)
Equipment Needed
- Large, heavy-bottomed pan
- Vegetable peeler
- Knife
- Cutting board
- Hand blender (immersion blender)
- Spoon
- Small plate
- Sterilized jars or bowls
- Vegetable parchment paper (or wax paper)
Instructions
- Begin by preparing the fruit. Peel the quinces and the apples thoroughly. It’s essential to remove all the skin, as it can affect the clarity of the jelly.
- Next, remove the cores and seeds from both the quinces and the apples. The cores can impart a slightly bitter taste to the final jelly, so this step is important.
- Now, cut the peeled and cored quinces and apples into small, manageable pieces. The smaller the pieces, the faster they will cook down.
- In a large, heavy-bottomed pan, combine the cut quinces, apples, sweet Aloe Vera drink, and the sugar. The heavy-bottomed pan will help to prevent scorching and ensure even cooking.
- Stir the mixture well to ensure that the sugar is evenly distributed throughout the fruit. This will help to draw out the natural juices of the fruit and create a good consistency.
- Simmer the mixture over medium-low heat for approximately 1 hour, stirring occasionally to prevent sticking. Be patient during this stage; the fruit needs time to break down and release its pectin, which is essential for the jelly to set properly.
- After simmering for an hour, use a hand blender (immersion blender) to blend the mixture until it reaches a smooth, puréed consistency. Be careful when blending hot liquids.
- Once blended, return the purée to the pan. Stir the purée well and continue to simmer it over low heat for an additional 10 minutes. This final simmering stage helps to further concentrate the flavors and ensure that the jelly will set properly.
- To test for doneness, place a small spoonful of the hot jelly onto a cold plate. Allow it to cool for a few seconds.
- Draw a line through the center of the cooled jelly with a spoon. Observe whether the line holds its shape or if the jelly runs back together. If the line remains distinct, the jelly has reached its setting point. If it runs back together, continue to simmer the jelly for a few more minutes, then test again.
- Once the jelly has reached the setting point, carefully pour it into sterilized jars or bowls. Leave a little space at the top of each jar.
- To prevent a skin from forming on the surface of the jelly as it cools, place a piece of vegetable parchment paper directly on top of the hot jelly in each jar or bowl.
- Let the jelly cool completely at room temperature before covering and storing. This process may take several hours.
- Once cooled, the jelly is ready to enjoy!
Expert Tips & Tricks
- Use a sugar thermometer to ensure that the jelly reaches the correct setting temperature, which is typically around 220°F (104°C). This can provide a more precise method for determining doneness.
- Add a knob of butter (about a teaspoon) at the end of cooking to reduce any foam that may have formed and help create a clearer jelly.
- If you don’t have a sweet Aloe Vera drink readily available, you can use regular Aloe Vera juice, but you might need to adjust the amount of sugar to compensate for the lack of sweetness. Taste and adjust accordingly.
- Sterilize your jars properly to ensure a longer shelf life for your jelly. You can do this by boiling the jars and lids in water for 10 minutes.
- For a smoother jelly, you can strain the purée through a jelly bag or cheesecloth before simmering it for the final 10 minutes.
Serving & Storage Suggestions
This quince jelly with apple and aloe vera is incredibly versatile. It’s delicious spread on bread, toast, or crackers. It also pairs beautifully with cheese, especially creamy cheeses like brie or goat cheese.
For storage, keep the cooled and sealed jelly in a cool, dark place. Unopened jars can be stored at room temperature for up to a year. Once opened, refrigerate the jelly and consume it within a few weeks. The jelly is best stored in the refrigerator to maintain its quality and prevent spoilage. While freezing is possible, it might affect the texture of the jelly.
Nutritional Information
| Nutrient | Amount per Serving (approx.) | % Daily Value (approx.) |
|---|---|---|
| Calories | 250 kcal | 13% |
| Total Fat | 0.1g | 0% |
| Saturated Fat | 0g | 0% |
| Cholesterol | 0mg | 0% |
| Sodium | 1mg | 0% |
| Total Carbohydrate | 65g | 22% |
| Dietary Fiber | 1g | 4% |
| Sugars | 58g | 232% |
| Protein | 0.1g | 0% |
Note: Nutritional information is an estimate and can vary depending on specific ingredients and portion sizes.
Variations & Substitutions
- Spice it up: Add a pinch of ground cinnamon, cloves, or ginger to the jelly for a warm, spiced flavor.
- Citrus twist: Incorporate the zest of one lemon or orange for a bright, citrusy note.
- Floral enhancement: Add a tablespoon of rosewater or orange blossom water to the jelly after it has been blended for a delicate floral aroma.
- Different fruits: Experiment with other fruits like pears, plums, or cranberries to create unique flavor combinations.
FAQs (Frequently Asked Questions)
Q: Why is my quince jelly not setting?
A: Several factors can contribute to this. Ensure you’re using enough sugar, as sugar helps in the setting process. Also, be sure to cook the jelly for long enough to reach the setting point, testing with the cold plate method. Finally, quinces naturally contain pectin, but some apples have less; you may need to add pectin if your jelly persistently fails to set.
Q: How do I sterilize my jars properly?
A: Wash jars and lids in hot, soapy water, then rinse well. Place the jars on a rack in a boiling water canner filled with water, ensuring the jars are fully submerged. Boil for 10 minutes, then carefully remove the jars and let them air dry on a clean towel. Boil the lids separately for the last few minutes of the jar sterilization process.
Q: Can I use regular aloe vera juice instead of a sweet aloe vera drink?
A: Yes, you can. However, you may need to adjust the amount of sugar in the recipe to compensate for the lack of sweetness in the regular aloe vera juice. Taste and add sugar to achieve your desired level of sweetness.
Q: How long will this quince jelly last?
A: Unopened jars of quince jelly, properly sterilized, can last for up to a year in a cool, dark place. Once opened, refrigerate the jelly and consume it within a few weeks for the best quality.
Q: Can I make this jelly without the aloe vera?
A: Absolutely! The aloe vera adds a subtle sweetness and unique flavor, but the jelly is delicious without it as well. Simply omit it from the recipe.
Final Thoughts
I hope this recipe inspires you to create your own batch of quince jelly with apple and aloe vera. It’s a wonderful way to capture the flavors of autumn and create a delicious treat to enjoy throughout the year. Whether you spread it on toast, serve it with cheese, or simply enjoy it by the spoonful, this jelly is sure to bring a touch of sunshine to your day. Don’t be afraid to experiment with variations and substitutions to create a jelly that perfectly suits your taste. And, most importantly, don’t forget to share your culinary creations with friends and family!