
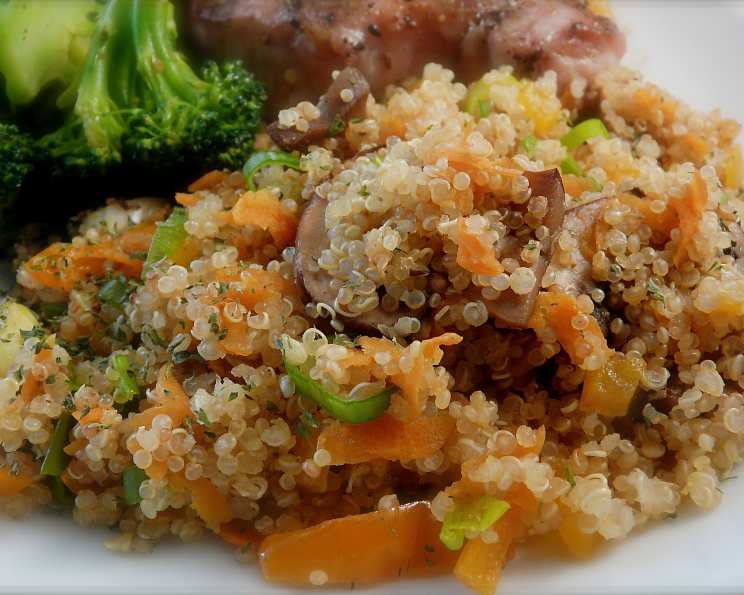
Quinoa Pilaf: A Chef’s Journey to the Perfect Grain Bowl
There’s something incredibly comforting about a well-made pilaf. It evokes memories of my grandmother’s kitchen, the aroma of simmering grains mingling with savory spices. While rice was her go-to, I discovered the versatility of quinoa years ago and never looked back. This Quinoa Pilaf recipe is a delicious and healthy twist on the classic, and I’m excited to share my secrets for creating a perfectly balanced and flavorful dish.
Recipe Overview
- Prep Time: 10 minutes
- Cook Time: 20 minutes
- Total Time: 30 minutes
- Servings: 3-4
- Yield: 2 1/2 cups
- Dietary Type: Gluten-Free
Ingredients
- 1/3 cup firmly packed chopped bacon
- Salad oil (optional)
- 1 cup sliced mushrooms
- 1/3 cup finely chopped onion
- 1 cup regular strength beef broth
- 1/2 cup toasted quinoa
- 1/3 cup shredded carrot
- 1/3 cup finely chopped green pepper
Equipment Needed
- 12-inch frying pan
- Slotted spoon
- Measuring cups
- Measuring spoons
Instructions
- In a 12-inch frying pan over medium-high heat, cook bacon, stirring occasionally, until crisp around the edges, about 8 minutes. Watch carefully to prevent burning. The rendered fat will add tremendous flavor to the pilaf.
- With a slotted spoon, lift bacon pieces from the pan and set aside. Reserve the crispy bacon for later; it will be used as a garnish.
- Spoon off and discard all but 3 tablespoons of the fat. Alternatively, you can drain all the fat and use vegetable oil. Ensure the pan is properly coated to avoid sticking.
- Add mushrooms and onion to the pan and cook, stirring occasionally, until the liquid cooks away and the mushrooms are golden, about 5-7 minutes. The mushrooms should have a slightly caramelized appearance, adding depth to the dish.
- Add beef broth, toasted quinoa, carrots, and green pepper to the pan. Stir well to combine all ingredients. The beef broth provides a savory foundation for the pilaf, while the vegetables add texture and sweetness.
- Bring the mixture to a boil over high heat. Once boiling, cover the pan and reduce the heat to simmer.
- Simmer until the liquid is absorbed, about 15 minutes. Keep the lid on tightly to ensure even cooking.
- Take the pan off the heat, remove the lid, and let stand for 2 minutes. This allows the quinoa to fully absorb any remaining moisture.
- Stir with a fork to separate the grains, creating a fluffy and evenly textured pilaf.
- Spoon the Quinoa Pilaf onto a serving dish and sprinkle with the cooked bacon. Serve immediately and enjoy.
Expert Tips & Tricks
- Toasting the quinoa beforehand enhances its nutty flavor. Spread the quinoa on a baking sheet and toast in a 350°F (175°C) oven for about 8-10 minutes, or until lightly golden and fragrant. Watch carefully, as quinoa can burn easily.
- Use low-sodium beef broth to control the saltiness of the dish. You can always add more salt to taste, but it’s difficult to remove excess salt.
- Adjust the vegetables to your preference. Feel free to add other vegetables like diced celery, zucchini, or bell peppers.
- For a vegetarian version, omit the bacon and use vegetable broth instead of beef broth. You can add smoked paprika to mimic some of the smoky flavor from the bacon.
- If the pilaf seems dry after simmering, add a tablespoon or two of broth and stir gently. If it’s too wet, continue simmering uncovered for a few more minutes to allow the excess liquid to evaporate.
Serving & Storage Suggestions
Serve the Quinoa Pilaf as a side dish with grilled chicken, fish, or roasted vegetables. It’s also delicious on its own as a light lunch or dinner.
Storage: Store leftover Quinoa Pilaf in an airtight container in the refrigerator for up to 3 days.
Reheating: Reheat the pilaf in the microwave or on the stovetop. Add a splash of broth or water to prevent it from drying out.
Nutritional Information
| Nutrient | Amount per Serving | % Daily Value |
|---|---|---|
| Calories | 204.4 kcal | N/A |
| Calories from Fat | 83 kcal | N/A |
| Total Fat | 9.2 g | 14% |
| Saturated Fat | 2.7 g | 13% |
| Cholesterol | 10.9 mg | 3% |
| Sodium | 444.3 mg | 18% |
| Total Carbohydrate | 22.9 g | 7% |
| Dietary Fiber | 3.2 g | 12% |
| Sugars | 2.3 g | N/A |
| Protein | 8 g | 15% |
Note: Percent Daily Values are based on a 2,000 calorie diet.
Variations & Substitutions
- Mediterranean Quinoa Pilaf: Add chopped sun-dried tomatoes, Kalamata olives, and feta cheese after cooking.
- Spicy Quinoa Pilaf: Add a pinch of red pepper flakes or a dash of hot sauce to the broth for a kick.
- Lemon Herb Quinoa Pilaf: Add lemon zest, fresh parsley, dill, and a squeeze of lemon juice after cooking.
- Vegan Quinoa Pilaf: Omit the bacon and use vegetable broth. Add a tablespoon of olive oil for richness. Consider adding chopped nuts like walnuts or almonds for added texture and flavor.
FAQs (Frequently Asked Questions)
Q: Can I use pre-cooked quinoa for this recipe?
A: Yes, you can use pre-cooked quinoa. Simply reduce the amount of broth to about 1/2 cup and simmer until the vegetables are tender and the flavors are combined, around 5-7 minutes.
Q: Do I have to toast the quinoa?
A: Toasting the quinoa is recommended as it enhances the flavor, but it’s not essential. If you skip toasting, the pilaf will still be delicious.
Q: Can I make this pilaf ahead of time?
A: Yes, you can make the pilaf up to 2 days ahead of time. Store it in an airtight container in the refrigerator and reheat before serving.
Q: Can I freeze Quinoa Pilaf?
A: Yes, you can freeze it for up to 2 months. Thaw overnight in the refrigerator before reheating.
Q: What can I serve with Quinoa Pilaf?
A: This pilaf pairs well with grilled chicken, fish, roasted vegetables, or tofu. It also makes a great addition to salads or grain bowls.
Final Thoughts
I encourage you to experiment with this Quinoa Pilaf recipe and make it your own. Feel free to adjust the vegetables, herbs, and spices to suit your taste preferences. I’m confident that this dish will become a staple in your kitchen, providing a healthy and flavorful meal that you can enjoy any time of day. Don’t hesitate to share your feedback and any variations you create. Bon appétit!